Skip to content
DisclaimerTerms Of UseGDPR PolicyCookie Policy

lazychefmagic

  • Home
  • Drinks
  • Appetizers
  • Dinner
  • Dessert
  • About
  • Contact
  • Privacy Policy
DisclaimerTerms Of UseGDPR PolicyCookie Policy

NO-ING-IMG

- Avocados: 2 ripe - Cherry tomatoes: 1 cup halved - Fresh mozzarella: 1 cup (bocconcini) - Fresh basil: ¼ cup finely chopped - Balsamic glaze: 2 tablespoons - Extra virgin olive oil: 1 tablespoon - Sea salt and black pepper: to taste For this Caprese stuffed avocados recipe, you need a few simple ingredients. First, pick ripe avocados. They should feel slightly soft but not mushy. Next, grab a cup of halved cherry tomatoes. Their sweet flavor balances the dish well. You will also need fresh mozzarella balls, known as bocconcini. They add a creamy texture and mild taste. Chop up some fresh basil leaves. They bring a bright and fresh aroma. For added flavor, you will use balsamic glaze. It gives a sweet and tangy finish. Extra virgin olive oil adds richness. Finally, season with sea salt and black pepper to enhance all the flavors. These ingredients come together to create a delightful dish. You can find the full recipe with step-by-step instructions to make this easy and flavorful meal. To start, take two ripe avocados. Slice each avocado in half lengthwise. Gently twist the halves to separate them. Next, you’ll need to remove the pit. Be careful! You can use a spoon or a knife to do this. After that, scoop out a little flesh from the center of each half. This will give you extra room for the tasty filling. Now, let’s make the filling. In a medium bowl, combine 1 cup of halved cherry tomatoes, 1 cup of drained mozzarella balls, and ¼ cup of finely chopped basil. These ingredients create a fresh and colorful mix. Next, drizzle 1 tablespoon of extra virgin olive oil over the mixture. Season it with sea salt and freshly cracked black pepper. Using a spatula or wooden spoon, gently toss everything together. This ensures all flavors mix well. Time to stuff the avocados! Using a spoon, fill each avocado half with the tasty tomato and mozzarella mixture. Make sure each half is heaping with filling. This makes them look amazing! To finish, drizzle 2 tablespoons of balsamic glaze over the top. This adds sweetness and a beautiful shine. If you like, garnish with extra fresh basil leaves for a pop of color. For the complete recipe, check out the Full Recipe. To make the best Caprese stuffed avocados, you need ripe avocados. A ripe avocado feels slightly soft but not mushy when you gently squeeze it. Check the color too. A dark green or almost black skin often means it's ready. If the avocado has a little give, it's perfect for stuffing. If it's too hard, give it a few days to ripen. When serving these stuffed avocados, think about sides that complement their fresh flavors. Crusty bread pairs nicely. A light salad with greens and citrus can brighten the meal. For a decorative touch, arrange the stuffed avocados on a large platter. Drizzle some balsamic glaze around the plate for a beautiful finish. This not only looks great but adds flavor too. Want to take your Caprese stuffed avocados to the next level? Try adding a pinch of garlic salt or a sprinkle of red pepper flakes for a kick. You can also swap the balsamic glaze for lemon juice for a zesty twist. For a unique flavor, try using flavored olive oils, like garlic or rosemary. These small changes can make a big difference in taste. {{image_4}} You can easily boost flavor by adding protein. Chicken or shrimp works great. Simply cook your choice, then chop it into small pieces. Mix this with the tomatoes, mozzarella, and basil for more taste. If you want a vegan option, you can skip the cheese. Instead, try using avocado or nuts for creaminess. Cashews or walnuts add a nice touch while keeping it plant-based. Switching up dressings can make this dish more exciting. Instead of balsamic glaze, try a lemon vinaigrette. This brightens up the avocado and adds zest. You can also use flavored oils. Garlic-infused or chili oil can add depth. Just drizzle it over the stuffed avocados for a new twist. To store your stuffed avocados, wrap each half tightly in plastic wrap. Place them in an airtight container. Keep them in the fridge for up to two days. This helps keep the avocados fresh. If you wait too long, they may turn brown. To slow this, sprinkle some lemon juice on the flesh before wrapping. Reheating stuffed avocados can be tricky. The best way is to use a microwave. Place the stuffed avocado on a microwave-safe plate. Heat on low for just a few seconds. Check often to avoid making them mushy. You want to keep the texture and flavor intact. If you want to warm them in an oven, preheat it to 350°F (175°C). Cover them with foil and heat for about 10 minutes. This method helps maintain the filling's freshness. Freezing stuffed avocados is not ideal. However, you can freeze the filling separately. Prepare the filling as usual, then place it in a freezer-safe bag. Remove as much air as possible before sealing. This keeps it fresh for up to three months. When you're ready to use it, thaw it in the fridge overnight. You can then stuff fresh avocado halves. If you want to freeze whole stuffed avocados, be aware that their texture may change. It’s best to use fresh avocados for the best flavor and texture. You can make Caprese stuffed avocados ahead of time, but I don’t recommend it. The avocado can turn brown and mushy. If you want to prep, cut the other ingredients. Keep them in a bowl and cover. Right before serving, fill the avocados. This keeps them fresh and tasty. If you can’t find mozzarella, try these options: - Feta cheese adds a salty flavor. - Goat cheese brings a tangy taste. - Vegan cheese works well for a dairy-free option. These choices create their own flavor, so feel free to experiment. Yes, Caprese stuffed avocados are healthy! Here are some benefits: - Avocados are rich in healthy fats and fiber. - Tomatoes provide vitamins and antioxidants. - Basil has anti-inflammatory properties. Together, these ingredients create a balanced dish perfect for a snack or meal. To tell if an avocado is ripe, look for these signs: - The skin should be dark green or almost black. - Gently squeeze the avocado; it should feel slightly soft. - If the stem comes off easily and is green underneath, it’s ready. If it feels too soft, it might be overripe. Always check before using! This recipe features ripe avocados stuffed with tasty tomatoes, mozzarella, and basil. You learned how to prepare, fill, and serve these delicious bites. Remember to choose ripe avocados for the best flavor. You can customize the recipe by adding proteins or different dressings. Always store leftovers correctly to keep them fresh. Enjoy this simple yet tasty dish full of healthy ingredients. With these tips and ideas, you'll impress everyone at your next gathering!

Caprese Stuffed Avocados Flavorful and Easy Recipe

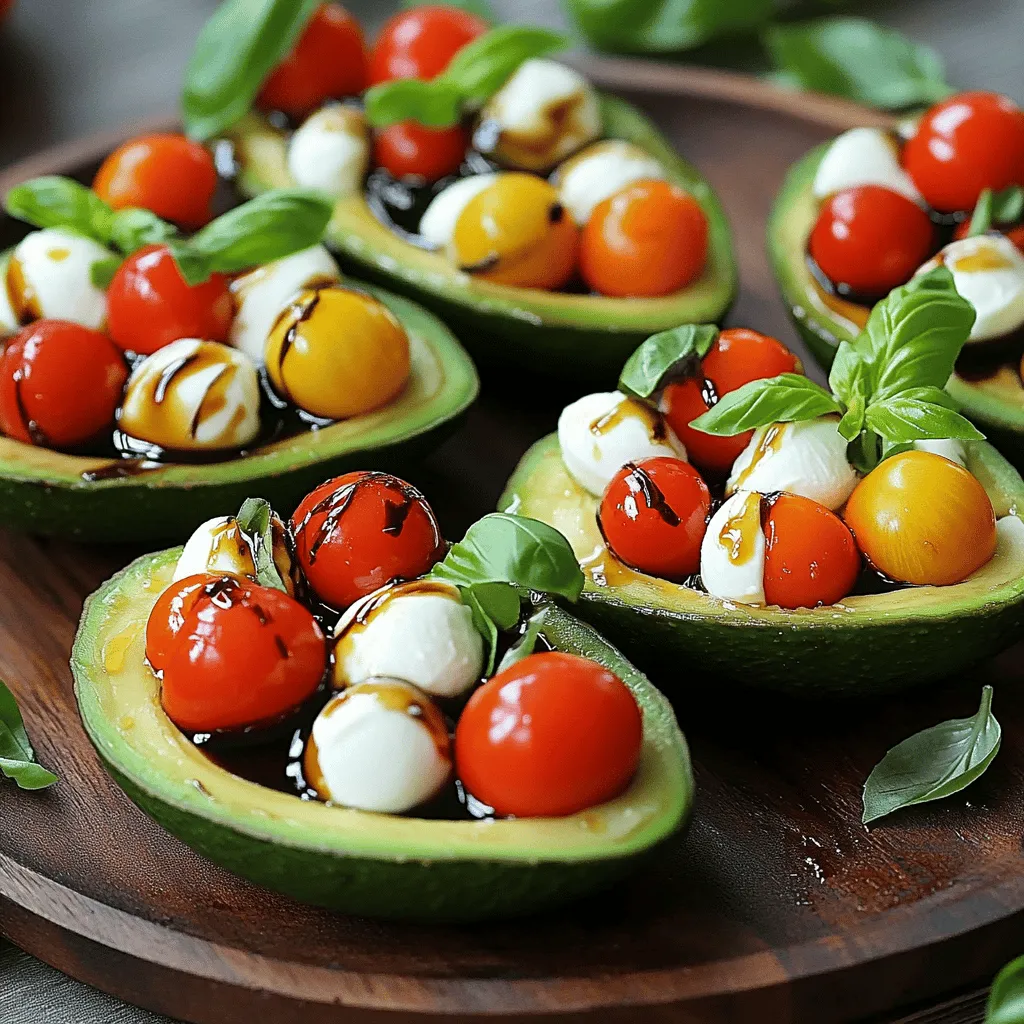
If you want a fresh, easy dish that bursts with flavor, try my Caprese Stuffed Avocados. This recipe combines creamy

Here’s what you need to make zucchini noodles with pesto. Each ingredient adds a unique taste and texture. - Zucchini: 4 medium zucchinis, spiralized - Pesto Components: 1 ripe avocado, 1 cup fresh basil leaves, 2 tablespoons lemon juice - Nuts: 1/4 cup walnuts or pine nuts - Flavor Enhancers: 1 garlic clove, 1/4 teaspoon red pepper flakes, sea salt, black pepper - Finishing Touches: 2 tablespoons olive oil, cherry tomatoes, extra basil leaves These ingredients blend together to create a bold and flavorful dish. The zucchini serves as a great base, while the creamy avocado pesto brings richness. You can customize the nuts and spices to match your taste. For the full recipe, check out the section above. To make zucchini noodles, you need to spiralize the zucchinis. Use a spiralizer or a julienne peeler. Aim for long, thin strands. This method gives your dish a fun, noodle-like shape. Once you spiralize the zucchinis, place them in a colander. Sprinkle a pinch of sea salt over them. This step draws out moisture. Let the noodles rest for about 10 minutes. After that, gently pat them dry with a paper towel. This helps keep your dish from becoming soggy. For the pesto, gather your ingredients. Place one ripe avocado, fresh basil leaves, lemon juice, walnuts, and minced garlic in a food processor. If you want a little heat, add red pepper flakes. Drizzle in the olive oil, too. Blend the mixture until smooth. Stop to scrape down the sides if needed. If your pesto is too thick, add a splash of water. Taste it and season with salt and pepper. You want it to be rich and flavorful. Heat a large skillet over medium heat. Add the prepared zucchini noodles. Cook them for about 2-3 minutes. You want them tender but still crisp. This quick cooking keeps the noodles fresh. Remove the skillet from heat. Spoon the creamy avocado pesto over the zucchini noodles. Toss the noodles gently in the pesto. Make sure every strand is coated well. Plate the zucchini noodles right away for the best texture. Garnish with halved cherry tomatoes and extra basil leaves. This adds color and flavor to your dish. For more details, check the Full Recipe. Substituting Nuts for Different Tastes You can switch nuts in your pesto for a new flavor. If you want a rich taste, use pine nuts instead of walnuts. For a crunchier bite, try almonds. Each nut adds a unique twist, so feel free to explore. Suggested Seasoning Variations Add spices to boost flavor. A pinch of smoked paprika gives a warm touch. For a kick, try more red pepper flakes. Fresh lemon zest brightens the dish and enhances the taste. Don't hesitate to play with herbs too; chives or parsley can add freshness. Meal Prep Strategies for Quick Assembly You can make zucchini noodles in advance. Spiralize the zucchinis and store them in an airtight container. Keep them in the fridge for up to two days. To save time, prepare the avocado pesto too. Store it in a jar with a layer of olive oil on top to keep it fresh. This way, you can whip up dinner quickly. Ways to Enhance the Dish Aesthetically Make your dish look inviting. Serve the zucchini noodles in shallow bowls for a nice touch. Add a drizzle of olive oil around the edges for flair. Scatter halved cherry tomatoes on top for color. Finish with fresh basil leaves for a pop of green. Beautiful food is more fun to eat! For the full recipe, check out Zesty Zucchini Noodles with Avocado Pesto. {{image_4}} You can make zucchini noodles even better by adding protein. Grilled chicken or shrimp pairs well with the creamy avocado pesto. - Grilled Chicken: Season chicken breast with salt and pepper. Grill until cooked through. Slice it and toss it over your noodles. - Shrimp: Season shrimp with your favorite spices. Sauté in a pan for just a few minutes. Toss them on top of the zucchini noodles for a tasty twist. If you need a dairy-free option, use nutritional yeast in place of cheese in your pesto. This keeps the flavor rich and savory. - Nutritional Yeast: It adds a cheesy flavor without dairy. Just blend it into the pesto. You can also add extra nuts for creaminess. - Tofu or Tempeh: Cube and sauté tofu or tempeh for added protein. This keeps your meal fully vegan while still being satisfying. Using seasonal veggies can enhance your dish. Try adding bell peppers, carrots, or spinach. Here’s how to incorporate them: - Bell Peppers: Chop and sauté them along with the zucchini noodles for added crunch and color. - Carrots: Spiralize or julienne them for a sweet, crunchy addition. - Spinach: Toss fresh spinach in right before serving. It wilts quickly and adds nutrients. These variations make your zucchini noodles with pesto fun and exciting! Check out the Full Recipe to see how to create this bold dish at home. To keep your leftover zucchini noodles fresh, store them in an airtight container. Place a paper towel inside to absorb extra moisture. This method helps keep them crisp. You can store them in the fridge for up to three days. If you notice any signs of spoilage, it’s best to toss them out. Yes, you can freeze zucchini noodles and pesto! For freezing, blanch the noodles first. Boil them for just one minute, then cool them in ice water. Drain and dry them well. Place the noodles in freezer bags, removing as much air as possible. Pesto can also freeze well. Use ice cube trays to store small portions. Once frozen, transfer the cubes to a bag. Both can last in the freezer for up to three months. You can get creative with leftover pesto! It makes a great spread on sandwiches or wraps. Mix it into salads for extra flavor. You can also use it as a dip for veggies or crackers. If you have leftover zucchini noodles, try adding them to soups. They can also be sautéed with other veggies for a quick side dish. You can easily make zucchini noodles without a spiralizer using a vegetable peeler. Just peel the zucchini lengthwise into thin strips. You can also use a box grater. Simply grate the zucchini on the large holes, creating noodle-like strands. Both methods work well, but the peeler gives you wider noodles. If you're looking for a substitute for avocado, try using cooked and cooled white beans. They provide creaminess and a good texture. You can also use sunflower seeds or tahini to create a nut-free version. These options keep the pesto rich and flavorful. Zucchini noodles will last about 3 to 5 days in the fridge. Keep them in an airtight container to maintain freshness. Check for any signs of spoilage, like a slimy texture or a bad smell. If they look or smell off, it's best to toss them. Serve zucchini noodles in shallow bowls for a nice touch. Top them with fresh cherry tomatoes and basil for color and flavor. A drizzle of olive oil adds a lovely shine. You can also sprinkle some cheese or nuts for extra texture and taste. Yes, you can make pesto ahead of time. Store it in an airtight container in the fridge. To keep it fresh, drizzle a thin layer of olive oil on top. This helps prevent browning. Pesto can last about a week in the fridge. You can also freeze it for longer storage. Just pour it into ice cube trays, freeze, and transfer the cubes to a bag. This way, you’ll have ready-to-use pesto for your next meal. We explored making delicious zucchini noodles topped with creamy avocado pesto. You learned about the ingredients, step-by-step instructions, and helpful tips for the best results. The flexibility of this dish shines through with options for added protein or seasonal vegetables. You can easily store leftovers or repurpose them creatively. I hope you feel inspired to try this recipe. Healthy eating can be simple and tasty with just a few tweaks! Enjoy your cooking adventure!

Zucchini Noodles with Pesto Bold and Flavorful Dish

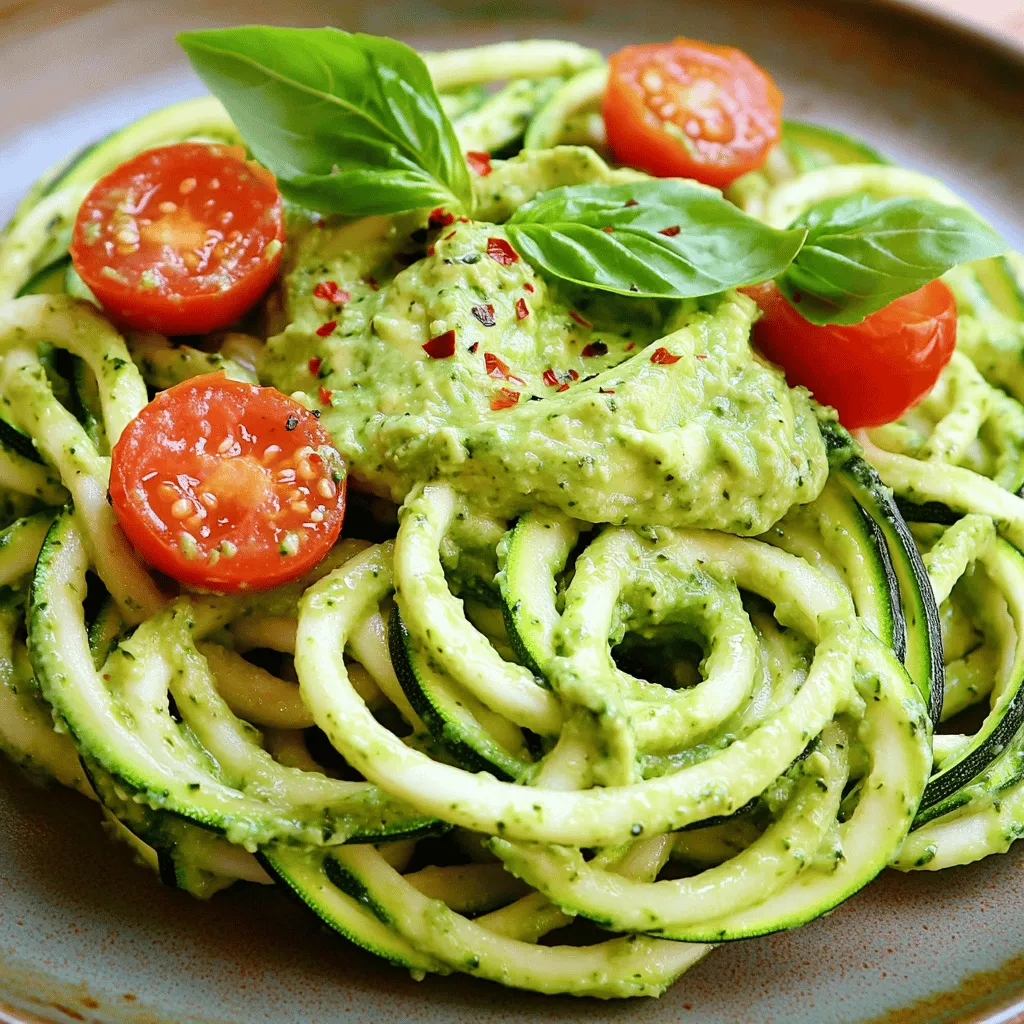
If you’re looking for a fresh and bold meal, zucchini noodles with pesto are a must-try! You can create this

- 2 pounds chicken wings - 2 tablespoons baking powder - 1 teaspoon salt - 1 teaspoon freshly ground black pepper - 1 teaspoon garlic powder - 1 teaspoon onion powder - 1 teaspoon smoked paprika - ½ teaspoon cayenne pepper (adjust based on heat preference) - 2 tablespoons extra-virgin olive oil - 1 tablespoon fresh lime juice - Optional: Fresh herbs for garnish (such as parsley or cilantro) Each ingredient plays a key role in making these wings crispy and tasty. - Chicken wings are the main star. They have the right fat content for flavor. - Baking powder helps create a crispy skin. It works by drawing moisture away from the wings. - Salt enhances the flavor. It also helps to draw out moisture, which keeps the wings crisp. - Black pepper, garlic powder, onion powder, and smoked paprika add depth. Each spice brings its unique flavor, making the wings more exciting. - Cayenne pepper adds heat. You can adjust this to match your spice level. - Olive oil helps with browning. It also adds richness. - Lime juice adds acidity. This brightens the flavors and gives a fresh taste. - Fresh herbs are optional but add color and freshness when serving. You can swap some ingredients if needed. Here are a few ideas: - Chicken wings can be replaced with drumsticks or thighs for a different texture. - Baking powder can be swapped with cornstarch. It also helps with crispiness but watch the amount. - Spices can be adjusted to your taste. Try chili powder or Italian seasoning for a unique twist. - Olive oil can be replaced with vegetable oil or melted butter for added flavor. - Lime juice can be switched out for lemon juice or vinegar for a similar zing. Feel free to get creative with these ingredients. Each choice can change the taste and make your wings special. For the full recipe, check out the detailed instructions above. First, you need to preheat your oven to 425°F (220°C). This heat is key for crispy wings. Line a large baking sheet with aluminum foil. Then, place a wire rack on top. This setup lets hot air flow around the wings, making them crispy all over. Now, let’s make the spice mix. Grab a large bowl. Combine the baking powder, salt, black pepper, garlic powder, onion powder, smoked paprika, and cayenne pepper. Mix well. This blend adds great flavor to your wings. You can adjust the cayenne if you like more or less heat. Next, take your chicken wings and pat them dry with paper towels. This step is a must for crispy skin. After drying, toss the wings into the bowl with the spice mixture. Drizzle in the olive oil and lime juice. Mix until every wing is coated in the zesty spice blend. Place the wings in a single layer on the wire rack. Make sure they’re not touching. This spacing helps them cook evenly. Bake the wings for 40-45 minutes until they turn golden brown and crispy. Flip them halfway through for even cooking. After baking, let them rest for a few minutes. This helps keep them crispy. If you want, add some chopped fresh herbs for garnish. Serve hot with your favorite dips. For more details, check the Full Recipe. To get your chicken wings super crispy, start with drying them well. Use paper towels to get rid of all moisture. This step is key. Next, coat the wings with a mix of baking powder and spices. The baking powder helps create that perfect crunch. Lay the wings in a single layer on a wire rack. This allows hot air to flow around them. Bake at 425°F (220°C) for about 40-45 minutes. Flip them halfway for even cooking. Trust me, this method will give you the best crispy texture. One common mistake is not drying the wings enough. Moisture is the enemy of crispiness. Another mistake is overcrowding the baking sheet. If wings touch, they steam instead of crisp. Also, don’t skip the baking powder; it’s essential for that crunch. Lastly, resist the urge to open the oven too soon. This lets heat escape and can lead to soggy wings. For the best results, use a good wire rack. It keeps the wings elevated. This helps them cook evenly. A large baking sheet lined with aluminum foil also makes cleanup easy. Use a meat thermometer to check for doneness. This ensures your wings are safe to eat. Lastly, have some tongs handy for flipping the wings. For the full recipe, check out the detailed steps to make your wings shine. {{image_4}} You can change the flavor of your wings easily. For BBQ wings, coat them with your favorite BBQ sauce after baking. This adds sweetness and tang. For Buffalo wings, toss them in hot sauce right after they come out of the oven. This gives them that spicy kick we all love. You can also mix flavors. Try honey garlic for a sweet and savory treat. Or go for lemon pepper for a zesty twist. Baking is my go-to method for wings, but you can grill them for a smoky flavor. Preheat your grill to medium heat. Place the wings directly on the grill grates. Cook them for about 15-20 minutes, turning often. You can also use an air fryer. It makes the wings crispy and cuts down on cooking time. Set it to 400°F and cook for about 25 minutes. Dipping sauces can elevate your wing experience. Classic ranch dressing is a fan favorite. It cools down the heat from spicy wings. Blue cheese dressing also adds a rich flavor. If you want something different, try honey mustard. It brings sweet and tangy notes that pair well with savory wings. You can also mix Greek yogurt with herbs for a light dip. Each sauce brings its own charm to your wings. Explore and find your favorite! To keep your crispy baked chicken wings fresh, let them cool first. Once they are at room temperature, place them in an airtight container. This step helps prevent moisture from making the wings soggy. You can store them in the fridge for up to three days. If you want to keep them longer, freezing is a better option. When you are ready to enjoy your wings again, preheat your oven to 350°F (175°C). Place the wings on a baking sheet lined with foil. Heat them for about 15-20 minutes, or until they are hot and crispy again. You can also use an air fryer for reheating. Just set it at 350°F (175°C) and cook for 5-7 minutes. This method helps maintain that tasty crunch. If you have leftover wings, freezing is a great option. First, make sure they are completely cooled. Then, arrange them in a single layer on a baking sheet and freeze for one hour. Once frozen, transfer them to a freezer-safe bag or container. They can last up to three months in the freezer. When you're ready to eat, just thaw them in the fridge overnight and reheat as mentioned above. To get the best crispiness, bake chicken wings for 40 to 45 minutes at 425°F. This high temperature helps to render the fat and dry out the skin. After 20 minutes, flip the wings for even cooking. You’ll know they are done when they turn golden brown and crispy. Yes, you can use frozen chicken wings. Just make sure to thaw them first. This helps them cook evenly and become crispy. You can soak them in cold water for about 30 minutes. Then, dry them well before coating with the spice mix and baking. Leftover wings are great for many meals. You can reheat them in the oven to keep them crispy. You can also chop them up and add to salads or pasta. If you like, use them in a wrap with veggies and sauce. They make a quick and tasty snack. To make wings crispy without frying, drying them is key. Pat them dry with paper towels before seasoning. Using baking powder in the spice mix also helps. It raises the pH level, making the skin crispier. Finally, bake them on a wire rack to allow air circulation around the wings. For the full recipe, check out the detailed steps and ingredient list above. This guide covered the essential steps for cooking perfect chicken wings. We discussed the key ingredients and their importance. We also shared steps for preparation, baking, and tips for crispiness. Don't forget the fun variations and proper storage methods. Mastering these techniques helps you create tasty wings for any occasion. With practice, you’ll cook wings that impress everyone. Enjoy your cooking journey and the delicious wings to come!

Crispy Baked Chicken Wings Perfect for Any Occasion

If you’re craving crispy baked chicken wings that impress every time, you’re in the right place! I’ll guide you through

For a delightful Peach Cobbler Dump Cake, you will need a few simple ingredients. Here’s what you’ll gather for this easy and tasty recipe: - Fresh peaches or canned peaches - Granulated sugar, vanilla extract, and ground cinnamon - Yellow cake mix and unsalted butter - Optional: chopped pecans or walnuts Let’s break it down a bit more. Fresh Peaches or Canned Peaches: Choose ripe peaches for the best flavor. If fresh peaches aren’t available, canned peaches work well too. Just make sure to drain them well. Granulated Sugar, Vanilla Extract, and Ground Cinnamon: The sugar sweetens the peaches. Vanilla adds a nice aroma, and cinnamon brings warmth to the dish. Yellow Cake Mix and Unsalted Butter: The cake mix forms the base of this dump cake. The melted butter creates a rich, golden topping. Optional: Chopped pecans or walnuts give a crunchy texture. Feel free to skip them if you prefer a smoother cake. These ingredients come together to create a warm, comforting dessert that’s easy to make. Check out the Full Recipe to see how these ingredients transform into a delicious peach cobbler dump cake. 1. Preheat the oven and prepare the baking dish Start by preheating your oven to 350°F (175°C). This helps the cake cook evenly. Take a 9x13-inch baking dish and grease it with butter or non-stick spray to keep the cake from sticking. 2. Mix the peach filling ingredients In a large bowl, add 4 cups of sliced peaches. If you use canned peaches, drain them first. Mix in 1 cup of granulated sugar, 1 teaspoon of pure vanilla extract, and 1 teaspoon of ground cinnamon. Stir gently until the peaches are well-coated. Set this aside to let the flavors blend. 3. Layer the cake mix and melted butter Pour the peach mixture into the greased baking dish, spreading it evenly. Now, take a box of yellow cake mix and sprinkle it evenly over the peaches. Next, melt 1 cup of unsalted butter and drizzle it over the cake mix. It’s okay if some spots remain dry. They will soak up moisture while baking. 1. Set baking time and temperature Place the baking dish in your preheated oven. Bake for 45-50 minutes. You want the top to turn golden brown and bubbly. 2. Check for doneness To check if it's done, insert a toothpick into the center. It should come out clean. If it’s not clean, bake for a few more minutes. - Optional toppings Serve the dump cake warm. Add a scoop of vanilla ice cream or a dollop of whipped cream on top. This adds a creamy touch. - Presentation tips For a nice finish, garnish with a fresh peach slice or a sprig of mint. This makes your dish look vibrant and inviting. To ensure even baking, spread the peach mixture and cake mix evenly. This helps the cake bake uniformly. Use a toothpick to check for doneness; it should come out clean. If you want to avoid a soggy bottom, make sure to drain canned peaches well. Too much liquid can make the base mushy. Using alternative fruits can add a fun twist to your dump cake. Try blueberries, cherries, or apples for new flavors. For allergies or dietary needs, swap the cake mix for a gluten-free version. You can also use coconut oil instead of butter for a dairy-free option. Pair your dump cake with cold drinks like iced tea or lemonade. It also goes great with dessert wines or a scoop of vanilla ice cream. You can enhance the dish with whipped cream, fresh mint, or even a sprinkle of cinnamon. For a special touch, serve it in a clear dish to show off the layers. These ideas will make your dump cake shine at any gathering! {{image_4}} To make your Peach Cobbler Dump Cake even tastier, try adding some spices. Ground cinnamon is a great choice, but you can also use nutmeg or ginger for extra warmth. These spices bring out the sweetness of the peaches and add depth. You can mix in other fruits too! Try blueberries, raspberries, or even sliced strawberries. Combining these fruits with peaches adds a fun twist and a burst of color to your dish. The mix of flavors keeps every bite exciting. If you're looking for lower-sugar options, consider using less sugar or a sugar substitute. You can also use ripe bananas or applesauce for natural sweetness. This keeps the dish delicious while cutting down on added sugars. For a gluten-free option, check out gluten-free cake mixes. Many brands offer great alternatives that work well in this recipe. This way, everyone can enjoy a slice of this tasty treat. Want to try something different? You can make this dump cake in a slow cooker. Just layer the ingredients and cook on low for 3 to 4 hours. This method makes the cake super moist and brings out the flavors. If you have an Instant Pot, you can prepare it there too! Use the cake setting for about 35 minutes. Just remember to use the trivet to keep the cake above the water. This method is quick and yields a soft and fluffy dessert. For the full recipe, check out the details provided earlier! To keep your peach cobbler dump cake fresh, start by cooling it completely. Once it's cool, cover it tightly with plastic wrap or aluminum foil. This helps prevent it from drying out. You can also store it in an airtight container. - Refrigeration tips: Place in the fridge for up to 4 days. The cold helps maintain flavor and texture. - How to freeze the dump cake: Wrap it tightly in plastic wrap, then in foil. It can freeze for up to 3 months. To serve later, thaw it in the fridge overnight. When you want to enjoy your dump cake again, reheating is easy. - Best methods for reheating: Warm slices in the microwave for 30-40 seconds. You can also reheat in the oven at 350°F for about 10-15 minutes. This restores the cake's warmth and texture. - Serving cold vs. warm: While some like it cold, I recommend serving it warm. It pairs perfectly with ice cream when warm. Knowing how long your cake lasts is important. - How long it lasts in the fridge/freezer: In the fridge, your cake stays good for about 4 days. If frozen, it lasts about 3 months. Just remember, the sooner you eat it, the fresher it tastes! Can I use frozen peaches instead of fresh? Yes, you can use frozen peaches. Just thaw them and drain any excess liquid. This helps keep your dump cake from getting soggy. Frozen peaches work well and still taste great! How can I make this recipe vegan? To make this recipe vegan, swap the butter for a plant-based alternative. Use a vegan cake mix instead of the yellow cake mix. Also, check that your sugar is vegan, as some sugars are processed with bone char. What to do if the cake is too dry? If your cake turns out too dry, you can add a little more melted butter next time. You might also want to cover it while baking. This keeps moisture in and helps it stay soft. How to fix a burnt topping? If the topping burns, don’t worry! You can scrape off the burnt parts and serve the rest. For next time, cover the cake with foil halfway through baking to prevent burning. What is the origin of dump cake? Dump cake started in the United States in the 1970s. It was an easy way to make dessert with little effort. You simply "dump" the ingredients into a pan, hence the name! Can I double this recipe for a larger crowd? Yes, you can double the recipe! Just use a larger baking dish and adjust the baking time. Keep an eye on it as it bakes to ensure even cooking. This blog post covered a simple peach dump cake recipe, with clear steps and tips. You learned about ingredient choices, baking instructions, and ways to serve it best. Remember, cooking is fun and creative. Don't shy away from trying new fruits or methods. Each batch can be unique. Enjoy your delicious treat, and get ready for compliments!

Peach Cobbler Dump Cake Quick and Tasty Recipe

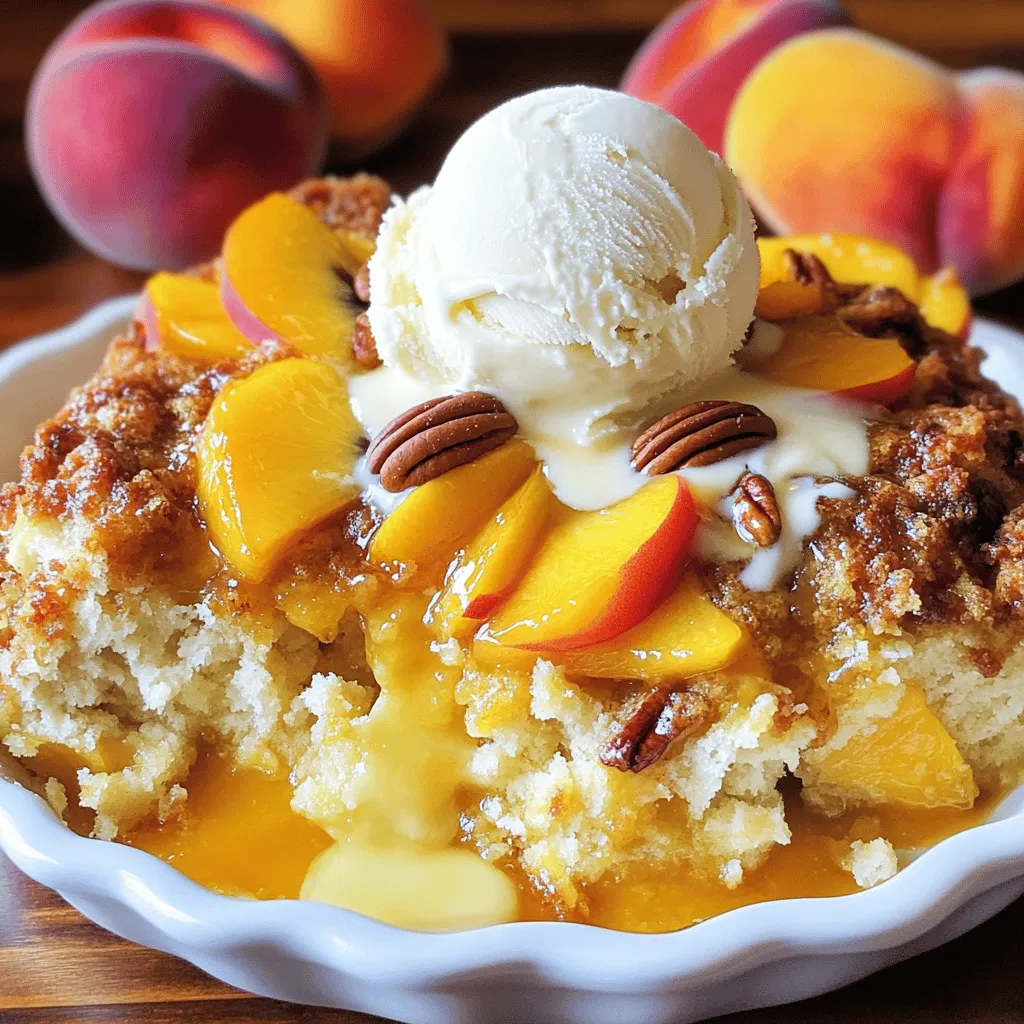
Craving a sweet treat that’s quick and easy? Let me introduce you to Peach Cobbler Dump Cake! This simple recipe

To make Vegan Quinoa Stuffed Peppers, gather these ingredients: - 4 large bell peppers (choose your favorite color) - 1 cup quinoa, thoroughly rinsed - 2 cups vegetable broth - 1 can (15 oz) black beans, well rinsed and drained - 1 cup corn kernels (fresh or frozen is fine) - 1 medium red onion, finely diced - 2 cloves garlic, minced - 1 teaspoon ground cumin - 1 teaspoon smoked paprika - 1 teaspoon chili powder - Salt and freshly ground black pepper to taste - 1 cup diced tomatoes (use fresh or canned) - 2 tablespoons freshly chopped cilantro (for garnish) - Lime wedges (for serving) You can swap some ingredients if needed: - Use brown rice instead of quinoa for a different grain. - Swap black beans for kidney beans or chickpeas. - Replace corn with chopped zucchini or spinach for a veggie boost. - If you don’t have red onion, use yellow onion or shallots. - Fresh herbs like parsley or basil can replace cilantro for a new flavor. This dish is not just tasty; it is also healthy: - Quinoa is high in protein and fiber. - Black beans add more protein and iron. - Bell peppers provide vitamins A and C. - Each stuffed pepper is around 250 calories. - Full of nutrients, this dish supports a balanced diet. For the complete recipe, check the Full Recipe section. Start by preheating your oven to 375°F (190°C). This warms the oven while you prepare the peppers. Next, take your bell peppers and slice off the tops. Make sure to remove the seeds and membranes inside. This creates a space for the delicious filling. Stand the peppers upright in a baking dish. This helps them hold their shape while baking. In a medium-sized saucepan, add the rinsed quinoa and vegetable broth. Place this over medium-high heat and bring it to a boil. Once boiling, reduce the heat to a gentle simmer. Cover the pot and let it cook for about 15 minutes. Your quinoa will absorb the broth and become fluffy. This step is key for a tasty filling. While the quinoa cooks, grab a skillet and heat a splash of oil over medium heat. Add the diced red onion and sauté for about 3-4 minutes. You want the onions to become soft and translucent. Then, add the minced garlic and sauté for another minute. This brings out the garlic's flavor. Now, mix the cooked quinoa into the skillet with the onions and garlic. Add the black beans, corn, diced tomatoes, ground cumin, smoked paprika, chili powder, salt, and black pepper. Stir everything well until it's heated through. Carefully spoon this mixture into each hollowed-out pepper. Press the filling down gently, but don’t pack it too tight. Cover the baking dish with aluminum foil to keep moisture in. Bake for 30 minutes. After 30 minutes, remove the foil and bake for another 10-15 minutes. This helps the peppers get tender and slightly charred. Once done, take the stuffed peppers out and let them cool for a few minutes. Sprinkle with fresh cilantro and serve with lime wedges. This adds a fresh touch to your meal. For the full recipe, check the complete instructions above. Enjoy your flavorful and nutritious vegan quinoa stuffed peppers! When making vegan quinoa stuffed peppers, avoid overcooking the quinoa. If it gets mushy, the filling lacks texture. Also, do not skip rinsing the quinoa. This step removes bitterness. Don’t forget to taste your filling. Adjust spices as needed to suit your taste. Lastly, ensure you don’t overstuff the peppers. They should hold the filling but not burst. To keep your peppers tender, choose fresh, firm peppers. Bake them covered with foil for the first part of cooking. This traps steam and helps them soften. After 30 minutes, remove the foil to give them a nice char. You can also try parboiling them briefly before stuffing. This quick cook keeps them juicy and tender. Vegan quinoa stuffed peppers pair well with a fresh green salad. Try a citrus vinaigrette for a bright touch. You can also serve them with avocado slices or a dollop of vegan sour cream. For a heartier meal, consider adding a side of brown rice or quinoa. A chilled glass of sparkling water with lime complements the dish nicely. You can find the full recipe for these delicious stuffed peppers above. {{image_4}} You can customize your vegan quinoa stuffed peppers by adding different vegetables. Try using chopped zucchini, mushrooms, or spinach. These veggies can enhance flavor and add more nutrients. You can also mix in diced carrots or celery for extra crunch. Just make sure to chop them small to fit well in the filling. If you want a twist, use other grains instead of quinoa. Brown rice offers a nutty taste and chewy texture. Farro adds a hearty bite and is rich in fiber. You can also try couscous for a lighter option. Each grain brings its own flavor and texture, making your dish unique. Adjust the spice level to fit your taste. For mild flavors, skip the chili powder and use sweet paprika. If you love heat, add diced jalapeños or cayenne pepper to the mix. You can also top the peppers with a spicy salsa before serving. This way, everyone can enjoy the stuffed peppers just how they like them. For more detailed cooking steps, check the Full Recipe. Storing leftover stuffed peppers is easy. First, let them cool down to room temperature. Then, place them in an airtight container. If you have multiple peppers, stack them carefully. You can keep them in the fridge for about 3 to 5 days. Reheating stuffed peppers is simple. You can use the oven or microwave. For the oven, preheat it to 350°F (175°C). Place your peppers on a baking sheet and cover them with foil. Bake for about 15 to 20 minutes, or until they are warm throughout. If you’re in a hurry, use a microwave. Heat them on a microwave-safe plate for 2 to 3 minutes. Check if they are hot enough before serving. Freezing stuffed peppers is a great way to save them for later. First, let the peppers cool completely. Wrap each pepper tightly in plastic wrap. Then, place them in a freezer-safe bag or container. They can last in the freezer for up to 3 months. When you're ready to eat them, thaw them overnight in the fridge. After thawing, reheat them using the oven or microwave as mentioned above. For the best flavor, try to use them within a month. For the full recipe, check the Vegan Quinoa Stuffed Peppers section above! Yes, you can prepare Vegan Quinoa Stuffed Peppers ahead of time. Make the filling and stuff the peppers. Then, store them in the fridge for up to a day. When ready to cook, bake them directly from the fridge. Just add a few extra minutes to the cooking time. If you need a substitute for quinoa, try brown rice or farro. Both grains cook well and add nice texture. You can also use couscous for a quicker option. Adjust cooking times based on the grain you choose. Stuffed peppers can last in the fridge for about three to five days. Store them in an airtight container to keep them fresh. If you notice any off smells or colors, it’s best to discard them. Vegan quinoa stuffed peppers are easy and fun to make. We covered ingredients, steps, tips, and ways to store them. You can try different veggies, grains, or spice levels for variety. Remember, don’t rush the cooking process. This will help ensure tender peppers. You can store leftovers for quick meals later. Enjoy experimenting with flavors and share it with friends. These stuffed peppers can be a hit at any meal. Have fun cooking and make it your own!

Vegan Quinoa Stuffed Peppers Flavorful and Nutritious

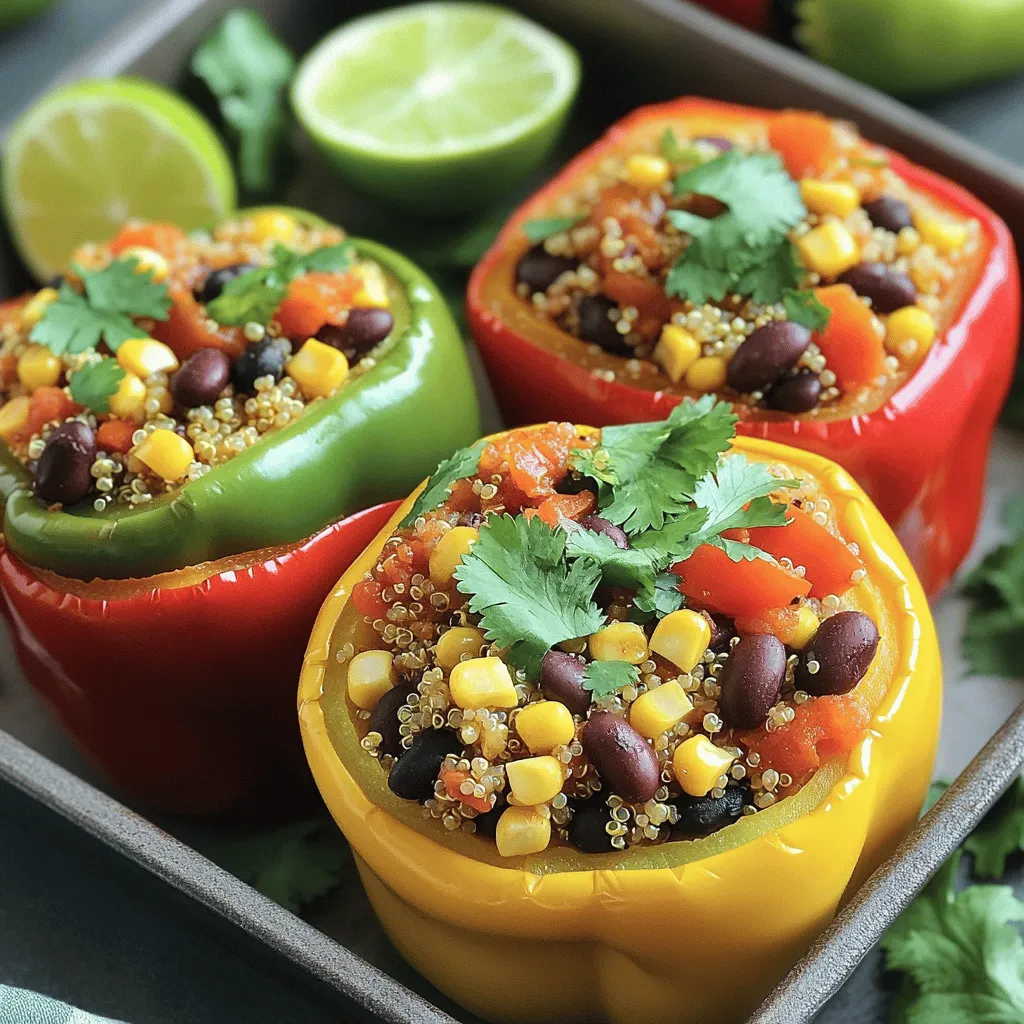
Are you ready to spice up your dinner routine? These Vegan Quinoa Stuffed Peppers are both flavorful and nutritious! Packed

- 2 cups cooked chicken, shredded - 1 cup barbecue sauce (your favorite brand) - 1/4 cup hot honey (store-bought or homemade) - 1 cup shredded cheese (cheddar or Monterey Jack) - 8 flour tortillas (medium size) These main ingredients create the heart of your quesadillas. The cooked chicken adds protein, while the barbecue sauce and hot honey give it a sweet and spicy kick. The cheese melts beautifully, tying all the flavors together. Finally, the tortillas wrap everything up perfectly. - 1/2 cup red onion, thinly sliced - 1/2 cup diced bell peppers (any color for a vibrant dish) - Fresh cilantro, chopped (for garnish) - Sour cream (for serving) You can personalize your quesadillas with fresh vegetables. Red onion and bell peppers add crunch and color. Chopped cilantro brightens the dish and gives it an extra layer of flavor. Sour cream serves as a cool dip that balances the heat. These optional ingredients can take your quesadillas from good to amazing! {{ingredient_image_2}} Start by shredding your cooked chicken into bite-sized pieces. In a medium bowl, mix the shredded chicken with barbecue sauce and hot honey. Make sure every piece of chicken gets a nice coating. This step is key for bringing out the flavors. You want the chicken to be rich and sweet with a hint of heat. Heat a large skillet over medium heat. Add one tablespoon of olive oil. Let it warm up until it shimmers. Lay one tortilla flat in the skillet. Spoon about half a cup of the chicken mixture evenly across the tortilla. Next, sprinkle a generous amount of shredded cheese on top. Then, add sliced red onion and diced bell peppers. This adds crunch and color. Place a second tortilla on top and gently press down. Cook until the bottom tortilla turns golden and crispy, about three to four minutes. Carefully flip the quesadilla using a spatula. If needed, drizzle the remaining olive oil around the edge. This helps crisp the other side. Cook for another three to four minutes until it is golden and the cheese is fully melted. Once the quesadilla is cooked, transfer it to a cutting board. Let it rest for a minute. This makes it easier to slice. Cut the quesadilla into wedges. Repeat the cooking process with the rest of the tortillas and filling. To make the dish pop, garnish each quesadilla with chopped cilantro. Serve with a small bowl of cool sour cream for dipping. This adds a nice touch and balance to the heat. Enjoy your flavorful twist on a classic dish! To make your quesadillas crispy, follow these tips: - Cooking Times: Cook each quesadilla for about 3-4 minutes on each side. Watch for a golden color. - Oil Usage: Use 1 tablespoon of olive oil for each quesadilla. Coat your skillet well to help with crispiness. A hot skillet helps achieve that perfect crunch. If the oil smokes, turn the heat down. Want to add more flavor? Here are some ideas: - Spices and Seasonings: Try adding garlic powder or smoked paprika to the chicken mix. This adds depth to the flavor. - Sauce Pairings: Serve your quesadillas with ranch or a zesty salsa. These add coolness and a nice kick. You can also try adding fresh lime juice over the quesadillas before serving. It brightens up the dish. Explore different combinations to find your favorite! Pro Tips Use Leftover Chicken: This recipe is perfect for using up leftover rotisserie chicken or any cooked chicken you have on hand. Customize Your Heat: Adjust the amount of hot honey based on your spice preference, or use regular honey for a milder flavor. Cheese Choices: Experiment with different cheeses like pepper jack or gouda for a unique twist on flavor and texture. Serve with Sides: Pair these quesadillas with a fresh salad or grilled vegetables for a complete meal. {{image_4}} For a tasty twist, you can swap out chicken. Try shredded pork or beef. These meats soak up flavors well and add depth to your quesadillas. If you're in the mood for a meatless meal, use black beans or lentils. Both options provide protein and pair nicely with the sauce. Barbecue sauce comes in many styles. You can use a sweet, tangy sauce or a smoky one. Each brings a unique taste to the quesadillas. For cheese, consider trying pepper jack for a spicy kick or mozzarella for a mild flavor. Mixing cheeses can also help create a rich, gooey texture that melts beautifully. To keep your quesadillas fresh, cool them down quickly. Let them sit at room temperature for no more than two hours. Once cooled, wrap them tightly in plastic wrap or foil. You can also place them in an airtight container. This helps keep them from drying out. Store them in the fridge for up to three days. When it’s time to reheat, use a skillet for the best results. Heat the skillet over medium heat and add a little oil. Place the quesadilla in the pan and cook for about 2-3 minutes on each side. This method keeps them crispy and tasty. You can also use the microwave for quick reheating. Be aware that this may make them a bit soggy. You can freeze both uncooked and cooked quesadillas. For uncooked quesadillas, assemble them as usual but do not cook. Wrap each one in plastic wrap and place them in a freezer bag. They can last up to three months in the freezer. When you are ready to cook them, thaw them in the fridge overnight. Cook them in a skillet as mentioned above. For cooked quesadillas, let them cool completely before freezing. Wrap them well and store them in a freezer bag. To reheat, you can thaw them in the fridge or microwave. Then, heat them in a skillet for a few minutes on each side until warm. This keeps them nice and crispy while ensuring the cheese melts perfectly. You can enjoy these quesadillas with many tasty sides. Here are some great options: - Corn on the cob: Sweet and crunchy, it pairs well. - Guacamole: Creamy and fresh, it adds a nice touch. - Pico de gallo: This salsa brings a burst of flavor. - Mixed green salad: Light and refreshing, it balances the meal. - Chips and salsa: Crunchy chips and zesty salsa make a fun snack. These sides enhance the flavors and make the meal more exciting. Yes, you can prepare some parts of this recipe in advance. Here’s how: - Cook and shred the chicken: Do this a day before. Store it in the fridge. - Mix the chicken, barbecue sauce, and hot honey: Combine these in advance for quick assembly. - Chop the vegetables: Slice the red onion and bell peppers a few hours ahead. By preparing ahead, you can whip up your quesadillas in no time. If you don’t have hot honey, here are some easy swaps: - Regular honey with cayenne pepper: Mix a bit of cayenne into honey for heat. - Maple syrup with chili flakes: This gives a sweet and spicy kick. - Agave nectar with hot sauce: Combine these for a unique flavor. These substitutes keep the sweet heat that makes the quesadillas special. Creating Hot Honey BBQ Chicken Quesadillas is simple and fun. We explored key ingredients, cooking steps, and how to customize your dish. Remember, using the right oil makes a crisp quesadilla. You can even swap ingredients for a unique flavor. Storing leftovers properly keeps your meal fresh for next time. Enjoy experimenting with flavors and creating this tasty dish. Each bite offers a burst of flavor you will love!

Hot Honey BBQ Chicken Quesadillas Flavorful Twist

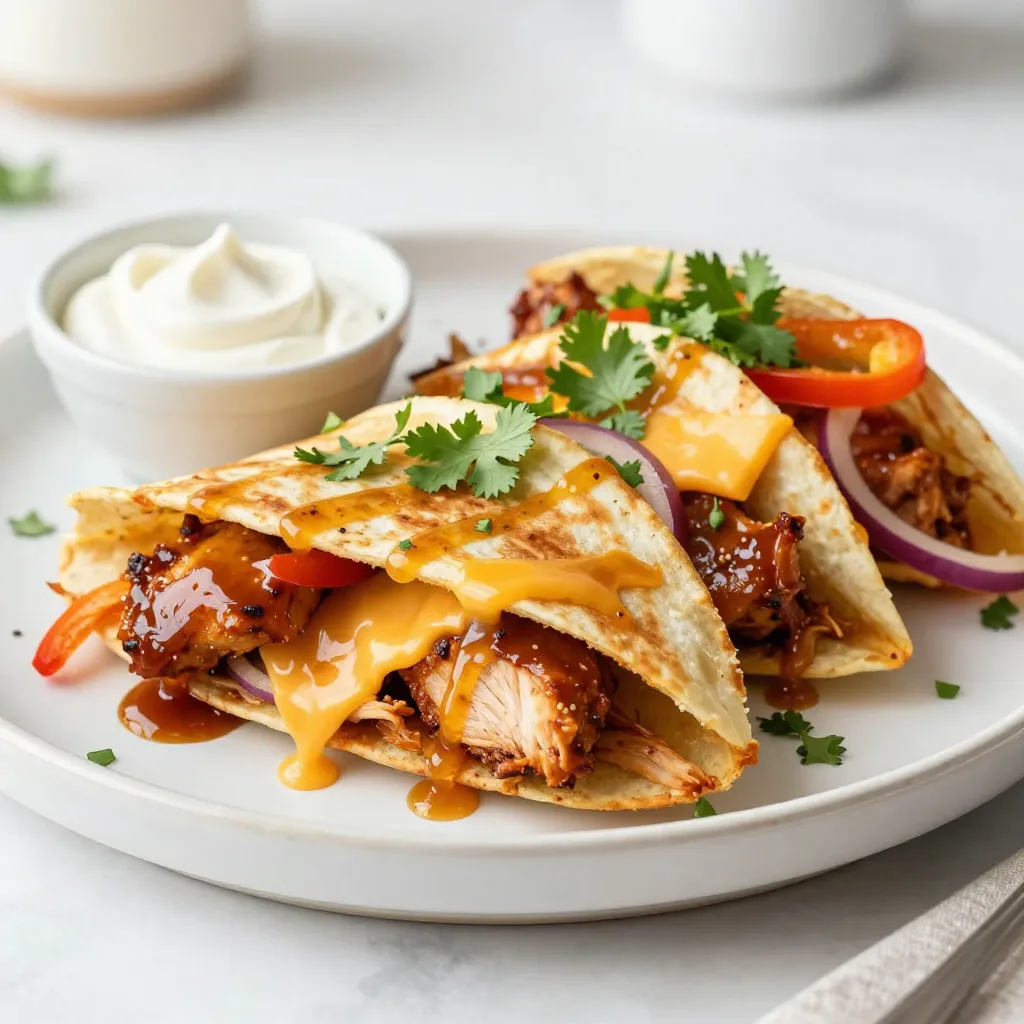
Are you ready to spice up your dinner routine with a tasty treat? Hot Honey BBQ Chicken Quesadillas are the

- 1 cup unsalted butter, softened - 1 cup packed brown sugar - 1/2 cup granulated sugar - 2 large eggs, at room temperature - 2 teaspoons pure vanilla extract - 1 3/4 cups all-purpose flour - 3/4 cup unsweetened cocoa powder - 1 teaspoon baking soda - 1/2 teaspoon fine sea salt - 1 cup semi-sweet chocolate chips - 1/2 cup crushed peppermint candies (plus extra for garnish) - 1/2 cup white chocolate chips (optional) For the butter, use margarine if needed. If you are out of brown sugar, mix white sugar with molasses. You can also swap semi-sweet chips for dark chocolate chips. Need a nut-free option? Try using dairy-free chocolate chips. If you want to skip the eggs, use 1/4 cup of unsweetened applesauce per egg. Using unsalted butter gives better control over salt levels. Pure vanilla extract adds a warm flavor. The combination of cocoa powder and chocolate chips creates a deep, rich taste. Crushed peppermint candies give a fresh, minty kick. If you add white chocolate chips, they provide a creamy contrast to the dark chocolate. {{ingredient_image_2}} First, gather all your ingredients. You need unsalted butter, brown sugar, granulated sugar, eggs, vanilla, flour, cocoa powder, baking soda, salt, chocolate chips, and peppermint candies. Preheat your oven to 350°F (175°C). Line two baking sheets with parchment paper to prevent sticking. In a large bowl, beat the softened butter, brown sugar, and granulated sugar. Use an electric mixer on medium speed until the mix is light and fluffy. This takes about 3-5 minutes. Next, add the eggs one at a time. Make sure each egg is mixed in well before adding the next. Stir in the vanilla extract for flavor. In another bowl, whisk together the flour, cocoa powder, baking soda, and salt. This helps mix the dry ingredients evenly. Slowly add this dry mix to the wet butter mixture. Mix on low speed until just combined. This step is key; you want to avoid over-mixing. Gently fold in the chocolate chips and crushed peppermint candies. If you like, add white chocolate chips too. Using a cookie scoop or tablespoon, drop rounded dough portions onto your prepared baking sheets. Leave about 2 inches of space between each cookie. This allows them to spread while baking. Bake in your preheated oven for 10-12 minutes. The edges should be set, while the centers are soft. This gives you that chewy texture. After baking, let the cookies cool on the sheets for about 5 minutes. Then, transfer them to wire racks to cool completely. While they are still warm, sprinkle extra crushed peppermint candies on top. This makes them look festive and adds a burst of flavor. Enjoy your delicious double chocolate peppermint cookies! To get that perfect chewy texture in your double chocolate peppermint cookies, follow these simple steps. First, do not over-mix your dough. Mix just until the dry and wet ingredients come together. Second, leave the cookies slightly underbaked. The edges should look set, but the center should still be soft. This helps keep them chewy. Lastly, let them cool on the baking sheet for a few minutes before moving them. This resting time allows them to finish baking and firm up just right. Baking cookies can be tricky. One common mistake is using cold butter. Always use softened butter to ensure a creamy texture. Another mistake is not measuring the flour correctly. Too much flour makes cookies dry. Use the spoon-and-level method to get it right. Also, remember to rotate your baking sheets halfway through baking. This ensures even cooking and browning. Want to boost flavor? You can add a pinch of espresso powder to your dough. This enhances the chocolate without adding a coffee taste. Another option is to mix in some chopped nuts, like walnuts or pecans. They add a nice crunch. For extra peppermint flavor, consider adding peppermint extract. Just a few drops will make a big difference! Pro Tips Room Temperature Ingredients: Ensure that your butter and eggs are at room temperature for better incorporation and a smoother dough. Don’t Overmix: Mix the dough until just combined to keep the cookies tender and avoid a tough texture. Use Parchment Paper: Line your baking sheets with parchment paper to prevent sticking and ensure even baking. Cool on Wire Racks: Allow cookies to cool on wire racks to maintain their chewy texture and prevent sogginess. {{image_4}} You can customize your Double Chocolate Peppermint Cookies easily. Here are a few ideas: - Espresso: Add 1 tablespoon of instant espresso powder for a coffee kick. - Orange Zest: Mix in 1 teaspoon of fresh orange zest for a citrus twist. - Caramel: Incorporate chunks of caramel candy for a sweet surprise inside. These flavors can add depth and excitement to your cookies. Making these cookies gluten-free or dairy-free is simple. For gluten-free, swap all-purpose flour with a 1:1 gluten-free blend. Ensure the blend has xanthan gum for best results. For a dairy-free option, use coconut oil or dairy-free butter instead of regular butter. Use dairy-free chocolate chips to keep the flavor intact. You can make these cookies festive with seasonal touches. Here are some fun ideas: - Candy Cane Crumbles: Use crushed candy canes instead of peppermint candies for a crunchier texture. - Pumpkin Spice: Add 1 teaspoon of pumpkin pie spice for a cozy fall flavor. - Holiday Sprinkles: Decorate with holiday-themed sprinkles before baking for a pop of color. These additions can make your cookies extra special for any occasion! To keep your Double Chocolate Peppermint Cookies tasty, store them in an airtight container. This helps them stay soft and fresh. If you have some left after a day or two, add a slice of bread to the container. The cookies will soak up moisture from the bread, keeping them chewy. You can also layer the cookies with parchment paper to avoid sticking. You can freeze these cookies to enjoy later. Start by letting them cool completely. Place the cooled cookies in a single layer on a baking sheet. Freeze them for about an hour. Once frozen, transfer the cookies to a freezer bag. Remove as much air as possible and seal. They can stay fresh for up to three months in the freezer. When you want to enjoy them, take the cookies out and let them thaw at room temperature. To keep your cookies fresh for longer, store them in a cool, dry place. Avoid direct sunlight, as heat can dry them out. If using a tin, line it with wax paper. This prevents sticking and keeps the cookies moist. For extra freshness, consider wrapping the cookies individually in plastic wrap before placing them in a container. This method also makes sharing easy! To make cookies softer, follow a few simple steps. First, use room temperature butter. This helps create a creamy mix. Second, do not over-mix the dough. Mix just until combined. Lastly, bake the cookies until edges are set, but the centers are still soft. This keeps them chewy. Yes, you can use different types of chocolate! You can mix dark, milk, or semi-sweet chocolate. Each type adds a unique flavor. If you want a sweeter cookie, try milk chocolate. If you like a richer taste, dark chocolate works well. You can even use white chocolate chips for a fun twist. Crushing peppermint candies is easy. Place the candies in a zip-top bag. Use a rolling pin or a heavy pan to crush them. You can also use a food processor for a finer grind. Just be careful not to turn them into dust. You want little bits for texture in your cookies. In this blog post, you learned about the key ingredients, step-by-step baking instructions, and tips for cookie perfection. I shared ways to enhance flavor and avoid common mistakes. We also explored tasty variations and smart storage options to keep your cookies fresh. Remember, baking is fun, and each cookie is a chance to express your creativity. Use these insights to bake delicious treats that everyone will enjoy!

Double Chocolate Peppermint Cookies Rich Delight Recipe

If you crave a sweet twist this holiday season, you’re in for a treat! My Double Chocolate Peppermint Cookies Rich

- 1 large head of cauliflower, cut into bite-sized florets - 1 cup all-purpose flour (or gluten-free flour) - 1 teaspoon garlic powder - 1 teaspoon smoked paprika - 1/2 teaspoon sea salt - 1/4 teaspoon ground black pepper - 1/4 cup sriracha sauce (adjust for spice tolerance) - 2 tablespoons honey (or maple syrup for vegan) - 1 tablespoon soy sauce (or tamari) - 1 tablespoon sesame oil When making Sriracha honey cauliflower bites, the right ingredients make all the difference. First, choose a fresh head of cauliflower. Cut it into small, bite-sized florets. This size helps them cook evenly and makes them easier to eat. For the batter, use all-purpose flour. If you prefer gluten-free options, gluten-free flour works just as well. Next, add garlic powder and smoked paprika to boost flavor. These spices bring a warm, savory taste to your bites. Seasoning is key. Use sea salt and ground black pepper to enhance the flavors. The star of the show is sriracha sauce. Adjust the amount based on how spicy you like your food. Always taste as you go! For sweetness, honey is perfect. If you want a vegan option, maple syrup is a great substitute. Soy sauce adds a savory depth, while sesame oil provides a rich, nutty flavor. All these ingredients blend together to create a tasty and exciting dish. For the full recipe, check out the details provided above. - Preheat the Oven: Set your oven to 425°F (220°C). This helps the bites cook evenly and get crispy. - Prepare the Baking Sheet: Line a baking sheet with parchment paper. This keeps the cauliflower from sticking and makes cleanup easy. - Combine Dry Ingredients: In a bowl, mix 1 cup of flour, 1 teaspoon of garlic powder, 1 teaspoon of smoked paprika, 1/2 teaspoon of sea salt, and 1/4 teaspoon of ground black pepper. Whisk these together until they blend well. - Gradually Mix in Water: Slowly add in 1/2 cup of water while stirring. Keep mixing until the batter is smooth. It should coat the back of a spoon without being too thick. Adjust the water as needed for the right consistency. - Coat the Cauliflower: Take each cauliflower floret and dip it into the batter. Let any extra batter drip off. Place the battered florets on the prepared baking sheet in one even layer. - Bake the Cauliflower: Put the baking sheet in the preheated oven. Bake for 20-25 minutes. Watch for a golden-brown color and a crispy texture. Follow these steps from the Full Recipe, and you will enjoy a tasty snack in no time! To get the best batter, start with your flour mix. Add water little by little. You want a smooth batter. It should coat the back of a spoon easily. If it’s too thick, add more water. If it’s too thin, add a bit more flour. For an even coating, dip each floret fully. Let excess batter drip off before placing them on the baking sheet. Watch your baking time closely. Bake the cauliflower for 20-25 minutes. Look for a golden color. This means they are crisping up nicely. After adding the sauce, return them to the oven. Bake for another 5-8 minutes. This step gives them an extra crunch. Garnishing makes your dish pop! I suggest using sliced green onions and sesame seeds. These add taste and a nice look. For serving, arrange the bites on a big platter. Add small bowls of extra sriracha and honey on the side. This invites everyone to enjoy their own flavor mix. For the full recipe, check out the complete guide. {{image_4}} You can easily make these bites vegan. Just swap the honey for maple syrup. Maple syrup gives a great sweetness and works well with the sriracha. This change keeps the flavor while making it suitable for vegans. Want less heat? Use less sriracha. You can also mix in some ketchup for a milder taste. If you love spice, add more sriracha or even a pinch of cayenne pepper. Adjust to your taste for the perfect bite. These cauliflower bites pair well with many dips. Try serving them with ranch dressing or a tangy yogurt dip. You can also enjoy them as a side with rice or a fresh salad. They make a great snack for any gathering. For the full recipe, check the original guide for more tips and details! To keep your Sriracha honey cauliflower bites fresh, store them in an airtight container in the fridge. Place a paper towel inside to soak up any moisture. This helps maintain crispiness. When you want to eat them again, reheat in the oven at 350°F (175°C) for about 10 minutes. This way, they will get warm and crisp. You can freeze the cauliflower bites if you have leftovers. First, let them cool completely. Then, arrange them in a single layer on a baking sheet. Freeze for about one hour. Once frozen, transfer them to a freezer bag or container. When you want to enjoy them, bake straight from the freezer at 400°F (200°C) for 15-20 minutes until hot and crispy. In the fridge, your cauliflower bites will last for about 3-4 days. If you freeze them, they can stay good for up to 3 months. Just remember to check for any changes in smell or texture before eating. Enjoy your crispy snack! You can find the full recipe for making these tasty bites above. You can pair these bites with various side dishes. Here are some great options: - Rice: Serve with jasmine or brown rice for a hearty meal. - Salad: A fresh green salad adds a nice crunch and balance. - Dips: Consider ranch, blue cheese, or extra sriracha for dipping. - Wraps: Use in a wrap with veggies and hummus for a tasty lunch. These sides will enhance your meal and make it more filling. Yes, you can easily make these bites gluten-free. Just follow these tips: - Flour Substitute: Use gluten-free flour instead of all-purpose flour. - Soy Sauce: Replace regular soy sauce with tamari, which is gluten-free. - Check Labels: Always check that other ingredients are gluten-free. These simple swaps keep the flavor while catering to dietary needs. Achieving extra crispiness is key for these bites. Here are my best tips: - High Oven Temp: Bake them at 425°F (220°C) for a good crunch. - Spread Out: Arrange cauliflower florets in a single layer on the baking sheet. - Second Bake: After tossing with sauce, bake them again for 5-8 minutes. - No Overcrowding: Avoid crowding the baking sheet to ensure even cooking. These steps will help you get that perfect crispy texture. If you don’t have sriracha, there are several alternatives: - Hot Sauce: Use any hot sauce you prefer, like Frank's RedHot. - Chili Paste: Chili garlic paste offers a similar flavor and heat. - Homemade Mix: Blend hot peppers with garlic and vinegar for a DIY sauce. Choose the substitute based on your spice level and what you have on hand. This blog post covered a tasty recipe for Sriracha honey cauliflower bites. We explored ingredients, steps, and helpful tips. You learned how to make a delicious dish that anyone can enjoy. Remember, you can adjust spice levels and make it vegan too. These bites are perfect for game day or a snack. Enjoy your cooking and have fun with different flavors! You’ll impress friends and family with your skills in the kitchen.

Sriracha Honey Cauliflower Bites Crispy and Tasty Snack

Are you ready to spice up your snack game? My Sriracha Honey Cauliflower Bites are not just any snack; they

To make delicious Oven-Baked Taco Bites, you'll need the following simple ingredients: - 1 lb ground turkey or beef - 1 tablespoon extra virgin olive oil - 1 small onion, finely diced - 2 cloves garlic, minced - 1 packet taco seasoning (about 1 oz) - 1 cup black beans, drained and rinsed thoroughly - 1 cup corn kernels (can be fresh, frozen, or canned) - 1 cup shredded cheese (cheddar, Monterey Jack, or a blend) - 1 package mini tortilla cups (or create your own using small flour tortillas) - Fresh cilantro, finely chopped (for garnish) - Sour cream and salsa (for serving) You can easily swap out some ingredients. If you're allergic to beef, use ground turkey or chicken instead. For a vegetarian option, use lentils or mushrooms in place of meat. If you don't like black beans, try pinto beans or kidney beans. Some people may have dairy allergies. You can skip the cheese or use a dairy-free cheese alternative. Always check labels for allergens in pre-packaged items like taco seasoning and tortilla cups. When picking ingredients, freshness is key. Choose lean ground meat for less fat. Look for vibrant onions and garlic with no blemishes. Fresh corn is crunchy and sweet. If using canned beans, rinse them well to remove extra salt. For cheese, select a block and shred it yourself for better flavor. Buying organic ingredients can enhance taste and health. Support local farms for fresh produce. This makes your meal not only tasty but also more sustainable. For more details on how to make these tasty bites, check the Full Recipe. First, I preheat my oven to 375°F (190°C). This step is key for getting a nice crunch. While the oven heats, I gather all my ingredients. You need ground turkey or beef, onion, garlic, taco seasoning, black beans, corn, cheese, and mini tortilla cups. Having everything ready makes cooking smooth and easy. Next, I heat a large skillet over medium heat and add olive oil. I toss in the diced onion and stir it for about 3-4 minutes until it turns soft and clear. The smell is amazing! Then I add minced garlic and cook for one more minute. Now, I add the ground turkey or beef. I break it apart with a spatula. I cook it until it's brown, which takes about 5-7 minutes. It's important to make sure the meat is fully cooked. After that, I mix in taco seasoning, black beans, and corn. I let everything cook for another 3-4 minutes. This helps the flavors mix well. Once it’s done, I take the skillet off the heat. I fold in half of the shredded cheese, letting it melt a bit into the mixture. This makes it creamy and delicious. Next comes the fun part—assembling the taco bites! I arrange the mini tortilla cups on a baking sheet. Then, I spoon the filling mixture into each cup. I pack it down gently to make sure there's plenty of yummy filling. After that, I sprinkle the rest of the cheese on top of each filled cup. Now, I slide the baking sheet into the oven and bake for 12-15 minutes. I watch until the cheese melts and turns golden brown. When they're ready, I take them out and let them cool for a couple of minutes. To finish, I sprinkle some chopped cilantro on top. This adds a fresh touch. I serve the taco bites warm with sour cream and salsa. They are a tasty treat for any gathering! You can find the full recipe for these bites above. To make your taco bites extra crispy, use mini tortilla cups. If you want to make your own, cut small flour tortillas into circles and bake them for a few minutes before filling them. This step ensures they get a nice crunch. Another tip is to bake the filled cups on a wire rack. This allows hot air to circulate around the bites, making them crispy all over. One common mistake is overfilling the tortilla cups. If you pack them too tightly, they can become soggy. Instead, fill them generously but leave a little space on top. Also, avoid using too much cheese on the bottom layer. It can cause the filling to stick and make it hard to eat. Lastly, don’t skip the cooling time after baking. If you serve them right away, they might fall apart. To amp up the flavor, try adding fresh lime juice to your filling mixture. It brightens up the taste. You can also add diced jalapeños for a spicy kick. Experiment with different types of cheese, too. A mix of cheddar and Monterey Jack works well. Lastly, don’t forget the garnishes! Fresh cilantro adds a nice touch, and a dollop of sour cream on top makes each bite even more delicious. For the complete recipe, check out the [Full Recipe]. {{image_4}} You can easily make these taco bites meat-free. For a vegetarian version, use more black beans and corn. Replace meat with cooked quinoa or lentils for protein. If you want a vegan option, skip the cheese and use plant-based cheese instead. You can also add diced bell peppers or zucchini for extra flavor and texture. If you want to switch up the protein, you have great options. Ground chicken or pork works well. For a low-carb choice, use cauliflower rice in place of meat. You can also try shredded jackfruit for a unique taste. Each option brings a new twist to the dish. Get creative with flavors by adding different spices or ingredients. Try adding taco sauce or salsa to the filling for more zest. You can mix in chopped jalapeños for some heat. For a sweet touch, add diced pineapple or mango. These unique combinations will surprise and delight your guests. For the full recipe, check out the Oven-Baked Taco Bites Delight. To store leftover taco bites, let them cool first. Place them in an airtight container. Keep the container in the fridge for up to three days. This method keeps them fresh and tasty. If you want to freeze taco bites, do it before baking. Prepare the filling and fill the tortilla cups. Then, place them on a baking sheet and freeze until solid. Once frozen, transfer them to a freezer bag. They can last for up to three months. When you're ready to eat, bake them straight from the freezer. To reheat taco bites, use an oven for the best results. Preheat the oven to 350°F (175°C). Place the taco bites on a baking sheet. Heat them for about 10-12 minutes. This keeps the bites crispy and warm throughout. You can also use a microwave, but the bites may get soggy. If you prefer this method, heat them in short bursts to avoid overcooking. Yes, you can make Oven-Baked Taco Bites ahead of time. Prepare the filling and assemble the bites in the tortilla cups. Then, place them in the fridge for up to 24 hours. When you’re ready to eat, bake them straight from the fridge. This way, you save time and still enjoy a warm, tasty snack. You can serve Oven-Baked Taco Bites with various dips. Here are some great ideas: - Sour cream - Salsa - Guacamole - Fresh pico de gallo - Cheese sauce These dips add flavor and make your meal fun. You can also serve a fresh salad or tortilla chips on the side for a complete meal. Customizing toppings for Taco Bites is easy and fun. Here are some ideas: - Add sliced jalapeños for heat - Use diced tomatoes for freshness - Sprinkle green onions for crunch - Top with avocado for creaminess - Include olives for a briny touch Feel free to mix and match to suit your taste. You can make each bite unique and delicious! For the full recipe, check out the [Full Recipe]. Oven-baked taco bites are easy to make and fun to eat. We discussed key ingredients, including swaps for allergens. I shared step-by-step instructions for perfect bites and tips for a crispier texture. You now have ideas for variations and storage. If you try these bites, you'll impress your friends and family. Experiment with flavors and toppings to make them your own. Enjoy every delicious bite!

Oven-Baked Taco Bites Flavorful Crunchy Treat

Ready to elevate your snack game? Oven-Baked Taco Bites are the perfect blend of crunch and flavor. I’ll guide you

- 1 can (15 oz) chickpeas - 8 small corn or flour tortillas - 1 ripe avocado - Smoked paprika - Ground cumin - Garlic powder - Onion powder - Salt and black pepper - Shredded red cabbage - Pico de gallo - Fresh cilantro leaves - Lime wedges To make crispy chickpea tacos, you need a few simple ingredients. Start with a can of chickpeas. They give a great texture and flavor. You'll also need tortillas for wrapping up your tacos. I prefer small corn or flour tortillas, but the choice is yours. Next, grab a ripe avocado. Slicing it adds creaminess and balances the crunch of the chickpeas. Now let's spice things up! You will need smoked paprika, ground cumin, garlic powder, onion powder, salt, and black pepper. These spices bring warmth and depth to the dish. Finally, fresh toppings make your tacos pop. Shredded red cabbage adds a nice crunch. Pico de gallo offers freshness and zest. Don't forget fresh cilantro leaves for garnish and lime wedges for a little zing. For the full recipe, check the instructions above. - Preheat the oven to 400°F (200°C). - Drain and rinse the chickpeas thoroughly. - Pat dry the chickpeas with a paper towel. To get crispy chickpeas, make sure they are dry. Wet chickpeas won't crisp up. Drying helps them become crunchy and tasty. - Toss chickpeas with olive oil and spices. - Roast in the oven for 25-30 minutes. Mix olive oil, smoked paprika, cumin, garlic powder, onion powder, salt, and black pepper. This adds great flavor. Stir the chickpeas halfway through. This helps them cook evenly. - Warm tortillas in a skillet or microwave. - Prepare for assembly. You can warm tortillas in a skillet for about a minute on each side. If you prefer, wrap them in a damp paper towel and microwave for 30 seconds. This makes them soft and easy to fold. - Scoop crispy chickpeas into tortillas. - Add avocado, cabbage, and pico de gallo. - Garnish with cilantro and serve. Fill each tortilla with crispy chickpeas. Add slices of creamy avocado, shredded red cabbage, and a spoonful of pico de gallo. Finally, sprinkle fresh cilantro on top. Serve with lime wedges for a burst of flavor. Enjoy your Crispy Chickpea Tacos! For the complete recipe, check out the Full Recipe section. To make crispy chickpeas, start by drying them well. After rinsing, use a paper towel to pat them dry. This step helps the chickpeas crisp up nicely in the oven. Also, stir the chickpeas halfway through roasting. This ensures they cook evenly and get crunchy on all sides. When serving your tacos, arrange them on a colorful platter. This makes them look fun and inviting. Adding a sprinkle of fresh cilantro on top enhances the look. Serve lime wedges in a small bowl on the side. This adds a nice touch and allows everyone to add lime juice to taste. To make gluten-free tacos, use corn tortillas instead of flour. They are just as tasty and work well with the chickpeas. You can also customize spice levels. If you like heat, add a pinch of cayenne or chili powder to the chickpeas. This lets you control how spicy you want your tacos to be. For the full recipe, check out the complete dish details. {{image_4}} You can switch up the protein in your tacos. Black beans are a great choice. They add a nice creaminess and a rich flavor. Lentils also work well and are easy to cook. They blend nicely with spices and offer a hearty bite. For a fun twist, add grilled vegetables. Bell peppers, zucchini, and onions taste amazing when grilled. They add color and crunch to your tacos. Sauces can elevate your tacos. A creamy avocado lime dressing is a fresh option. It adds a smooth texture and tangy flavor. You can easily make it by blending avocado, lime juice, and a pinch of salt. If you like heat, try spicy sriracha or hot sauce. Just a drizzle can give your tacos a bold kick. Pair your crispy chickpea tacos with tasty sides. Mexican rice or beans are classic choices. They complement the tacos well and round out the meal. For something fresh, corn salad or guacamole can add a vibrant touch. These sides not only taste great but also make your plate look beautiful. For the full recipe, check out the Crispy Chickpea Tacos section above. After enjoying your crispy chickpea tacos, let the chickpeas cool down. This step is key to keeping their crunch. Once cooled, place them in an airtight container. Glass or plastic containers work well. You can store them in the fridge for up to three days. Keep the tortillas in a separate container to avoid sogginess. To reheat chickpeas, spread them on a baking sheet. Bake them at 350°F (175°C) for about 10 minutes. This method helps regain their crispiness. For tortillas, use a skillet over medium heat. Warm each tortilla for about 30 seconds on each side. You can also wrap them in a damp paper towel and microwave them for 20 seconds. You can freeze chickpeas and tortillas if you have leftovers. For chickpeas, spread them on a baking sheet. Freeze them until solid, then transfer to a freezer bag. For tortillas, stack them with parchment paper in between. Wrap them tightly and freeze. To use, thaw chickpeas in the fridge overnight. Warm the tortillas in a skillet before assembling your tacos again. Yes, you can prepare the chickpeas in advance. Roast them and store in a container. Keep them in the fridge for up to three days. To serve, reheat the chickpeas in the oven. Warm the tortillas just before assembly. You can also slice the avocado and store it in lemon juice to prevent browning. As for the cabbage and pico de gallo, chop them ahead of time too. You can customize your tacos with many toppings. Try adding sliced radishes or diced bell peppers. Shredded carrots add a nice crunch. If you like cheese, sprinkle some crumbled feta or cotija on top. For a zesty twist, you can drizzle some hot sauce or yogurt. Each topping brings a unique flavor and texture to the dish. Yes, crispy chickpea tacos are great for meal prep. Store the chickpeas in an airtight container. This keeps them fresh and crunchy. The tortillas can be stored separately to avoid sogginess. When you're ready to eat, reheat the chickpeas and warm the tortillas. These tacos are quick to assemble and perfect for busy days. To add heat, increase the amount of smoked paprika. You can also add cayenne pepper or chili powder to the chickpeas. For a fresh kick, try diced jalapeños on top. If you enjoy sauces, drizzle sriracha or a spicy salsa on your tacos. Just adjust the spice level to fit your taste. These crispy chickpea tacos are easy to make and tasty. We covered the main ingredients, from chickpeas to toppings, to create a delicious meal. I shared step-by-step instructions and handy tips for crispiness and presentation. You can also explore variations, storage tips, and common questions. Whether you enjoy them fresh or reheated, these tacos fit many diets. Get creative with toppings and spices to suit your taste. Enjoy making and sharing this dish with friends and family!

Crispy Chickpea Tacos Flavorful and Simple Recipe

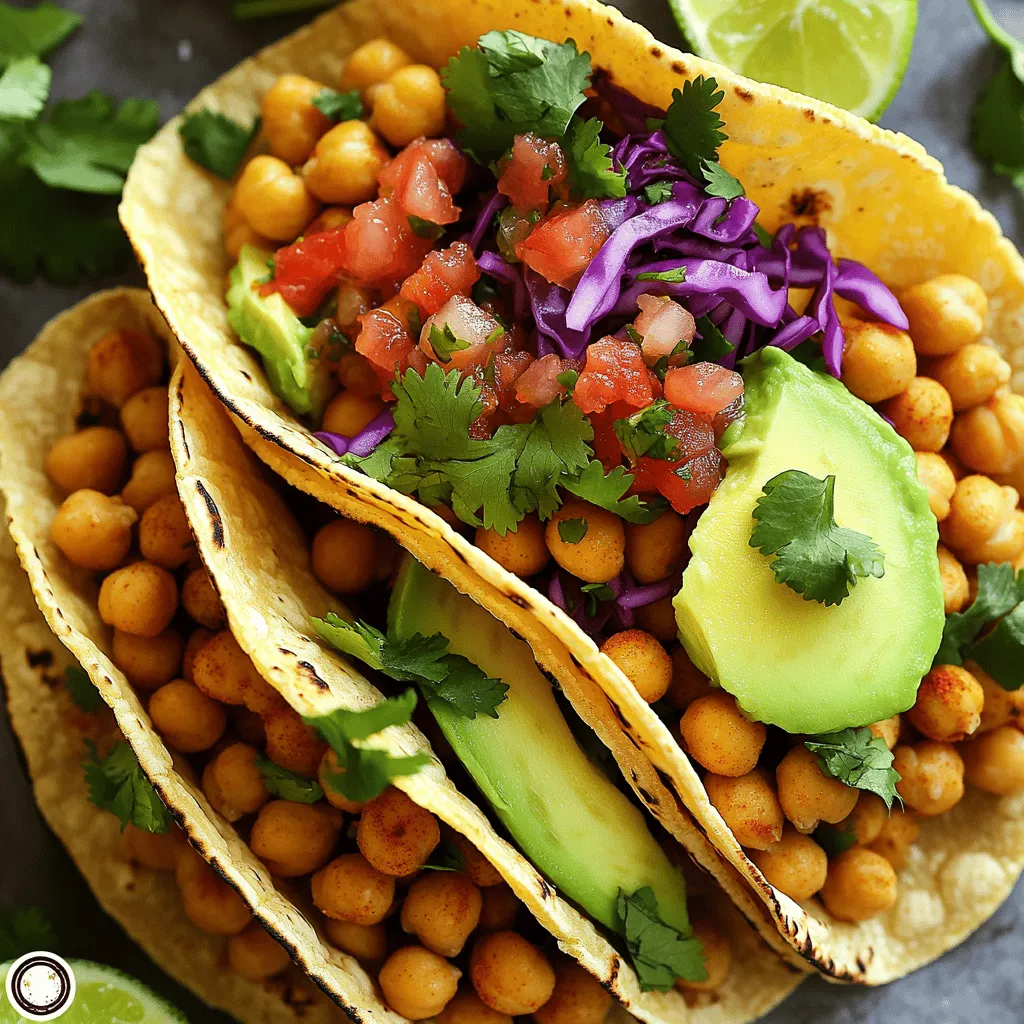
Looking for a tasty dinner that’s quick and easy? Try my Crispy Chickpea Tacos! They’re packed with flavor and come

Older posts
Newer posts
← Previous Page1 … Page63 Page64 Page65 … Page86 Next →

dsad

© 2026 lazychefmagic • Built with GeneratePress

Our Policies

  • Copyright Policy
  • Cookie Policy
  • GDPR Policy
  • Privacy Policy
  • Disclaimer
  • Terms Of Use

More Information

  • Home
  • About
  • Contact
  • Appetizers
  • Dessert
  • Dinner
  • Drinks
©2026, lazychefmagic About Back To Top