Skip to content
DisclaimerTerms Of UseGDPR PolicyCookie Policy

lazychefmagic

  • Home
  • Drinks
  • Appetizers
  • Dinner
  • Dessert
  • About
  • Contact
  • Privacy Policy
DisclaimerTerms Of UseGDPR PolicyCookie Policy

NO-ING-IMG

- 4 ears of sweet corn, husked - 2 tablespoons extra virgin olive oil - 1 teaspoon chili powder - 1/2 teaspoon garlic powder - 1/2 teaspoon smoked paprika - Zest and juice of 1 fresh lime - 1/4 cup cotija cheese, crumbled (or substitute with feta cheese) - A handful of fresh cilantro, finely chopped, for garnish - Sea salt and freshly ground black pepper, to taste - Lime wedges for serving - Additional spices for enhanced flavor Fresh sweet corn tastes better. It is sweet, juicy, and crisp. When you bite into it, you get a burst of flavor. Fresh lime adds brightness. Its zesty notes enhance the corn’s sweetness. Using fresh spices gives the dish depth. Spices like chili powder and smoked paprika add heat and smokiness. They make this dish exciting and full of life. When you use fresh ingredients, you create a dish that sings with flavor. You can check out the Full Recipe for more details on making Chili Lime Corn on the Cob. - Preheat your grill to medium-high heat. This is key for great charring. - In a small bowl, mix together the olive oil, chili powder, garlic powder, smoked paprika, lime zest, lime juice, sea salt, and black pepper. Whisk until smooth. This will be your chili lime dressing. - Take each ear of corn and coat it with about half of the dressing. Make sure all sides get flavor. - Place the corn on the grill. Cook for 10-12 minutes. Turn the corn every few minutes. You want nice char marks and tender kernels. - After grilling, remove the corn using tongs. Brush the rest of the chili lime dressing on each ear. This adds even more flavor. - While still hot, sprinkle crumbled cotija cheese on the corn. It will stick well to the dressing. - Finally, garnish with chopped cilantro. This adds a fresh touch. For a full recipe, check out the detailed instructions in the article. - To grill corn perfectly, soak the ears in water for 30 minutes. This helps keep them moist. - Use a medium-high heat for the grill. A hot grill gives you the best char. - Turn the corn every few minutes. This ensures all sides cook evenly and get that nice char. - Avoid cooking corn for too long. Overcooking makes it tough. Aim for 10-12 minutes on the grill. - Pair your chili lime corn with grilled chicken or fish. The flavors complement each other well. - Serve the corn on a rustic wooden board. It adds a nice touch to your summer table. - Add lime wedges on the side. Guests can squeeze extra lime juice on their corn. - For a pop of color, sprinkle more cilantro on top when serving. - For the perfect char, don’t rush. Let the corn sit on the grill for a few moments. - Make sure to coat the corn well with the dressing before grilling. This helps the cheese stick later. - If using cotija cheese, sprinkle it on while the corn is hot. The heat helps it adhere better. - Don’t forget to brush on more dressing after grilling. It boosts the flavor and keeps it moist. For more details on creating this dish, check out the Full Recipe. {{image_4}} To add heat, I love mixing in jalapeños. You can chop them finely and sprinkle them on top. You can also drizzle hot sauce over the corn for a spicy kick. Try using different chili powders like chipotle or cayenne for unique flavors. For a tasty twist, experiment with different cheeses. Feta adds a tangy bite, while Parmesan gives a nutty flavor. You can also mix in fresh herbs like basil or mint. These add brightness and depth to the dish. If you can't grill, try oven-roasting the corn. Preheat your oven to 400°F (200°C). Wrap the corn in foil and roast for about 20-25 minutes. You can also use a stovetop grill pan. Heat it over medium heat and follow the same cooking steps. Both methods create delicious results! For more detailed steps, check the Full Recipe. To keep leftover chili lime corn fresh, refrigeration is key. First, let the corn cool down. Then, wrap each ear in plastic wrap. This keeps moisture in and prevents it from drying out. You can also place the corn in an airtight container. This method protects the corn from strong smells in the fridge. When reheating, aim to keep the flavor intact. The best way is to use a grill. Preheat the grill to low. Place the corn on the grill for about 5 minutes, turning it often. This method revives the corn’s juicy taste. If you prefer the microwave, wrap the corn in a damp paper towel. Heat it for 30 seconds to 1 minute. Check often to avoid overcooking. For freezing, first, let the corn cool completely. Wrap each ear in plastic wrap. Then, place the wrapped corn in a freezer bag. Remove as much air as possible before sealing. When you're ready to enjoy it, take the corn out of the freezer. Thaw it in the fridge overnight. To reheat, follow the grilling method mentioned earlier. This helps bring back the fresh flavors. Chili lime corn on the cob is a delightful summer dish. It features sweet corn slathered in a spicy and tangy dressing. The mix of chili powder and fresh lime juice gives it a vibrant kick. This dish tastes bright and zesty, making it perfect for barbecues. The cotija cheese adds a creamy texture, balancing the spice. Fresh cilantro on top adds color and a fresh taste. Together, these flavors create a fun and tasty side dish. Yes, you can easily make this dish vegan. Instead of cotija cheese, use a plant-based cheese or skip it entirely. You can also replace the olive oil with avocado oil for a similar flavor. This way, you keep the dish tasty while making it dairy-free. Enjoy the zesty flavors without the cheese if you prefer. It still tastes great with the chili lime dressing. To boost the flavor, try adding more chili powder for extra heat. You can also mix in some cayenne pepper for a spicy kick. Squeeze more lime juice over the corn just before serving for added brightness. For a smoky twist, consider using smoked chili powder instead of regular. You can also add fresh herbs, like basil or mint, to create new flavor layers. Each change can make your corn on the cob even more exciting. This article shared a simple, tasty recipe for chili lime corn on the cob. You learned about essential and optional ingredients, the benefits of fresh items, and step-by-step cooking instructions. I also included tips for serving and common mistakes to avoid. Fresh, flavorful corn elevates your meals, while variations keep it exciting. Enjoy experimenting with this dish, making it your own, and sharing it with others. Happy grilling!

Chili Lime Corn on the Cob Tasty Summer Side Dish

Looking for a fresh and zesty side dish that will brighten your summer meals? Chili Lime Corn on the Cob

Let's gather everything you need for your baked sweet potato fries. These ingredients make a simple yet delicious snack that everyone loves. - Sweet potatoes - Olive oil - Spices and seasonings - Optional garnish and dipping sauces You will need two large sweet potatoes. They add a sweet flavor and a lovely color. Use extra virgin olive oil to coat the fries. This oil helps them become crispy. For seasoning, garlic powder, smoked paprika, ground cumin, fine sea salt, and black pepper create a flavorful mix. You can adjust spices based on your taste. Don’t forget optional garnishes! Fresh parsley makes the fries look pretty and adds freshness. You can serve them with your favorite dipping sauces like spicy mayo or classic ketchup. With these ingredients, you are ready to create crispy and flavorful sweet potato fries! For the full recipe, check out the detailed steps in the next section. Start by washing and peeling your sweet potatoes. Cut them into long, even strips. Aim for a uniform thickness. This helps them cook at the same rate. Next, place the fries in a large bowl. Drizzle in the extra virgin olive oil. Toss them gently until all fries are coated. This oil adds flavor and helps with crispiness. Now, let’s add some flavor! Sprinkle garlic powder, smoked paprika, ground cumin, fine sea salt, and pepper over the fries. Use about one teaspoon of each spice, except for salt and pepper. Toss the fries again to mix everything well. Make sure each fry gets a nice coating of the spices. This step is key to tasty fries. Prepare your baking sheet by lining it with parchment paper. Spread the seasoned fries in a single layer. Avoid stacking them; this helps them get crispy. Preheat your oven to 425°F (220°C). Bake for 25-30 minutes. Flip the fries halfway through to brown them evenly. Look for a golden color when they are done. Let them cool for a few minutes before serving. Garnish with chopped parsley for a nice touch. Enjoy your crispy, flavorful sweet potato fries! For the full recipe, check the details above. To get your sweet potato fries crispy, start by preheating your oven to 425°F (220°C). This hot temperature helps to crisp the fries quickly. Use a baking sheet lined with parchment paper. This helps fries brown evenly and reduces sticking. Also, avoid overcrowding the baking sheet. Give each fry space to breathe. This lets hot air circulate and keeps them crisp. Flip the fries halfway through cooking. This ensures they brown on both sides. You can change the flavor of your fries with different seasonings. Try adding cayenne pepper for heat or Italian herbs for a fresh taste. Mix and match to find what you love. Balance the flavors by tasting as you season. Add a little salt, then adjust according to your taste. You can also try a sweet twist. Sprinkle cinnamon and a bit of brown sugar for a sweeter fry. Sweet potato fries pair well with many dips. Spicy mayo adds a kick, while classic ketchup offers a familiar taste. For a twist, try a yogurt-based dip or a tangy barbecue sauce. When plating, stack the fries in a cone shape or line them up neatly on a plate. Garnish with fresh parsley for a pop of color. This makes your dish look as good as it tastes. Enjoy your crispy delight! For the full recipe, check out the detailed instructions above. {{image_4}} You can easily change up your sweet potato fries to keep things fun. Here are two great ideas: - Spicy sweet potato fries: Add a kick by mixing in cayenne pepper or chili powder. This heat pairs well with the natural sweetness of the potatoes. Just sprinkle it in with your spices. - Herb-infused fries: Fresh herbs can make a big difference. Try adding rosemary or thyme for a fragrant touch. Chop the herbs finely and toss them in with the fries before baking. Making your sweet potato fries fit your diet is simple. Here are two options: - Gluten-free options: Sweet potatoes are naturally gluten-free. You can enjoy these fries without worry. Just make sure your spices and dips are also gluten-free. - Vegan-friendly additions: This recipe is already vegan! You can enhance the flavor by adding nutritional yeast for a cheesy taste. Sprinkle it on right before serving. Sweet potato fries work well with many meals. Here are some ideas: - What meals to serve with sweet potato fries: Pair them with burgers, grilled chicken, or veggie wraps. They add a nice crunch and color to your plate. - Complementary dishes for a complete meal: Serve with a fresh salad or coleslaw for balance. A creamy dip, like ranch or avocado, also makes a great addition. For the full recipe, check the list of ingredients and instructions. You’ll love how easy it is to make these tasty fries! To keep your baked sweet potato fries fresh, follow these best practices: - Let them cool completely before storing. - Place fries in an airtight container. - You can also use a resealable bag for easy storage. Leftover fries can last in the fridge for about 3 to 5 days. Check for any signs of spoilage before eating. If they start to smell odd or look strange, it’s best to toss them. To reheat your sweet potato fries and keep them crispy, try these techniques: - Preheat your oven to 400°F (200°C). - Spread the fries out on a baking sheet in a single layer. - Bake for about 10 minutes, flipping halfway through. For best results, avoid using the microwave. It can make the fries soggy. If you have an air fryer, that’s another great option for reheating. Just set it to 350°F (175°C) and heat for 5-7 minutes. Enjoy your fries like they are fresh from the oven! For making sweet potato fries, I prefer using orange-fleshed sweet potatoes. They are sweet and have a nice texture. Japanese sweet potatoes also work well for a creamier taste. Both types give great flavor and crispiness. Yes, you can use an air fryer! Just follow these simple steps: - Cut the sweet potatoes into fries as usual. - Toss them with olive oil and seasonings. - Place them in the air fryer basket in a single layer. - Cook at 400°F (200°C) for about 15-20 minutes. - Shake the basket halfway through for even cooking. This method keeps them crispy while using less oil. To make your fries healthier, try these tips: - Use less oil. You can cut the olive oil by half and still get good results. - Bake instead of fry. Baking reduces calories and keeps them crispy. - Add spices instead of salt. Herbs and spices add flavor without extra sodium. - Serve with a healthy dip, like yogurt-based sauces or hummus. These changes keep your fries tasty while making them a better snack choice. Enjoy making your baked sweet potato fries! You can find the full recipe above. In this blog post, we explored how to make delicious sweet potato fries from start to finish. We listed key ingredients like sweet potatoes and olive oil, plus spices for flavor. I shared tips for perfect crispiness and variations to suit your taste. Remember to try different seasonings and serve with yummy sauces. Finally, always store leftovers properly to keep them tasty. Enjoy making these fries, and have fun experimenting with your favorites!

Baked Sweet Potato Fries Crispy and Flavorful Snack

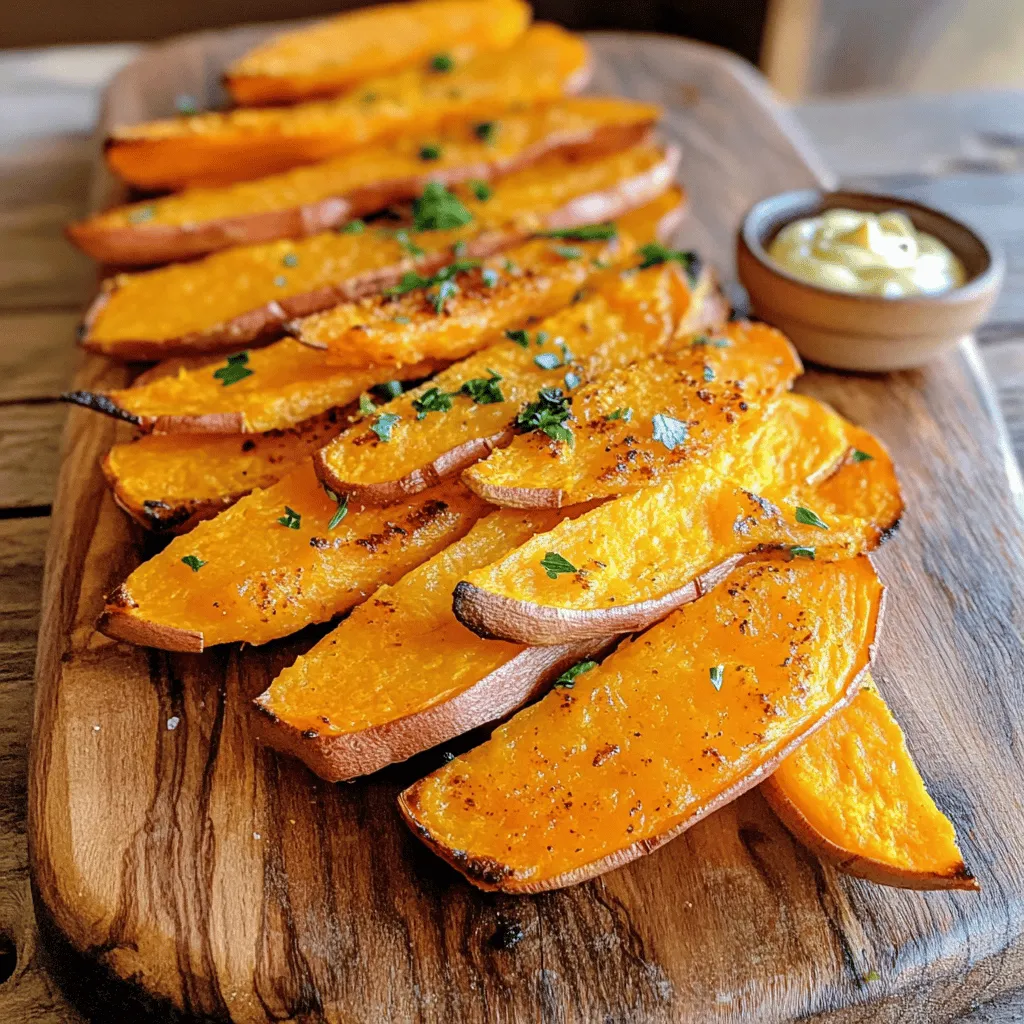
Craving a snack that’s both crispy and packed with flavor? Let me introduce you to baked sweet potato fries—a delicious

This recipe for caramelized onion and goat cheese tart is a true delight. It blends sweet, soft onions with tangy goat cheese. The puff pastry gives it a flaky crust, making each bite a treat. For this delicious tart, you will need: - 1 pre-made puff pastry sheet - 3 large onions, thinly sliced - 3 tablespoons olive oil - 1 tablespoon balsamic vinegar - 1 teaspoon sugar - Salt and freshly ground black pepper, to taste - 4 ounces goat cheese, crumbled - 1 tablespoon fresh thyme leaves (or 1 teaspoon dried thyme) - 1 egg, beaten (for egg wash) - Fresh arugula, for garnish To make this tart, gather these tools: - A tart pan (approximately 12 inches in diameter) - A large skillet - A rolling pin - A pastry brush - A sharp knife for slicing - A mixing bowl for the egg wash Using the right tools makes cooking easier and more fun. You can find the full recipe [here](#). First, preheat your oven to 400°F (200°C). This step is key for a perfect bake. Next, take the pre-made puff pastry sheet and place it on a floured surface. Roll it out to about 12 inches wide. Now, gently fit the pastry into your tart pan. Press it into the edges nicely. Trim any extra pastry off the edges. Use a fork to prick the bottom of the crust. This prevents puffing during baking. After that, put the tart pan in the fridge while you caramelize the onions. Grab a large skillet and set it on medium heat. Pour in 3 tablespoons of olive oil. Add the 3 thinly sliced onions to the skillet. Sprinkle in a pinch of salt to help the onions release moisture. Stir the onions every few minutes. Cook them for about 15-20 minutes. You want them soft and golden-brown. Once they reach that color, drizzle in 1 tablespoon of balsamic vinegar. Add 1 teaspoon of sugar and some freshly ground black pepper. Keep cooking for another 5 minutes. This will make the onions sticky and sweet. Remove the skillet from heat and let the onions cool a bit. Now that your onions are ready, take the chilled pastry shell from the fridge. Evenly spread the caramelized onions over it. Crumble 4 ounces of goat cheese over the onions. Add 1 tablespoon of fresh thyme leaves for extra flavor. In a small bowl, beat 1 egg for the egg wash. Use a pastry brush to coat the edges of the pastry with the egg wash. This will give it a nice golden color when baked. Finally, place the tart in the oven. Bake for 20-25 minutes. Look for a puffed, golden crust and melted cheese. Once done, remove it from the oven and let it cool for a few minutes. Cut into slices and enjoy your delicious tart! For the full recipe, check the details above. To caramelize onions, start with a good skillet. Heat olive oil over medium heat. Add your thinly sliced onions and sprinkle a pinch of salt. The salt helps pull out the moisture. Stir the onions every few minutes. This helps them cook evenly. After about 15-20 minutes, they will turn soft and golden brown. For deeper flavor, add a teaspoon of sugar. Sugar helps to enhance the sweetness. Drizzle in balsamic vinegar for a tangy kick, and cook for another 5 minutes. This step creates a sticky, rich mixture. Make sure to let them cool slightly before using them in your tart. To ensure a crispy puff pastry, keep it cold. Roll it out on a floured surface. Don’t overwork the dough; this keeps layers intact. Place the rolled pastry into the tart pan and press gently. Prick the bottom with a fork. This prevents bubbling during baking. Chill the pastry in the fridge while preparing the filling. A cold pastry bakes better and stays crisp. When ready, brush the edges with an egg wash. It gives the final product a lovely golden color. Bake in a preheated oven for the best results. This tart is great warm or at room temperature. To add freshness, garnish with arugula. The peppery taste of arugula contrasts well with the sweetness of the onions. You can also serve the tart with a light salad. A simple green salad with lemon dressing pairs well. For a more robust meal, include a hearty soup. Tomato basil or butternut squash soup can be perfect companions. Enjoying the tart with good friends makes it even better. This dish is simple but always impresses. For the full recipe, check out the Caramelized Onion and Goat Cheese Tart recipe. {{image_4}} You can easily turn this tart into a vegetarian delight. Replace the goat cheese with a mix of ricotta and feta. This swap gives you a creamy and tangy flavor. You can also add cooked spinach or roasted red peppers for more color and taste. These changes make the tart rich and satisfying without losing any joy. If you want to explore different cheese flavors, try using brie or camembert. These cheeses melt wonderfully and add a lovely creaminess. You could also use sharp cheddar for a bolder taste. Mixing cheeses is a fun way to customize the tart based on what you have at home. Each choice brings a unique twist to the dish. Herbs can elevate your tart’s flavor. Consider adding fresh basil or rosemary for an exciting twist. You can also sprinkle in some crushed red pepper for a touch of heat. If you want a sweet note, try adding a bit of caramelized garlic. Each herb or spice enhances the taste and makes your tart even more special. Feel free to get creative with these variations. They let you tailor the Caramelized Onion and Goat Cheese Tart to your liking. Check out the Full Recipe for more details on creating this delicious dish! To store your leftover tart, let it cool down first. Wrap it tightly in plastic wrap or foil. You can also place it in an airtight container. Keep it in the fridge for up to three days. This helps keep the flavors fresh and the pastry from getting soggy. When you’re ready to enjoy your tart again, preheat your oven to 350°F (175°C). Place the tart on a baking sheet. Heat it for about 10-15 minutes. This will warm it up and make the pastry crispy again. Avoid using the microwave, as it can make the crust chewy. If you want to freeze your tart, it’s best to do so before baking. Wrap the prepared, unbaked tart tightly in plastic wrap. You can also use foil for extra protection. Store it in the freezer for up to three months. When you’re ready to bake, don’t thaw it first. Just bake it straight from the freezer. Add a few extra minutes to the baking time. Enjoy your homemade treat whenever you wish! For the complete recipe, refer to the Full Recipe section. To prepare your tart in advance, start by caramelizing the onions. Allow them to cool before spreading them on the pastry. Next, cover the assembled tart with plastic wrap. You can store it in the fridge for up to one day. When you're ready to bake, simply preheat the oven and follow the baking steps. This method saves time and still delivers a tasty dish. Yes, you can use various cheeses in this tart. Feta cheese works well and adds a salty kick. Cream cheese gives a rich texture that blends nicely. For a sharper flavor, try using blue cheese. Just remember to balance the flavors with the sweet onions. Experiment with what you have on hand or your favorites. This tart pairs well with a fresh green salad. Consider arugula or mixed greens tossed with a light vinaigrette. A chilled glass of white wine also complements the flavors perfectly. For a heartier meal, serve it alongside roasted vegetables or a bowl of soup. These sides enhance the tart’s rich taste and make a complete meal. This blog post covered how to make a Caramelized Onion and Goat Cheese Tart. We explored the key ingredients, tools, and the step-by-step instructions to guide you. I shared tips for perfect caramelized onions and a crispy pastry, along with storage ideas. Making this tart can be fun and rewarding. Don't hesitate to try different cheeses or herbs to make it your own. Enjoy creating this savory dish, and share it with others. You’ll impress your family and friends with your skills!

Caramelized Onion and Goat Cheese Tart Recipe Delight

Looking for a dish that wows everyone? My Caramelized Onion and Goat Cheese Tart is it! This savory treat features

To make these delicious lemon blueberry muffins, gather the following: - 2 cups all-purpose flour - 1 cup granulated sugar - 1 tablespoon baking powder - 1/2 teaspoon baking soda - 1/2 teaspoon salt - 1/2 cup unsalted butter, melted and slightly cooled - 2 large eggs, at room temperature - 1 cup buttermilk (or substitute with yogurt for a tangy twist) - Zest of 1 large lemon (about 1 tablespoon) - 1/4 cup freshly squeezed lemon juice - 1 1/2 cups fresh blueberries (frozen can be used if necessary) - 1 teaspoon pure vanilla extract When measuring flour, spoon it into your cup and level it off with a knife. This method prevents packing it down, which can lead to dense muffins. For sugar, scoop directly into the cup and level it off, too. If you need to measure liquids, use a clear liquid measuring cup for accuracy. Always check the measurement at eye level for the best results. If you don’t have buttermilk, you can use regular milk and add one tablespoon of vinegar or lemon juice. Let it sit for five minutes to sour. You can replace the eggs with flaxseed meal for a vegan option. Just mix 1 tablespoon of flaxseed meal with 2.5 tablespoons of water for each egg. If you want a lighter muffin, try using cake flour instead of all-purpose flour. This change will give your muffins a softer texture. 1. Preheat your oven to 375°F (190°C). 2. Line a muffin tin with paper liners or spray it with non-stick spray. 3. In a large bowl, mix 2 cups of flour, 1 cup of sugar, 1 tablespoon of baking powder, 1/2 teaspoon of baking soda, and 1/2 teaspoon of salt. Stir until there are no lumps. 4. In another bowl, combine 1/2 cup of melted butter, 2 eggs, 1 cup of buttermilk, zest from 1 lemon, 1/4 cup of lemon juice, and 1 teaspoon of vanilla. Whisk until smooth. 5. Pour the wet mix into the dry mix. Stir gently until just combined. Don't overmix! 6. Fold in 1 1/2 cups of blueberries, making sure they stay whole. 1. Fill each muffin cup about two-thirds full with batter. 2. Bake in the preheated oven for 18-22 minutes. 3. Check for doneness with a toothpick; it should come out clean or with a few crumbs. 1. Let the muffins cool in the tin for 5 minutes. 2. Transfer them to a wire rack to cool completely. 3. Enjoy the lovely aroma and flavor of your fresh muffins! For the complete recipe, check the full recipe above. To bake perfect muffins, follow these tips. First, always preheat your oven. This helps your muffins rise well. Use fresh ingredients for the best taste. Measure flour correctly; spoon it into the cup and level it off. Avoid packing it down. Also, remember to use room temperature eggs and buttermilk. This ensures a smooth batter. For a tall muffin, fill each cup two-thirds full. This gives them room to rise without spilling over. Do not overmix your batter. Stir just until combined. Overmixing can make them tough. Finally, place muffins in the hot oven right after mixing. This helps them rise faster and get that nice dome shape. You can boost the flavor of your lemon blueberry muffins. Consider adding a pinch of cinnamon for warmth. A tablespoon of honey can add depth to the sweetness. If you like nuts, fold in some chopped walnuts or pecans for crunch. For a twist, try adding a tablespoon of poppy seeds. These changes can make your muffins even more delightful! For the full recipe, check out the Zesty Lemon Blueberry Bliss Muffins 🫐. {{image_4}} Making gluten-free lemon blueberry muffins is easy. Use gluten-free all-purpose flour. This flour blend often has xanthan gum, which helps with texture. Follow the same steps in the recipe. You will still get a light and fluffy muffin. To create vegan lemon blueberry muffins, swap out the butter and eggs. Use coconut oil instead of butter. For eggs, try flax eggs. Mix one tablespoon of ground flaxseed with three tablespoons of water. Let it sit for five minutes. Use your plant-based milk instead of buttermilk. Your muffins will still taste amazing! You can play with flavors in your muffins. Add a pinch of cinnamon for warmth. Chopped nuts like pecans or walnuts add a nice crunch. You can also mix in some white chocolate chips for sweetness. For a tropical twist, add shredded coconut or replace some blueberries with diced pineapple. These small changes can create a whole new muffin experience without losing that zesty lemon flavor. Don't be afraid to experiment and discover your favorite version of lemon blueberry muffins! For the full recipe, check the earlier section. To keep your lemon blueberry muffins fresh, store them in an airtight container. Place a paper towel at the bottom. This absorbs extra moisture. You can keep them at room temperature for up to three days. If you want them to last longer, consider refrigerating them. In the fridge, they stay good for about a week. Freezing is a great way to enjoy muffins later. First, let the muffins cool completely. Then, wrap each muffin in plastic wrap. Place the wrapped muffins in a freezer-safe bag or container. This method helps prevent freezer burn. You can freeze them for up to three months. When you want one, just take it out and thaw it at room temperature. To enjoy warm muffins, reheating is easy. If they are at room temperature, heat them in the oven at 350°F (175°C) for about 5-7 minutes. This helps maintain their texture. If you are in a hurry, you can use the microwave. Heat them for 10-15 seconds. Just be careful not to overheat, or they will become tough. Enjoy your muffins the way they should be! For more detailed cooking steps, check the Full Recipe. What makes muffins rise? Muffins rise due to a chemical reaction. Baking powder and baking soda create gas bubbles. This helps the batter expand and rise in the oven. Why do my muffins have a flat top? Flat tops may happen if the batter is overmixed. It can also be due to low oven temperature. Always preheat your oven properly. How do I know when muffins are done? Insert a toothpick in the center. If it comes out clean or with few crumbs, they are ready. Look for a golden-brown color on top. Why are my muffins too dense? Dense muffins often result from overmixing the batter. Mix just until combined. Also, check the freshness of your baking powder. What if my muffins stick to the pan? Greasing the pan well prevents sticking. Use paper liners or a non-stick spray. Allow muffins to cool before removing them. How can I prevent dry muffins? Measure your flour accurately. Use room temperature ingredients and do not overbake. Adding yogurt or buttermilk helps keep them moist. One muffin contains roughly: - Calories: 200 - Total Fat: 8g - Saturated Fat: 5g - Cholesterol: 40mg - Sodium: 150mg - Total Carbohydrates: 30g - Dietary Fiber: 1g - Sugars: 10g - Protein: 3g These muffins are a lovely treat. They offer a balance of flavor and nutrition. Lemon and blueberry provide vitamins and antioxidants. For the full recipe, refer to the section above. In this post, we covered how to make lemon blueberry muffins. We started by listing key ingredients and offering measurement tips. Then, we outlined each step, from preparation to cooling. I shared best practices for baking, achieving a perfect rise, and enhancing flavor. Variations included gluten-free and vegan options. Lastly, we discussed storage and answered common questions. Muffin baking is simple and rewarding. You can enjoy fresh, tasty muffins with just a bit of care.

Lemon Blueberry Muffins Irresistible Flavor Guide

Welcome to my guide on Lemon Blueberry Muffins! If you crave a sweet treat with a zesty twist, you’re in

To make Savory Herb and Cheese Scones, you will need the following: - 2 cups all-purpose flour - 1 tablespoon baking powder - 1/2 teaspoon salt - 1/4 teaspoon freshly ground black pepper - 1/4 cup cold unsalted butter, cubed - 1 cup sharp cheddar cheese, shredded - 1/4 cup Parmesan cheese, grated - 1 tablespoon fresh chives, finely chopped - 1 tablespoon fresh parsley, finely chopped - 3/4 cup whole milk - 1 large egg, beaten (for egg wash) Using fresh ingredients makes a big difference in flavor. Fresh herbs, like chives and parsley, add a bright taste. Quality cheese, such as sharp cheddar and Parmesan, brings depth and richness. If you can't find fresh chives or parsley, you can use dried herbs. Just remember that dried herbs are more potent, so use less. For the cheese, feel free to swap sharp cheddar with a milder cheese or use a blend of your favorite cheeses. Choosing the best ingredients helps you create scones that are flaky and flavorful. Always aim for the freshest produce and highest quality cheese. This choice elevates your scones, making them a true treat. For the full recipe, refer to the section above. Set your oven to 400°F (200°C). This helps the scones rise nicely. While the oven heats, line a baking sheet with parchment paper. This step stops the scones from sticking and makes cleanup easy. In a large bowl, mix the dry ingredients. Add 2 cups of all-purpose flour, 1 tablespoon of baking powder, 1/2 teaspoon of salt, and 1/4 teaspoon of black pepper. Use a whisk to blend them well. You want a smooth mix with no lumps. Next, add 1/4 cup of cold unsalted butter, cubed. Use a pastry cutter or your fingers to mix the butter into the flour. Keep mixing until it looks like coarse crumbs. This makes the scones flaky. Now it’s time to add the good stuff! Fold in 1 cup of shredded sharp cheddar cheese, 1/4 cup of grated Parmesan cheese, 1 tablespoon of chopped fresh chives, and 1 tablespoon of chopped fresh parsley. Stir until all the cheese and herbs are evenly mixed. Create a well in the center of your dry mix. Pour in 3/4 cup of whole milk. Gently mix with a wooden spoon until the dough comes together. Don’t overmix! A soft touch keeps the scones light. Lightly flour your work surface. Turn the dough out onto it and knead gently two to three times. This helps shape the dough without making it tough. Pat the dough into a circle about 1 inch thick. Use a sharp knife to cut it into 8 wedges. Alternatively, use a round cutter for uniform shapes. Place the scones on the prepared baking sheet, leaving space for them to rise. Brush the tops with a beaten egg. This makes them golden and shiny when baked. Bake in your preheated oven for 15 to 20 minutes. Look for a golden brown color and a nice rise. If you want the perfect golden crust, keep an eye on them during the last few minutes. For a full list of steps and details, check the Full Recipe. To make your savory herb and cheese scones flaky, handle the dough gently. Overworking it can make the scones tough. Use your fingertips to mix the butter into the flour until it looks like coarse crumbs. This step is key for a light texture. Chilling the dough before baking also helps. It firms up the butter, which creates steam when baking. This steam leads to a puffier, flakier scone. Aim to chill your dough for at least 30 minutes if you can. These scones shine when served warm. Pair them with a pat of butter or a spread like cream cheese. They also go great with soups or salads. Try serving them alongside a rich tomato soup for a perfect lunch. For a lovely display, use a rustic wooden board. Place the warm scones on it and sprinkle fresh herbs on top. This adds color and invites everyone to dig in. For more ideas, check the Full Recipe for details. {{image_4}} To make your savory herb and cheese scones even better, consider adding different herbs or types of cheese. Fresh herbs like thyme or rosemary can give a new twist. For cheese, try feta or gouda. These will change the taste and make the scones special. You can also mix in extra ingredients. Crumbled bacon adds a nice crunch and flavor. Sun-dried tomatoes bring a little sweetness and tang. Feel free to experiment and find what you love! If you need to make this recipe gluten-free, use a gluten-free flour blend. Many options are available in stores. For a vegan version, swap butter for a plant-based butter and use a non-dairy milk. You can also skip the cheese or use a vegan cheese substitute. To lower fat or calories, replace some butter with applesauce or yogurt. You can cut the cheese amount by half without losing too much flavor. These adjustments help you enjoy tasty scones without worry. For the full recipe, check out the detailed instructions above. To keep your scones fresh, follow these simple steps: - Cool Down: Let the scones cool completely after baking. - Wrap Well: Place them in an airtight container or wrap them tightly in plastic wrap. - Keep at Room Temp: Store scones at room temperature for up to two days. - Refrigeration: If you need them to last longer, refrigerate them. They can stay fresh for up to a week in the fridge. - Freezing: For longer storage, freeze the scones. Wrap each one in plastic wrap, then place them in a freezer bag. They can last for up to three months. When you want to enjoy your scones again, reheating them is easy: - Oven Method: Preheat your oven to 350°F (175°C). Place the scones on a baking sheet. Heat for about 10 minutes. This keeps them warm and fresh. - Microwave Method: If you're in a hurry, use the microwave. Heat each scone for about 15-20 seconds. Be careful not to overheat, as they can dry out. - Serving Leftovers: Leftover scones make a great snack. Enjoy them plain or with some butter or cheese spread. You can also crumble them over soups or salads for added flavor. What makes these scones savory vs. sweet? Savory scones use herbs and cheese instead of sugar. The sharp cheddar and fresh herbs like chives and parsley create a rich, full flavor. This makes them perfect for pairing with soups or salads. Sweet scones often include sugar and fruits, which give them a different taste and texture. Can I make the dough ahead of time? Yes, you can make the dough in advance. Wrap it tightly in plastic wrap and store it in the fridge for up to 24 hours. When you are ready to bake, simply roll it out and cut the scones as directed. Just remember that letting the dough rest can help enhance the flavors. What to do if the scones turn out too dry or too dense? If your scones are dry, you may have overmixed the dough or added too much flour. Adding a splash of milk can help restore moisture. For dense scones, check that your baking powder is fresh. This helps the scones rise properly. How to fix scones that didn't rise properly? If your scones did not rise, it could be due to old baking powder. Always check the expiration date. Make sure to handle the dough gently. Overworking it can cause the scones to be heavy instead of light and flaky. Essential kitchen tools needed for this recipe - Mixing bowl - Whisk - Pastry cutter or fingertips - Wooden spoon or spatula - Sharp knife or biscuit cutter - Baking sheet - Parchment paper Recommendations for best baking sheets and mixing bowls Choose a heavy-duty baking sheet for even baking. A non-stick surface helps prevent sticking. For mixing bowls, opt for a medium-sized stainless steel or glass bowl. They are easy to clean and great for mixing. A set with different sizes can also be useful for various recipes. For the full recipe, check out the Savory Herb and Cheese Scones section! In this article, we explored how to make Savory Herb and Cheese Scones. We covered the importance of quality ingredients and shared a detailed recipe with step-by-step instructions. You learned tips for achieving the perfect texture and ideas for serving. We also discussed variations to cater to different diets, along with proper storage techniques for freshness. Now, it’s time to gather your ingredients and start baking. Enjoy your delicious scones!

Savory Herb and Cheese Scones Flaky and Flavorful Treat

Are you ready to bake something special? Savory Herb and Cheese Scones are flaky, flavorful treats that will delight your

To make a great creamy mushroom risotto, you need these key ingredients: - 1 cup Arborio rice - 4 cups vegetable broth - 1 cup fresh mushrooms, sliced (cremini and shiitake) - 1 small onion, finely chopped - 3 cloves garlic, minced - 1/2 cup heavy cream - 1/2 cup finely grated Parmesan cheese These ingredients work together to create a rich and velvety dish. Arborio rice is special because it absorbs liquid well and stays firm. The vegetable broth adds depth and warmth to each bite. Fresh mushrooms give the risotto its earthy flavor, while onion and garlic provide a sweet base. Heavy cream and Parmesan cheese bring it all together, making it creamy and delicious. You can elevate your risotto with these optional ingredients: - Fresh parsley - Olive oil and butter - Salt and pepper Adding fresh parsley adds a pop of color and brightness to your dish. Using olive oil and butter enhances the richness of the flavors. Salt and pepper should be added to taste, making the dish truly yours. These extras help round out the flavors, making your risotto more vibrant and enjoyable. If you want to take your dish to the next level, consider checking the Full Recipe for more tips! Start by warming your vegetable broth. Pour it into a saucepan and place it over low heat. You want it hot but not boiling. This keeps your risotto cooking evenly. Next, grab a large skillet. Pour in the olive oil and add one tablespoon of butter. Heat over medium heat. Add your chopped onion once hot. Sauté for about three to four minutes. You want the onion to be soft and fragrant. Now, it’s time to add the garlic and mushrooms. Sauté these for five to seven minutes. Stir often so they cook evenly. The mushrooms will soften and release their juices. This adds great flavor to your dish. Now, let’s toast the rice. Add the Arborio rice to your skillet. Stir to coat each grain with the oil and butter. You’ll want to toast it for about two minutes. Look for a slight translucence around the edges. Begin adding the warmed broth, one ladle at a time. Stir the rice as you add the broth. Wait for most of the liquid to absorb before adding more. Repeat this for about twenty minutes. You want the rice to be creamy and al dente. Once your rice is ready, take the skillet off the heat. Stir in the heavy cream and grated Parmesan cheese. Add the remaining butter. Season with salt and pepper to taste. Mix everything until it’s creamy and well combined. Let it sit for a couple of minutes to thicken. Then, stir gently to enhance the creaminess. For the full recipe, check the earlier sections. To make creamy risotto, stir often. This keeps the rice moving and helps it cook evenly. Stirring lets the rice release starch, which adds creaminess. Always add broth slowly, too. Wait until the rice absorbs most of the liquid before adding more. This method ensures perfect texture. You can switch cheeses for different flavors. Try using goat cheese or feta for a tangy twist. For a lighter option, use ricotta. You can also add veggies for extra taste. Peas, spinach, or asparagus can bring freshness. They add color and nutrition. Serve risotto in shallow bowls. This makes it look fancy. Top with fresh parsley for a pop of color. You can also sprinkle more cheese on top. A drizzle of olive oil can enhance the dish’s shine. These small touches make your risotto stand out and look inviting. For the complete cooking process, check out the Full Recipe. {{image_4}} You can change up your creamy mushroom risotto by using different types of mushrooms. Try adding porcini, oyster, or even portobello mushrooms. Each type brings its own taste and texture. Mixing them creates a rich and earthy dish. You can also toss in fresh vegetables like peas or asparagus. These add color and crunch. Simply stir them in during the last few minutes of cooking. This gives your risotto a fresh look and a new flavor. Herbs can take your risotto to the next level. Infusing with thyme or rosemary adds depth. Just add them when you sauté the onions. Their aroma will fill your kitchen with warmth. Using white wine is another great twist. It adds a rich taste that complements the mushrooms. Add about half a cup after toasting the rice. Let it cook down before adding broth. This step deepens the flavor of your risotto. You can find the full recipe for this creamy mushroom risotto and more tips to make it shine. To keep your creamy mushroom risotto fresh, store it in an airtight container. Make sure to let it cool to room temperature first. Place it in the fridge for up to three days. Avoid leaving it out for more than two hours, as this can cause spoilage. When you're ready to enjoy your leftovers, reheating them properly is key. Use a saucepan over low heat. Add a splash of vegetable broth or cream to keep it creamy. Stir often until heated through. This method helps restore the silky texture of the risotto. You can freeze risotto, but the texture may change. To freeze, let it cool completely. Portion it into freezer-safe bags or containers. Label them with the date. When you're ready to eat, thaw it in the fridge overnight. Reheat it on the stove, adding broth or cream to help with creaminess. Enjoy this velvety dish later with ease! For the full recipe, check out the Creamy Mushroom Risotto Delight! How do I know when risotto is done? You know risotto is done when it is creamy and the rice is al dente. The grains should be tender but still have a slight bite. When you stir, the risotto should flow slowly. You can taste it to check for doneness. Can I make risotto ahead of time? You can make risotto ahead of time, but it may lose creaminess. If you do prepare it early, store it in an airtight container in the fridge. When you reheat, add a splash of broth or cream to bring back the smooth texture. What to serve with creamy mushroom risotto? Creamy mushroom risotto pairs well with grilled chicken or roasted vegetables. A crisp salad works too. For a light touch, serve with a side of sautéed greens. Can I pair wine with this dish? Yes, a white wine like Pinot Grigio or Sauvignon Blanc complements the risotto well. The wine should be light and refreshing to balance the rich flavors. Is risotto healthy? Risotto can be healthy, especially when you use fresh ingredients. Arborio rice provides energy and fiber. Balance it with veggies and lean proteins for a nutritious meal. Can I make a vegan version? Yes, you can make a vegan risotto! Use vegetable broth and skip the cream and cheese. Instead, add nutritional yeast for a cheesy flavor. You can also use coconut milk for creaminess. For a detailed cooking guide, check out the Full Recipe. In this post, we explored how to make creamy mushroom risotto. We covered key ingredients, cooking steps, and helpful tips. You learned how to cook the rice to perfection while adjusting flavors to your taste. Remember, the right stirring technique makes a big difference. With these steps, your risotto will impress everyone. Don't be afraid to experiment with variations and toppings. Lastly, enjoy your dish fresh or stored for later. Happy cooking!

Creamy Mushroom Risotto Velvet and Flavorful Dish

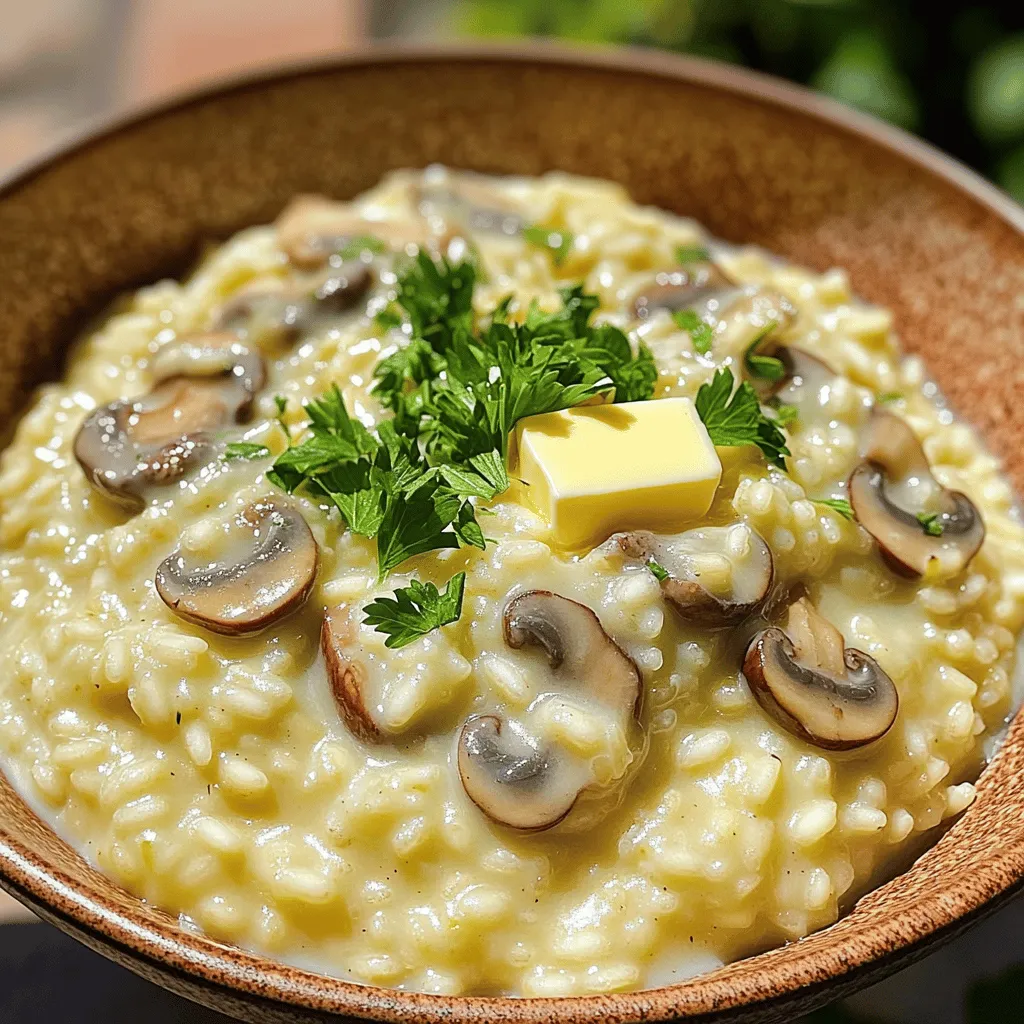
Are you ready to indulge in a warm, creamy mushroom risotto that will delight your taste buds? This dish isn’t

- 1 can (15 oz) chickpeas, thoroughly drained and rinsed - 1 medium cucumber, peeled and diced - 1 cup cherry tomatoes, halved for sweetness - 1 bright red bell pepper, diced into small pieces - 1/4 red onion, finely chopped - 1 fresh jalapeño, deseeded and finely minced - 1 ripe avocado, diced - 1/4 cup fresh cilantro leaves, coarsely chopped - 2 tablespoons extra virgin olive oil - 2 tablespoons fresh lime juice - 1 teaspoon ground cumin - 1 teaspoon smoked paprika - Salt and pepper to taste To make this spicy chickpea salad, you need fresh and vibrant ingredients. I often start with the chickpeas. They are the base of the salad and add protein. Make sure to rinse them well. This helps remove extra salt and enhances their taste. Next, I love adding cucumber. It adds a nice crunch. The cherry tomatoes bring sweetness, while the red bell pepper adds a pop of color and flavor. The red onion gives a punch, but you can adjust it to your liking. For spice, I include jalapeño. This gives the salad a nice kick. If you prefer less heat, you can skip it or reduce the amount. The avocado adds creaminess. It balances the other flavors. Fresh cilantro brightens the salad and gives it a fresh taste. Finally, the dressing combines olive oil, lime juice, cumin, and smoked paprika. This mix ties everything together. The salt and pepper enhance all the flavors. For the full recipe, check out the detailed instructions. Enjoy making your meal! 1. In a large mixing bowl, combine the chickpeas and chopped veggies. You’ll need the cucumber, cherry tomatoes, red bell pepper, red onion, and jalapeño. Mix these ingredients gently. You don’t want to mash the avocado yet. 2. In a small bowl, whisk together the olive oil, lime juice, cumin, and smoked paprika. Add a pinch of salt and pepper to taste. This dressing brings all the flavors together. 3. Drizzle the dressing over the salad mixture. Use large spoons or tongs to toss everything together. Make sure each piece of food is coated well. - When combining, be gentle with the avocado. You want chunks, not mush. - Ensure that the dressing coats every ingredient. This gives the salad a burst of flavor in each bite. For the full recipe, check out the detailed instructions above. Enjoy making this zesty salad! To make your spicy chickpea salad shine, adjust the seasoning. A splash of lime juice can boost the taste. Salt also helps bring out the flavors of the ingredients. Always use fresh ingredients for the best flavor. Fresh herbs and ripe veggies make a big difference. They add brightness and crunch to your dish. Serve your salad in a rustic wooden bowl for a charming look. This adds warmth to your table. You can also use vibrant plates to make the dish pop. Garnish with extra cilantro and lime wedges. This not only looks nice but invites guests to add more zing. A well-presented salad makes every meal special. For the complete spicy chickpea salad recipe, check out the [Full Recipe]. {{image_4}} You can make this spicy chickpea salad even better by adding protein. Here are two great ideas: - Grilled chicken or shrimp: Both options add a tasty kick and extra protein. They elevate the meal and keep you full longer. - Feta cheese: This creamy cheese adds a salty flavor. It pairs well with the other fresh ingredients. Sometimes, you might want to change things up. Here are some easy swaps you can try: - Red onion substitute: Swap red onion for green onions or shallots. They offer a milder taste while still adding a nice crunch. - Grain-based variation: Use quinoa instead of chickpeas for a different texture. Quinoa adds a nutty flavor and makes the salad more filling. Feel free to mix and match these ideas. You can create your own version of this energetic salad. For the full recipe, check out the details above! Store your leftover spicy chickpea salad in an airtight container. This keeps it fresh and tasty. Place it in the fridge and enjoy it within 2-3 days. The flavors will stay bright, and the ingredients will remain crisp during this time. Freezing this salad is not recommended due to the avocado. When frozen, the avocado can become mushy and lose its creamy texture. It is best enjoyed fresh, so make just enough for your meal. If you have leftovers, eat them quickly for the best taste and texture. Can I make this salad ahead of time? Yes, you can make this salad ahead of time. It tastes even better after the flavors mix. Just keep it in the fridge. Avoid adding avocado until serving time. This keeps it fresh and green. What can I substitute for chickpeas? If you cannot find chickpeas, use black beans or lentils. Both options work well. They add protein and taste great with the other ingredients. Is the salad vegan-friendly? Yes, this salad is entirely vegan. It contains no animal products. You can enjoy it as a healthy meal or side dish. Calories per serving and macronutrient breakdown This salad has about 200 calories per serving. Each serving includes: - Protein: 8 grams - Carbohydrates: 25 grams - Fat: 10 grams These numbers may vary based on ingredient choices. Health benefits of chickpeas and fresh ingredients Chickpeas are a great source of protein and fiber. They help keep you full. Fresh veggies add vitamins, minerals, and antioxidants. This salad supports a healthy diet. Best served chilled or at room temperature I recommend serving this salad chilled. It tastes fresh and crisp. If you let it sit for a while, it mixes flavors beautifully. Pair with grilled meats or as a standalone dish This salad is perfect with grilled chicken or fish. You can also enjoy it alone as a light meal. It’s filling and packed with flavor. For the full recipe, check the earlier section. This post shared a fresh and vibrant salad recipe. It highlights the key ingredients and simple steps. You learned how to enhance flavors and present the dish beautifully. Remember, fresh ingredients make a big difference. You can easily customize the salad by adding protein or swapping ingredients. Store leftovers wisely to keep them fresh. Enjoy this healthy salad chilled, and feel free to make it your own! This simple dish packs a tasty punch for any occasion.

Spicy Chickpea Salad Energizing and Flavorful Recipe

Are you ready to spice up your meal routine? This Spicy Chickpea Salad packs a flavorful punch while being energizing

To make apple cinnamon overnight oats, you need: - 1 cup rolled oats - 1 cup unsweetened almond milk (or your preferred milk) - 1 medium apple, grated (set aside a few slices for garnish) - 1 teaspoon ground cinnamon - 1 tablespoon maple syrup (or substitute with honey) - 1/4 cup Greek yogurt (optional for a creamier texture) - 1 tablespoon chia seeds - A pinch of salt These ingredients work together to create a creamy and tasty dish. The oats soak up the liquid and flavors overnight. You can add more fun with these optional ingredients: - Chopped walnuts or pecans for garnishing - A dash of vanilla extract - Nutmeg for an extra spice kick These extras can make your oats even more delicious. They add crunch and a new taste. One serving of apple cinnamon overnight oats has: - Calories: 350 - Protein: 10g - Fat: 9g - Carbohydrates: 60g - Fiber: 8g This dish is filling and packed with nutrients. It keeps you energized through your morning! Making apple cinnamon overnight oats is simple and fun. You start with easy steps and quick prep. Gather all your ingredients and tools first. You'll need a mixing bowl, a spoon, and jars for storage. 1. In your mixing bowl, add 1 cup of rolled oats and 1 cup of unsweetened almond milk. 2. Grate 1 medium apple and add it to the bowl. Set aside a few slices for later. 3. Sprinkle in 1 teaspoon of ground cinnamon and 1 tablespoon of maple syrup. If you like creaminess, add 1/4 cup of Greek yogurt. 4. Toss in 1 tablespoon of chia seeds and a pinch of salt for extra flavor. 5. Stir everything well until it's all mixed together. Make sure there are no dry oats left. 1. Spoon the mixture into jars, leaving a bit of space at the top. This helps with expansion. 2. Seal the jars tightly with their lids. 3. Place them in the fridge overnight or for at least 4 hours. This lets the oats soak up the almond milk. 4. In the morning, open your jars and stir. If you want them thinner, add a splash of almond milk. 5. Serve in bowls or eat right from the jars. Top with your reserved apple slices, extra cinnamon, and nuts for a crunch. For the full recipe, check out the detailed cooking instructions. Enjoy the taste of your apple cinnamon overnight oats! When making apple cinnamon overnight oats, some common mistakes can ruin your dish. First, don’t skip the soaking. Oats need time to absorb the liquid. If you don’t let them sit overnight, they can be dry. Second, be careful with the amount of cinnamon. Too much can overpower the apple flavor. Use just one teaspoon for a balanced taste. To get the perfect texture, use rolled oats instead of instant oats. Rolled oats soak better and create a creamy base. If you want a creamier mix, add Greek yogurt. The yogurt makes the oats rich and smooth. If you prefer a thinner consistency, add more almond milk before serving. Stir well to ensure everything is mixed. You can spice things up with different flavors. Try adding vanilla extract for a sweet note. A pinch of nutmeg can also add warmth. If you're feeling adventurous, consider adding dried fruits or nuts. Chopped walnuts or pecans offer a nice crunch. For a sweeter taste, drizzle more maple syrup before serving. This simple recipe is flexible and can fit your taste perfectly. For the complete mix of flavors, check out the Full Recipe. {{image_4}} You can make your oats even better with fruit. Berries add a nice burst of flavor. Try blueberries or strawberries for sweetness. Sliced bananas bring creaminess and a rich taste. You can even mix in diced peaches for a fun twist. Just remember to keep your apple as a base. This way, you still enjoy that great apple flavor. Adding new flavors can change your overnight oats game. You can mix in a splash of vanilla for warmth. A sprinkle of nutmeg gives a cozy feel. If you like spices, try adding a dash of ginger. Each option can make your oats special. Experiment with your favorites to find the perfect mix. You can easily adapt this recipe for your needs. If you're dairy-free, use almond milk or oat milk. For gluten-free oats, ensure you choose certified gluten-free rolled oats. You can also swap Greek yogurt with a dairy-free yogurt for creaminess. These simple changes keep the recipe tasty for everyone. For the full recipe, check out the details above. To store your apple cinnamon overnight oats, use clean, airtight containers. Jars with lids work best. Make sure to leave some room at the top. This lets the mixture expand while it chills. Place the containers in the fridge right after you prepare them. Keeping the oats cold helps them stay fresh. Apple cinnamon overnight oats can last up to five days in the fridge. Check for any signs of spoilage before eating. If you want to reheat them, you can use the microwave. Heat in short bursts, stirring in between. Add a splash of almond milk if they seem too thick after warming. I recommend using glass jars or BPA-free plastic containers. Glass jars are great for keeping the oats fresh. They are also easy to clean. Choose containers that are big enough to hold your oats without spilling. This way, you can enjoy your tasty breakfast without any mess! For the full recipe, check the original instructions. Yes, you can use instant oats. However, the texture of your oats will change. Instant oats cook faster and can become mushy. Rolled oats hold their shape better, providing a nice chew. If you prefer a creamier base, instant oats work well. Just remember to adjust the liquid slightly, as instant oats absorb faster. You can keep overnight oats in the fridge for up to five days. If you store them correctly in a sealed container, they stay fresh. Just make sure to check for any changes in smell or texture before eating. If you see any separation, give them a good stir before enjoying. Absolutely! To make this recipe vegan, just use plant-based milk. Almond milk works well, but you can choose soy, oat, or coconut milk too. Also, replace Greek yogurt with a dairy-free alternative or skip it altogether. The oats will still be tasty and satisfying without dairy. Overnight oats are packed with nutrients. They provide fiber, which helps digestion and keeps you full. Oats can lower cholesterol levels, supporting heart health. They also contain vitamins and minerals like magnesium and iron. Plus, you can add fruits and nuts for extra vitamins and healthy fats. This makes overnight oats a wholesome breakfast choice. For the full recipe, check out the details above! This blog post covered how to make delicious apple cinnamon overnight oats. We discussed all the required and optional ingredients to boost taste. You learned step-by-step how to mix, store, and chill your oats. We shared tips to avoid common mistakes and improve texture. Plus, we explored fun variations and storage tips. In summary, overnight oats are easy, flexible, and tasty. With these tips, you can enjoy a healthy breakfast daily. Try out this recipe and customize it to fit your taste!

Apple Cinnamon Overnight Oats Simple and Tasty Recipe

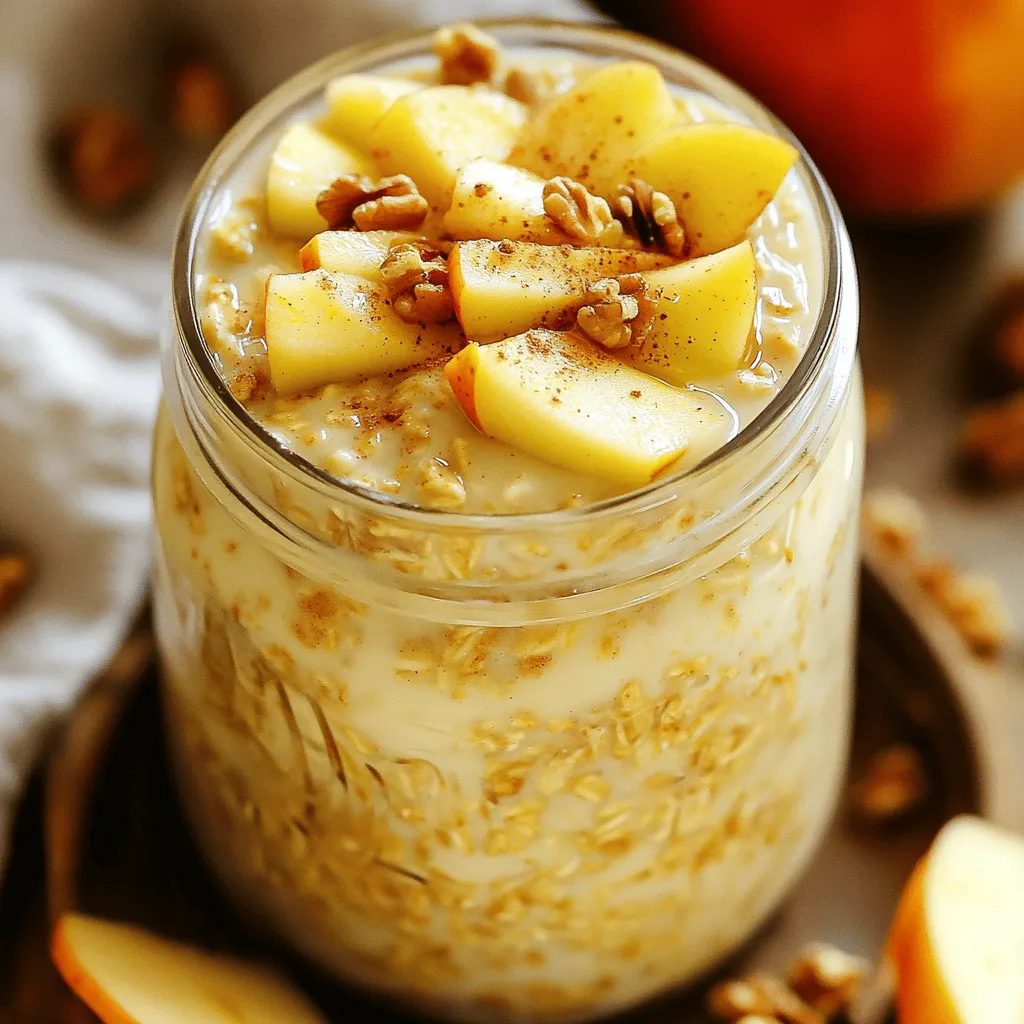
Are you ready to start your day with a delicious breakfast? Apple cinnamon overnight oats blend sweet apples and warming

To make the easiest chocolate lava cake, gather these simple yet rich ingredients: - 1/2 cup (1 stick) unsalted butter - 1 cup high-quality dark chocolate (70% cocoa or higher), chopped into small pieces - 1 cup powdered sugar - 2 large eggs - 2 egg yolks - 1 teaspoon pure vanilla extract - 1/2 cup all-purpose flour - A pinch of fine sea salt - Non-stick cooking spray or softened butter for greasing ramekins - Unsweetened cocoa powder for dusting Each ingredient plays a key role. The unsalted butter and dark chocolate create the rich base. Powdered sugar adds sweetness and smoothness. Eggs and yolks provide structure and moisture. Vanilla boosts flavor, while flour gives just the right texture. A pinch of salt enhances all the flavors. Make sure to use high-quality chocolate for the best taste. This recipe is all about making a special treat with simple items you may already have. You can find the full recipe with instructions that make this dessert a breeze to prepare. Gather these ingredients, and you'll be ready to create a dessert that impresses everyone! - Preheat your oven to 425°F (220°C). - Grease four ramekins with cooking spray or softened butter. - Dust the inside of each ramekin with cocoa powder to prevent sticking. - In a bowl, combine chopped dark chocolate and unsalted butter. - Microwave the mixture in 30-second intervals. Stir well after each interval until smooth. - Add powdered sugar to the melted chocolate and butter. Stir until it dissolves. - Next, add eggs and vanilla extract. Whisk until the mixture is uniform. - Carefully fold in all-purpose flour and a pinch of salt until just mixed. - Divide the batter evenly among the prepared ramekins. Fill them about three-quarters full. - Bake in the preheated oven for 12-14 minutes. The edges should be firm, and the center should jiggle slightly. Each step is key to making the easiest chocolate lava cake. For the full recipe, check the earlier section. To get that perfect molten center, timing is key. Bake the cakes for 12-14 minutes. Watch them closely. The edges should be set, but the center must be soft. If you bake too long, you lose the gooeyness. To check for doneness, use a toothpick. Insert it into the edge of the cake. If it comes out clean, the cake is done. If it has batter on it, bake a minute more. These cakes are best served warm. The chocolate flows out when you cut into them. Pair them with a scoop of vanilla ice cream. Fresh berries also add a nice touch. For a beautiful presentation, dust the cakes with powdered sugar. You can add fresh mint leaves on top. Drizzling chocolate sauce can make it look fancy and delicious. One common mistake is overmixing the batter. This can make the cakes tough. Mix just until the ingredients are combined. Another mistake is baking at the wrong temperature. Make sure your oven is at 425°F (220°C). An incorrect temp can ruin the texture. Trust me, sticking to the right heat is crucial for that perfect lava cake. For more details, check out the Full Recipe. {{image_4}} You can change the taste of your chocolate lava cake easily. Adding espresso or coffee gives it a rich flavor. Just mix in about a tablespoon of brewed coffee into the batter. You will love the depth it brings. Another fun twist is orange zest or mint. Grate a little orange peel or add fresh mint leaves to the mix. It adds a nice, fresh touch to the cake. If you need a gluten-free dessert, you can use almond flour instead of all-purpose flour. It works great and keeps the cake moist. For those who want a dairy-free option, swap the butter for coconut oil. Melt it just like the butter. This keeps the cake rich and tasty without dairy. When it comes to serving, you can get creative. Pair your lava cake with different ice creams, like vanilla or mint chocolate chip. You can also drizzle it with chocolate sauce or caramel for extra sweetness. Fresh seasonal fruit, like berries or sliced bananas, adds a nice contrast. This not only looks great but also balances the rich chocolate. For the full recipe, check out the recipe card above. Happy baking! To keep your leftover chocolate lava cake fresh, store it in the fridge. Place the cooled cakes in an airtight container. This helps retain moisture and flavor. They will stay good for up to three days. When you're ready to enjoy them again, reheat them. To reheat, use the microwave. Heat each cake for about 20-30 seconds. Check if they are warm in the center. Be cautious not to overheat, or the center will lose its gooey texture. You want that perfect molten center! You can freeze both unbaked and baked lava cakes. For unbaked cakes, prepare them as usual but don’t bake. Instead, cover the ramekins with plastic wrap. Freeze them for up to three months. If you have baked lava cakes, let them cool completely. Wrap each cake in plastic wrap and then foil. This double layer protects them from freezer burn. Baked cakes can also freeze for up to three months. To thaw, move the cakes from the freezer to the fridge for several hours. For a quick thaw, leave them at room temperature for about 30 minutes. When ready to bake, preheat the oven to 425°F (220°C). Bake the unbaked cakes for the same time as the fresh ones. For baked cakes, reheat them in the microwave, just like before. Enjoy that warm, rich chocolate! For the full recipe, check the earlier section. Use high-quality dark chocolate, 70% cocoa or higher. Brands like Ghirardelli, Guittard, or Valrhona work great. These chocolates melt smoothly and provide rich flavor. I prefer Ghirardelli for its perfect balance of sweetness and bitterness. Good chocolate makes a big difference in taste. Yes, you can prep the batter ahead. Just fill the ramekins and cover them with plastic wrap. Store them in the fridge for up to 24 hours. When you're ready, bake them straight from the fridge. Just add a minute or two to baking time. Look for firm edges and a soft center. The center should jiggle slightly but not be liquid. A toothpick inserted should come out with a few moist crumbs, not wet batter. This means the cake is ready to serve. Yes, but adjust the baking time. Smaller ramekins may need less time, while larger ones may need more. Start checking for doneness a few minutes early to avoid overcooking. Remember, the goal is that gooey center! This blog post detailed how to make a delicious lava cake from scratch. I shared key ingredients, simple steps, and tips for success. Remember, timing is crucial for that perfect molten center. Experiment with flavors and dietary needs to make it your own. Store leftovers properly and enjoy them later. With these steps, you will create a treat that impresses any guest. Enjoy baking, and trust the process!

Easiest Chocolate Lava Cake Irresistible Dessert Treat

Looking for a dessert that dazzles with minimal effort? You’re in the right place! This Easiest Chocolate Lava Cake recipe

To make a great Mediterranean quinoa salad, you need these key ingredients: - 1 cup quinoa, thoroughly rinsed - 2 cups vegetable broth or water - 1 cup cherry tomatoes, halved - 1 cucumber, finely diced - 1 bell pepper (choose red or yellow), diced - 1/2 red onion, finely chopped - 1 cup canned chickpeas, drained and rinsed - 1/2 cup Kalamata olives, pitted and thinly sliced - 1/2 cup feta cheese, crumbled (optional but recommended) - 1/4 cup fresh parsley, finely chopped - 1/4 cup fresh mint, finely chopped - 1/4 cup extra virgin olive oil - 2 tablespoons freshly squeezed lemon juice - Salt and freshly ground black pepper, to taste These ingredients create a vibrant and tasty salad. The quinoa adds protein and fiber. Fresh veggies bring crunch and color. Chickpeas add heartiness, while olives and feta offer a salty pop. You can customize your salad with these add-ins: - Avocado, diced - Roasted red peppers, chopped - Spinach or arugula, roughly chopped - Sun-dried tomatoes, sliced - Artichoke hearts, quartered - Nuts or seeds for extra crunch These options let you adjust flavors and textures. They also add more nutrition. Feel free to mix and match based on what you have. A good dressing can elevate your salad. Here are my favorites: - A simple mix of olive oil and lemon juice - A garlic vinaigrette for a zesty kick - Tahini dressing for a creamy touch - Balsamic vinaigrette for a sweet twist Each dressing brings its own flavor. You can also try adding herbs or spices to make it your own. For the full recipe, check out the detailed steps. To cook the quinoa, first rinse it well. This removes any bitter taste. Then, in a medium pot, combine one cup of quinoa with two cups of vegetable broth or water. Place the pot over medium-high heat until it boils. Once it boils, lower the heat to a gentle simmer. Cover the pot and cook for 15 minutes. The quinoa will absorb the liquid and look fluffy. Afterward, remove the pot from heat and let it sit for 5 minutes with the lid on. Finally, fluff the quinoa with a fork and let it cool. While the quinoa cools, you can prepare your vegetables. Take one cup of cherry tomatoes and cut them in half. Dice one cucumber into small pieces. Next, chop one bell pepper into bite-sized pieces. Use either red or yellow peppers for color. Finely chop half a red onion for a nice bite. Rinse one cup of canned chickpeas and drain them well. Slice half a cup of Kalamata olives thinly. If you want, crumble half a cup of feta cheese for a creamy touch. Gather all of these in a large mixing bowl. Once your quinoa is cool and your veggies are ready, it’s time to assemble. Gently fold the cooled quinoa into the bowl with your vegetables. Be careful not to mash anything. In a small bowl, whisk together a quarter cup of olive oil and two tablespoons of lemon juice. Add salt and freshly ground black pepper to taste. Drizzle this dressing over the salad and toss everything gently. To finish, sprinkle in a quarter cup of chopped parsley and mint, folding them in lightly. Taste your salad and adjust the seasoning as needed. You can enjoy it right away or chill it for about 30 minutes to let the flavors blend. For the full recipe, check out the complete list above. To cook perfect quinoa, rinse it well before using. This helps remove any bitter taste. Use a 1:2 ratio of quinoa to liquid. For this salad, I use vegetable broth or water. Bring the liquid to a boil, then lower the heat. Cover the pot and let it simmer for 15 minutes. After that, let it rest for 5 minutes. Fluff it with a fork to get a light texture. The quinoa should be soft but have a slight crunch. You can easily make this salad ahead of time. It tastes even better after resting. Prepare the quinoa and veggies in advance. Keep the dressing separate until serving. This helps keep everything fresh. Store the salad in an airtight container in the fridge. It lasts for about 3 days. If you want to freeze it, only freeze the quinoa. The veggies do not freeze well. You can change the flavors in this salad to suit your taste. Want more zest? Add more lemon juice. If you like it spicy, add some red pepper flakes. Fresh herbs can also change the flavor. Try basil or dill for a different taste. Taste as you go to find your favorite mix. Each bite should be a burst of flavor. {{image_4}} You can easily make this salad vegetarian or vegan. Simply skip the feta cheese. The salad will still taste great! You can add some avocado for creaminess. Nutritional yeast is a fantastic substitute for cheese. It adds a cheesy flavor without dairy. Want to boost the protein? Add grilled chicken, shrimp, or tofu. These choices blend well with the flavors. You can also use canned tuna for a quick option. Each adds a tasty twist and makes the meal more filling. Change it up with seasonal ingredients. In summer, use fresh corn or zucchini. In fall, add roasted butternut squash or apples. These ingredients will give new flavors while keeping the salad fresh. You can even try different herbs like basil or dill for a unique taste. For the full recipe, check out the Mediterranean Quinoa Salad. Enjoy creating your own delicious versions! To keep your Mediterranean quinoa salad fresh, use an airtight container. Glass or plastic containers work well. Make sure the salad is cool before sealing. This helps prevent moisture buildup, keeping your salad crisp. If you add dressing, store it separately. This way, your salad won’t get soggy. When stored properly, your Mediterranean quinoa salad can last up to five days in the fridge. If you don’t add dressing, it may last a bit longer. Always check for signs of spoilage, like off smells or changes in texture. Fresh ingredients are key to great flavor. You can freeze quinoa salad, but the texture may change. To freeze, place the salad in a freezer-safe bag. Remove as much air as you can before sealing. When ready to eat, thaw in the fridge overnight. For best results, serve chilled or at room temperature. Enjoy your meal even after freezing! Yes, you can make Mediterranean Quinoa Salad ahead of time. This salad tastes even better after the flavors meld together. I recommend making it a day in advance. Store it in the fridge in an airtight container. Just give it a good stir before serving. Yes, Mediterranean Quinoa Salad is gluten-free. Quinoa is a seed, not a grain, which makes it a great choice. It’s safe for those with gluten allergies or sensitivities. Always check your other ingredients to ensure they are gluten-free as well. If you want a feta cheese substitute, try using goat cheese or a dairy-free option. Crumbled tofu works well too if you want a vegan choice. You can also leave it out entirely and still enjoy a tasty salad. The other flavors will shine through without it. For the full recipe, check the details above. This blog post covers a tasty and healthy Mediterranean Quinoa Salad. I shared the main ingredients, optional add-ins, and dressing ideas. You learned how to cook quinoa and prepare fresh veggies. I also gave tips for storing and flavor adjustments. In the end, you can enjoy this salad your way. Feel free to mix in your favorite add-ins and dressings. With a few simple steps, you create a dish full of flavor and nutrition. Enjoy making your Mediterranean salad!

Mediterranean Quinoa Salad Fresh and Flavorful Recipe

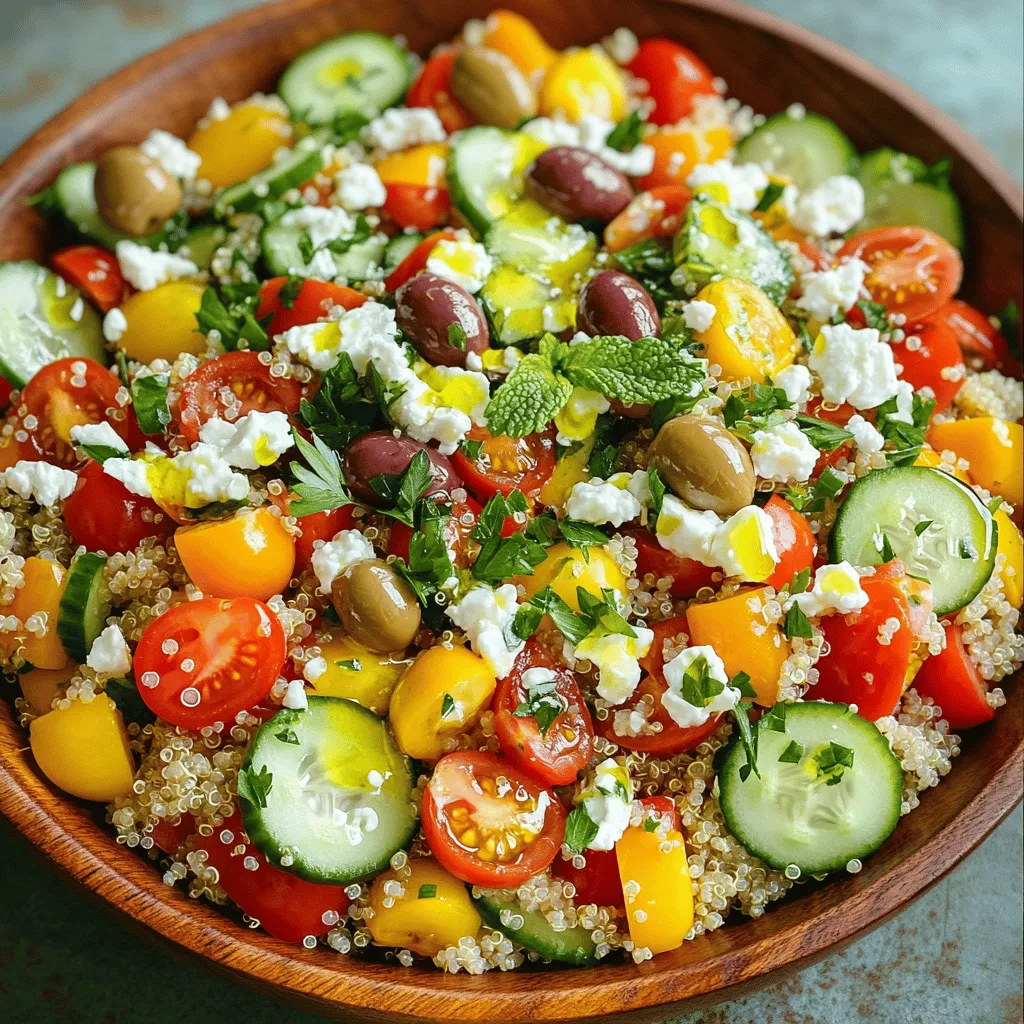
Are you ready to make a bright, tasty Mediterranean Quinoa Salad? This dish bursts with fresh flavors that pack a

Older posts
Newer posts
← Previous Page1 … Page65 Page66 Page67 … Page86 Next →

dsad

© 2026 lazychefmagic • Built with GeneratePress

Our Policies

  • Copyright Policy
  • Cookie Policy
  • GDPR Policy
  • Privacy Policy
  • Disclaimer
  • Terms Of Use

More Information

  • Home
  • About
  • Contact
  • Appetizers
  • Dessert
  • Dinner
  • Drinks
©2026, lazychefmagic About Back To Top