Skip to content
DisclaimerTerms Of UseGDPR PolicyCookie Policy

lazychefmagic

  • Home
  • Drinks
  • Appetizers
  • Dinner
  • Dessert
  • About
  • Contact
  • Privacy Policy
DisclaimerTerms Of UseGDPR PolicyCookie Policy

NO-ING-IMG

For the best jalapeño popper dip, you need some key ingredients. Here’s what to gather: - 8 oz cream cheese, softened to room temperature - 1 cup sour cream, ideally full-fat for creaminess - 1 cup shredded sharp cheddar cheese - 1 cup shredded mozzarella cheese, for that gooey texture - 2-3 fresh jalapeños, finely diced (remove seeds for a milder flavor) - 1/2 cup cooked and crumbled turkey bacon or shredded chicken (optional for added protein) - 1/2 teaspoon garlic powder, for depth of flavor - 1/2 teaspoon onion powder, to enhance the savory notes - 1/4 teaspoon smoked paprika, adding a hint of smokiness - Salt and black pepper to taste - 1/4 cup chopped green onions or scallions, for a fresh garnish You can make this dip even better with some optional ingredients. Consider adding: - 1/2 cup diced red bell peppers for sweetness - 1/4 cup chopped cilantro for freshness - A splash of hot sauce for added heat These extras can make your dip more unique and tasty. Garnishing your dip adds flair and flavor. Here are some ideas: - Extra chopped green onions on top for color - A sprinkle of paprika for a smoky touch - Fresh parsley or cilantro for a pop of green Use these garnishes to make your dip look as good as it tastes! For the full recipe, check out the details above. Start by gathering all your ingredients. You will need: - 8 oz cream cheese, softened - 1 cup sour cream - 1 cup shredded sharp cheddar cheese - 1 cup shredded mozzarella cheese - 2-3 fresh jalapeños, finely diced - 1/2 cup cooked turkey bacon or shredded chicken (optional) - 1/2 teaspoon garlic powder - 1/2 teaspoon onion powder - 1/4 teaspoon smoked paprika - Salt and black pepper to taste - 1/4 cup chopped green onions Make sure to finely dice the jalapeños. If you want less heat, remove the seeds. This will help balance the flavors in the dip. In a large bowl, mix the softened cream cheese and sour cream. You can use a hand mixer or a sturdy spatula. Blend until smooth. Next, fold in the shredded cheddar and mozzarella cheeses. Mix well until you see a creamy texture. Now, stir in the diced jalapeños. If you're using turkey bacon or chicken, add it to the mix. Next, sprinkle in the garlic powder, onion powder, and smoked paprika. Don’t forget to season with salt and black pepper. Make sure everything is well combined. Preheat the oven to 375°F (190°C). Grease a baking dish or line it with parchment paper. Carefully transfer the dip mixture into the dish. Smooth the top for even baking. Place the dish in the oven and bake for 25-30 minutes. Keep an eye on it. You want the top to be golden brown and bubbly. Once it's done, take it out and let it cool for a few minutes. Before serving, sprinkle the chopped green onions on top for extra color. This is how you make a simple and flavorful Jalapeño Popper Dip. Enjoy it warm with tortilla chips or fresh veggies. For the complete recipe, check out the Full Recipe. To change the heat of your dip, you can control the jalapeños. If you want it mild, remove all the seeds. The seeds hold a lot of heat. For more spice, leave some seeds in. You can also add a pinch of cayenne pepper for extra kick. If your dip ends up too hot, mix in more cream cheese or sour cream. This will balance the spice. Creaminess is key to a great dip. Start with room temperature cream cheese. This helps it blend well. Use full-fat sour cream for a rich texture. Mixing in mozzarella adds that gooey feel. If you want even more creaminess, try adding a splash of heavy cream. This will give your dip a dreamy texture. For a beautiful presentation, serve your dip in a nice dish. A bright, colorful dish can make it stand out. Use vibrant tortilla chips or fresh veggies for dipping. Bell pepper strips and cucumber slices add color. You can also sprinkle extra green onions on top for a fresh touch. For something different, serve it with crispy toasted baguette slices. This adds elegance to your spread. For the full recipe, check the section above. {{image_4}} You can easily boost your Jalapeño Popper Dip with protein. Adding cooked turkey bacon or shredded chicken gives the dip a hearty touch. Just mix in about half a cup of your choice. This adds flavor and makes the dip more filling. If you love shrimp, try adding cooked shrimp for a seafood twist. Mix in the protein when you combine the cheeses. For a vegetarian version, skip the meat and use beans. Black beans or pinto beans work well here. They add protein and fiber. You can also add corn for sweetness and texture. Just fold them into the cheese mixture. Don’t forget to adjust the spices for extra flavor. This way, you keep the dip tasty and satisfying. Cheese is key to the dip’s flavor and creaminess. While sharp cheddar and mozzarella are great, feel free to mix it up. Try pepper jack for a spicy kick or gouda for a smoky flavor. You can even use cream cheese blends for varied texture. Just stay within the same amount of cheese for balance. Each cheese brings its own unique taste, so have fun experimenting! You can find all the details in the Full Recipe for Jalapeño Popper Dip. To keep your Jalapeño Popper Dip fresh, store it in an airtight container. Let it cool completely before sealing it. This helps maintain flavor and texture. It can last in the fridge for up to three days. If you want to keep it longer, consider freezing it. Reheating your dip is easy. You can use the oven or microwave. For the oven, preheat it to 350°F (175°C). Place the dip in a baking dish and cover it with foil. Bake for about 15-20 minutes until hot. For the microwave, heat in short bursts, stirring in between, until warm throughout. Freezing is a great option if you have extra dip. Portion it into small containers for easy use later. Make sure to use freezer-safe containers. The dip can last for up to three months in the freezer. When ready, thaw it in the fridge overnight before reheating. Enjoy your tasty dip again! For the full recipe, check out the details above. Yes, you can prepare Jalapeño Popper Dip ahead. Mix the dip and store it in the fridge. Cover it tightly with plastic wrap. You can do this up to two days before you bake it. When ready to bake, just take it out and let it sit for 15 minutes at room temperature. Then, pop it in the oven. This way, you save time on game day or any gathering. You have plenty of tasty options for serving this dip. Here are some ideas: - Tortilla chips for a crunchy bite - Sliced bell peppers for a fresh crunch - Carrot and celery sticks for a healthy option - Toasted baguette slices for a gourmet touch - Crackers for a classic pairing Mix it up! Each option brings a different flavor and texture. Absolutely! There are simple swaps to lighten it up: - Use light cream cheese instead of regular - Choose Greek yogurt instead of sour cream - Skip the bacon or use turkey bacon - Add more veggies like corn or black beans These changes keep the dip tasty while cutting calories. Enjoy without guilt! You can find the full recipe for Jalapeño Popper Dip above. In this post, I covered the key ingredients for Jalapeño Popper Dip and optional flavors. I shared easy steps for prepping, mixing, and baking the dip to perfection. You learned tips for spice levels and creamy texture, plus ways to present it well. We explored variations, storage methods, and frequently asked questions. Make this dip your own, and enjoy every bite. It’s sure to impress at any gathering. Enjoy your cooking!

Jalapeño Popper Dip Simple and Flavorful Recipe

Are you ready to impress your friends with an easy and tasty appetizer? This Jalapeño Popper Dip is packed with

To make this hearty and healthy soup, you will need: - 1 cup green or brown lentils, rinsed and drained - 1 tablespoon extra virgin olive oil - 1 medium yellow onion, finely chopped - 2 garlic cloves, minced - 2 medium carrots, peeled and diced - 1 celery stalk, diced - 6 cups low-sodium vegetable broth - 1 teaspoon ground cumin - 1 teaspoon smoked paprika - 1/2 teaspoon sea salt (or to taste) - 1/4 teaspoon freshly ground black pepper - 4 cups fresh spinach leaves, washed and stems removed - Juice of 1 medium lemon - Fresh parsley, finely chopped (for garnish) This combination of ingredients brings rich flavors and nutrients into each bowl. The lentils provide protein and fiber, while the spinach adds vitamins and minerals. You can enhance your soup with these tasty add-ins: - A pinch of red pepper flakes for heat - Chopped tomatoes for acidity - Diced bell peppers for sweetness - Coconut milk for creaminess These options can add depth and variation. Feel free to mix and match based on your taste. If you have dietary needs, consider these swaps: - Use vegetable broth for a vegan option - Replace lentils with beans or peas if needed - Swap olive oil with coconut oil for a different flavor - Use quinoa instead of lentils for a gluten-free option These substitutions keep the dish enjoyable for everyone. The soup remains nourishing and satisfying regardless of your choices. For the full recipe, check out the Hearty Lentil Spinach Delight section. Gather all your ingredients first. This makes cooking smoother and easier. You will need: - 1 cup green or brown lentils, rinsed and drained - 1 tablespoon extra virgin olive oil - 1 medium yellow onion, finely chopped - 2 garlic cloves, minced - 2 medium carrots, peeled and diced - 1 celery stalk, diced - 6 cups low-sodium vegetable broth - 1 teaspoon ground cumin - 1 teaspoon smoked paprika - 1/2 teaspoon sea salt (or to taste) - 1/4 teaspoon freshly ground black pepper - 4 cups fresh spinach leaves, washed and stems removed - Juice of 1 medium lemon - Fresh parsley, finely chopped (for garnish) Chop the onion, garlic, carrots, and celery. Rinse the lentils well. This helps remove dirt. In a large pot, heat the olive oil over medium heat. Add the onion and sauté for about 5 minutes. Stir until the onion is soft and clear. Next, add the garlic, carrots, and celery. Cook for 3 to 4 more minutes. The veggies should start to soften. Now, add the rinsed lentils and vegetable broth. Stir in the cumin, smoked paprika, salt, and pepper. Bring this mix to a boil. Once it boils, turn down the heat to low. Cover the pot and let it simmer for 30 to 35 minutes. The lentils should be tender but still firm. After simmering, stir in the spinach. Cook for another 5 minutes. The spinach should wilt nicely. Take the pot off the heat. Squeeze the lemon juice into the soup. This adds a bright flavor. Taste it and adjust seasoning if needed. Ladle the soup into bowls. Top with chopped parsley for color and flavor. Enjoy this nourishing lentil soup warm. Pair it with crusty bread for a complete meal. Check the Full Recipe for more details! To cook lentils just right, choose the type you prefer. Green and brown lentils work well for this soup. Rinse the lentils under cold water to remove any dirt. Add them to your pot with the broth and spices. Bring everything to a boil, then lower the heat and cover. Let them simmer. Cooking them for 30-35 minutes gives the best texture. You want them soft but not mushy. If you have leftover soup, let it cool to room temperature. Pour it into an airtight container. Store it in the fridge for up to five days. For longer storage, freeze the soup in single-serving portions. This way, it will stay fresh for up to three months. When ready to eat, thaw it overnight in the fridge or use the microwave. Presentation makes a dish appealing. For this lentil soup, sprinkle fresh parsley on top before serving. It adds color and flavor. You can also add a squeeze of lemon juice to brighten the taste. Consider serving with warm, crusty bread on the side. A lemon wedge on each plate looks nice and gives a zesty touch. These simple garnishes enhance both beauty and taste. For the full recipe, check out the earlier sections. {{image_4}} You can easily make this lentil soup vegan and gluten-free. The recipe already uses vegetable broth, which is great for vegans. Just make sure to choose a gluten-free broth. All the main ingredients are naturally gluten-free. You can enjoy this soup without worry! Spices can change the whole feel of your soup. You can stick with cumin and smoked paprika, or try new spices. Add curry powder for an Indian twist. Use Italian herbs like basil and oregano for a Mediterranean flair. Don't be afraid to explore and find what you love! Want to make your lentil soup even heartier? You can add proteins like cooked chicken or turkey. Add a can of drained chickpeas for a boost. If you prefer plant-based options, toss in some tofu or tempeh. These add texture and make the soup more filling. Check the Full Recipe for the base, then get creative! After you make your lentil soup, let it cool down. Transfer it to an airtight container. It will stay fresh in the fridge for up to five days. Make sure to label the container with the date. This way, you keep track of how long it has been stored. To freeze your soup, use freezer-safe containers. Leave space at the top, as the soup will expand. It can stay frozen for up to three months. Thaw it overnight in the fridge before reheating. This keeps the flavors intact and makes it easy to enjoy later. When stored properly, lentil soup holds its quality well. If kept in the fridge, check for any signs of spoilage before eating. To reheat, gently warm it on the stove or in the microwave. Stir it well to heat evenly. Add a splash of water if the soup seems too thick. Enjoy your hearty lentil soup again! The best types of lentils for soup are green and brown lentils. They hold their shape well and cook evenly. Red lentils can also work but turn mushy quickly. For a hearty texture, stick with green or brown. Yes, you can make lentil soup in a slow cooker. Just add all your ingredients to the pot. Set it on low for 6-8 hours or on high for 3-4 hours. This method allows the flavors to meld beautifully over time. Lentil soup lasts about 4-5 days in the fridge. Store it in an airtight container for the best results. To enjoy it later, reheat the soup on the stove or in the microwave until hot. Absolutely! You can add other vegetables like spinach, kale, or bell peppers. Zucchini and potatoes also work well. Just chop them up and add them during cooking. This adds flavor and nutrition to your soup. For the full recipe, check the details above. Lentil soup with spinach is simple and tasty. We covered key ingredients, cooking steps, and tips for the best results. You learned about options for diet needs and fun flavor twists to try. Proper storage helps keep your soup fresh for future meals. Remember, use the right lentils and experiment with spices. Each bowl can be unique and satisfying. Enjoy making your own delicious lentil soup!

Lentil Soup with Spinach Nourishing and Hearty Recipe

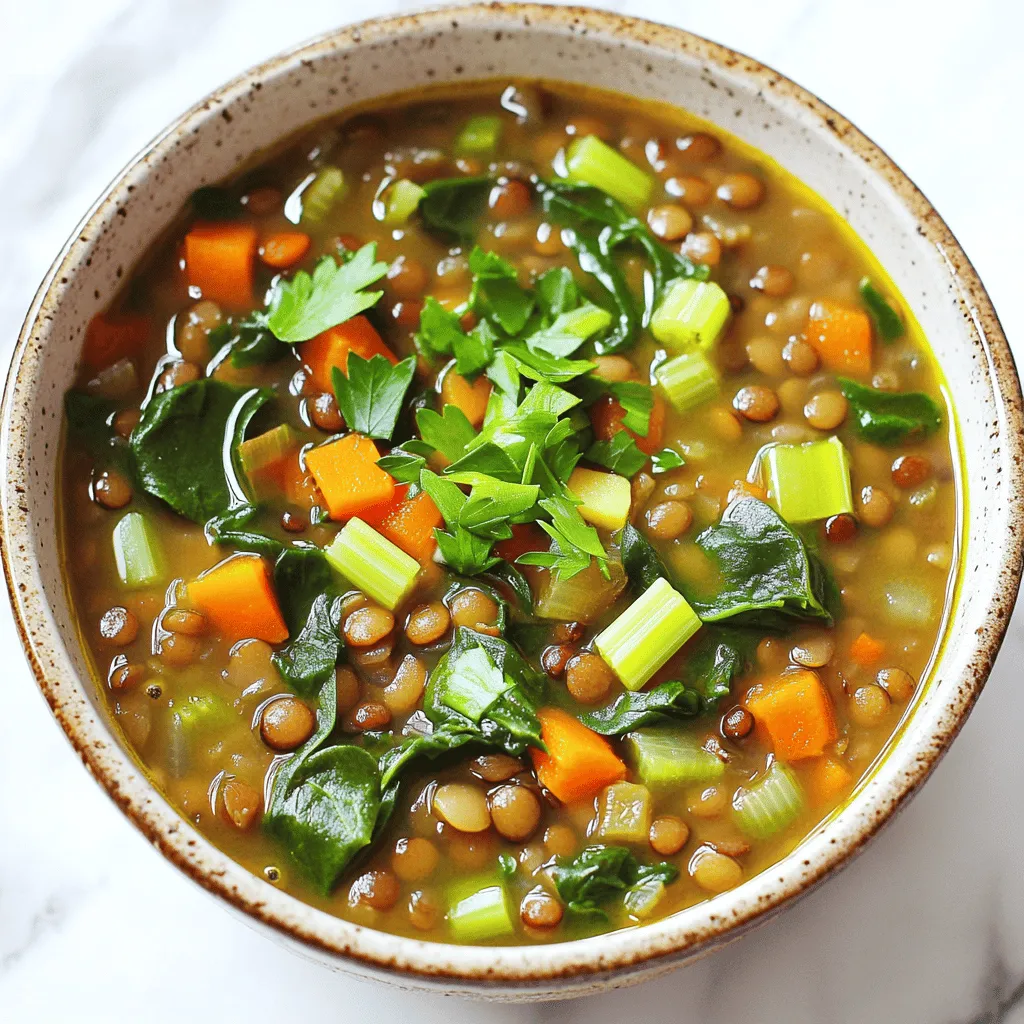
Looking for a warm and hearty meal? My Lentil Soup with Spinach is perfect! This recipe is packed with nutrients

- Canned chickpeas - Olive oil and seasoning - Fresh vegetables - Optional cheese and dressing ingredients For this Crispy Chickpeas and Spinach Salad, gathering the right ingredients is key. You will need one can of chickpeas, which adds protein and crunch. Use extra-virgin olive oil to help the chickpeas roast to a perfect crisp. The seasonings, like smoky paprika and garlic powder, bring out great flavors. Fresh vegetables make the salad vibrant and healthy. Grab 4 cups of fresh spinach, 1/2 cup of cherry tomatoes, 1/4 of a red onion, and 1 ripe avocado. You can optionally add crumbled feta cheese for a creamy touch. For the dressing, you will need balsamic vinegar, lemon juice, and honey or maple syrup for sweetness. This dish is simple yet packed with flavor. I love how the roasted chickpeas add crunch to the fresh, crisp salad. If you want to try this recipe, check out the Full Recipe for all the details. 1. Preheat your oven to 400°F (200°C). This sets the stage for crispy chickpeas. 2. Spread the drained chickpeas on a large baking sheet in a single layer. 3. Drizzle olive oil over the chickpeas. Make sure they are well-coated. 4. Sprinkle smoky paprika, garlic powder, salt, and black pepper on top. Toss gently to coat. 5. Roast the chickpeas for 20-25 minutes. Shake the pan halfway through to ensure even cooking. 1. While the chickpeas roast, mix the salad base. In a large bowl, combine the fresh spinach, halved cherry tomatoes, sliced red onion, and diced avocado. 2. Toss these ingredients lightly to mix. This ensures a fresh and colorful salad. 3. In a small bowl, whisk together balsamic vinegar, lemon juice, and honey (or maple syrup). This creates a tasty dressing. 4. Once the chickpeas are crispy and slightly cooled, add them to the salad bowl. 5. Drizzle the dressing over the salad and toss everything together. This helps coat all ingredients evenly. 1. For extra flavor, sprinkle crumbled feta cheese on top if you want. This adds a creamy touch. 2. Present your salad in a large bowl or plate. 3. For an attractive look, add a sprinkle of smoked paprika and fresh herbs like parsley. 4. Enjoy the vibrant colors and textures of this dish. You can find the complete details in the Full Recipe. To make crispy chickpeas, start with the right temperature. Preheat your oven to 400°F (200°C). This heat will help them roast well. Next, roast them for about 20 to 25 minutes. Shake the pan halfway through. This helps them cook evenly. Drying the chickpeas is key. After draining and rinsing, let them sit. Pat them dry with a towel. This step removes extra moisture. Less moisture means crispier results. Seasoning makes a big difference. I love using smoky paprika and garlic powder. They add depth and warmth to the chickpeas. Feel free to play with spices. Try cumin or chili powder for a kick. For the dressing, I recommend balsamic vinegar. It has a nice sweetness. Lemon juice adds brightness. Combine these with honey or maple syrup for balance. This mix brings the salad to life. Want to make this salad a full meal? Add some protein. Grilled chicken or chickpeas work great. If you like fish, try adding canned tuna or salmon. For serving, think about pairings. This salad goes well with crusty bread or a light soup. You could even serve it as a side dish. It looks pretty on a big plate. Don’t forget to check the Full Recipe for all the steps and tips! {{image_4}} You can easily make this salad vegan. Instead of honey, use maple syrup. This gives a sweet touch without harming bees. For cheese, try using vegan feta or leave it out. The salad still tastes great without it. You can switch up the dressing for variety. Try tahini, lemon vinaigrette, or a yogurt-based dressing. Add fresh herbs like basil or dill for more flavor. Spices like cumin or chili powder can also spice things up. Using seasonal veggies makes the salad fresher. In spring, add peas or asparagus. In summer, toss in some corn or zucchini. In fall, roasted pumpkin or apples work well. Adjust the salad based on what you find at local markets. This keeps the dish exciting and flavorful. To keep your salad fresh, store it in an airtight container. Place the spinach and chickpeas in separate containers. This helps keep the spinach crisp. The chickpeas will stay crunchy this way too. If you mix them, the salad will get soggy. Prepare the chickpeas and dressing in advance. Roast the chickpeas and let them cool. For the dressing, whisk together the balsamic vinegar, lemon juice, and honey. Keep these in the fridge until you're ready to eat. When it's time to serve, mix the spinach, veggies, and chickpeas. Drizzle the dressing right before eating to keep everything fresh. To refresh your roasted chickpeas, reheat them in the oven. Preheat it to 400°F (200°C). Spread the chickpeas on a baking sheet for about 5-10 minutes. This will bring back their crunch. Avoid reheating the salad in the microwave. This will make the spinach soggy and unappealing. To make crispy chickpeas, start with canned chickpeas. Drain and rinse them well. Then, preheat your oven to 400°F (200°C). Spread the chickpeas on a baking sheet. Drizzle with olive oil and sprinkle with smoky paprika, garlic powder, salt, and pepper. Toss them gently to coat. Roast for 20-25 minutes, shaking the pan halfway through. This creates a perfect crunch. Yes, you can use fresh chickpeas! However, you need to cook them first. Soak them overnight and boil them until tender. Then, follow the same steps to roast them. Fresh chickpeas can taste even better! If you want to skip feta cheese, try using goat cheese or ricotta. For a vegan option, consider tofu or avocado. These choices still add creaminess to your salad without losing flavor. A spinach salad lasts about 1-2 days in the fridge. Keep it in an airtight container. To keep the salad fresh, add dressing just before serving. This helps maintain the crunch of the vegetables. Absolutely! Grilled chicken adds great protein to the salad. Simply slice cooked chicken and toss it in with the other ingredients. This makes the salad more filling and satisfying. For the full recipe, check out the details above! This blog post covered the tasty and healthy chickpea salad. You learned about the key ingredients, from canned chickpeas to fresh veggies. I guided you through simple steps to prepare, assemble, and add your final touches. With helpful tips, you can make crispy chickpeas and enhance flavor easily. Explore variations for vegan tastes or seasonal fun. Finally, I shared smart storage and meal prep tips to keep your salad fresh. Embrace this recipe for a nutritious meal or snack that you'll enjoy anytime!

Crispy Chickpeas and Spinach Salad Fresh and Tasty Dish

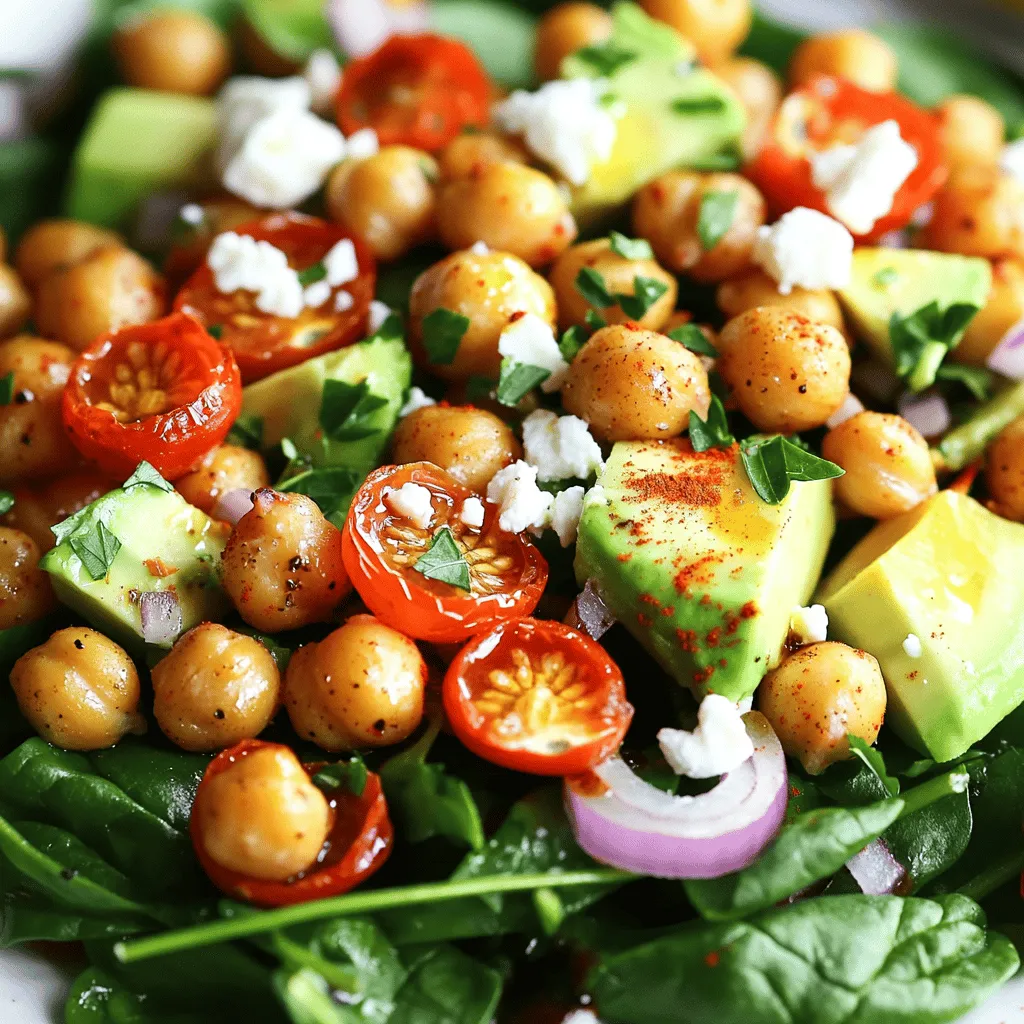
Looking for a fresh and tasty salad that’s both filling and healthy? You’ve got to try my Crispy Chickpeas and

To make a great vegetable fried rice, you need a few key ingredients. Here’s what you should gather: - 2 cups cooked jasmine rice (preferably chilled for better texture) - 1 cup mixed bell peppers (red, yellow, and green), diced into small pieces - 1 cup green peas (you can use fresh or frozen) - 1 medium carrot, finely chopped - ½ cup corn kernels (can be fresh or frozen) - 3 green onions, thinly sliced, including the green tops - 3 cloves garlic, minced for a burst of flavor - 2 tablespoons soy sauce for seasoning - 1 tablespoon sesame oil for richness - 2 tablespoons vegetable oil for frying - 1 teaspoon fresh ginger, grated for warmth - Salt and pepper to taste for seasoning - Fresh cilantro or parsley, roughly chopped, for garnish Want to spice things up? You can add some optional ingredients for more flavor: - 1 tablespoon oyster sauce for depth - A splash of rice vinegar for brightness - A pinch of red pepper flakes for heat - Chopped mushrooms for extra texture - Baby spinach for added greens Choosing fresh vegetables makes a big difference. Here are some tips: - Look for vibrant colors, as they often mean better taste. - Choose firm vegetables without any soft spots. - Try to buy seasonal veggies for the best flavor and price. - Wash and dry your veggies well before using them to avoid excess water in your dish. - Cut your vegetables into uniform sizes for even cooking. Using these ingredients and tips will help you create a delicious vegetable fried rice. For the full cooking steps, check out the [Full Recipe]. First, gather all your ingredients. This makes cooking easier and faster. You will need: - 2 cups cooked jasmine rice (preferably chilled for better texture) - 1 cup mixed bell peppers (red, yellow, and green), diced into small pieces - 1 cup green peas (you can use fresh or frozen) - 1 medium carrot, finely chopped - ½ cup corn kernels (can be fresh or frozen) - 3 green onions, thinly sliced, including the green tops - 3 cloves garlic, minced for a burst of flavor - 2 tablespoons soy sauce for seasoning - 1 tablespoon sesame oil for richness - 2 tablespoons vegetable oil for frying - 1 teaspoon fresh ginger, grated for warmth - Salt and pepper to taste for seasoning - Fresh cilantro or parsley, roughly chopped, for garnish Make sure your rice is cold. This helps it fry better and not clump. You can cook the rice a day ahead and store it in the fridge. Chop all your veggies small. This helps them cook evenly. Start by heating vegetable oil in a large skillet or wok. Use medium-high heat for a good sizzle. Add minced garlic and grated ginger first. Sauté them for about 30 seconds until they smell great. Keep stirring to avoid burning. Next, toss in the diced bell peppers, chopped carrot, and corn. Cook these for about 3-4 minutes. Stir them often until they soften but still have a bit of bite. Add the green peas and cook for another 2 minutes. This keeps their bright color and taste. Now, push the veggie mix to one side of the skillet. Make a space in the middle for your rice. Add the chilled jasmine rice. Break up any clumps with a spatula. Let it cook for 2-3 minutes without stirring. This helps create a nice crisp bottom. Once the rice has a bit of color, drizzle soy sauce and sesame oil over it. Mix everything well to coat the rice and veggies. Fold in the sliced green onions next. Season with salt and pepper. Cook everything for another 2-3 minutes, stirring occasionally. Using cold rice is key. It keeps the grains separate when frying. Freshly cooked rice tends to stick together. If you don’t have day-old rice, spread the hot rice on a tray. Let it cool for about 30 minutes before using. Another tip is to fry the rice without stirring it right away. Let it sit for a bit to get that crispy texture. Lastly, always taste your dish. Adjust seasoning as needed for that perfect flavor. For a full guide, check out the Full Recipe for Vegetable Fried Rice. To get the right texture in your vegetable fried rice, start with chilled rice. Freshly cooked rice can be too sticky. The chill helps the grains stay separate. Use cooked jasmine rice for its flavor and fragrance. Make sure to fry the rice in a hot skillet. This helps it crisp up nicely. When cooking, let it sit undisturbed for a few minutes. This creates a delightful texture on the bottom. One common mistake is using too much oil. While oil adds flavor, too much can make the dish greasy. Stick to the recipe's measurements for the best taste. Another mistake is overcrowding the pan. If you add too many ingredients at once, they will steam instead of fry. Cook in batches if needed to keep the heat high and the vegetables crisp. Vegetable fried rice pairs well with many dishes. You can serve it with a side of spring rolls for a crispy bite. Pair it with a light soup, such as miso or hot and sour. For protein, consider adding tofu or grilled chicken. Both options blend well with the rice's flavors. You can also enjoy it with a simple salad for a fresh touch. This makes a complete meal that's colorful and satisfying. {{image_4}} You can easily make vegetable fried rice vegetarian or vegan. Just skip the meat. Use soy sauce to add flavor. For a vegan boost, try adding tofu. Crumbled firm tofu works well. Just sauté it until golden brown. This gives a nice texture and protein. You can also add more veggies like broccoli or spinach for extra nutrients. If you want to add protein, consider using eggs or chicken. Scramble in a couple of eggs at the end. This adds richness and taste. For chicken, cook bite-sized pieces first, then mix with the veggies. Shrimp is another great option. Just make sure to cook them until pink. They cook fast and add a nice flavor. You can switch up your grains too. Quinoa is a great alternative to rice. It cooks well and adds protein. Brown rice is another option for a nutty flavor. It takes longer to cook, but it's worth it. You can even try cauliflower rice for a low-carb option. Just be sure to sauté it lightly to keep its texture. To keep your vegetable fried rice fresh, store it right. Wait for it to cool to room temperature. Use an airtight container to hold the rice. Place it in the fridge and eat it within three to four days. This keeps the flavors intact and prevents spoilage. Reheating fried rice is simple. You can use the microwave or a skillet. For the microwave, place the rice in a bowl. Add a splash of water to keep it moist. Heat it for one to two minutes, stirring halfway. In a skillet, heat a bit of oil over medium heat. Add the rice and stir it often for about five minutes. This method brings back its tasty texture. If you want to save fried rice for later, freezing is great. Allow the rice to cool fully, then scoop it into freezer-safe bags. Flatten the bags to save space. Label them with the date. You can freeze it for up to three months. When ready to eat, thaw it overnight in the fridge. Reheat it as mentioned before. You can enjoy your vibrant vegetable fried rice anytime! For the full recipe, check out the instructions above. To make vegetable fried rice from scratch, start with cooked rice. Use jasmine rice for the best taste. Heat vegetable oil in a large pan. Add garlic and ginger, then sauté for a few seconds. Next, add your favorite chopped vegetables like bell peppers and carrots. Stir-fry until they soften. Push the veggies to the side and add the rice. Mix in soy sauce and sesame oil. Finally, fold in green onions and season with salt and pepper. You can find the Full Recipe for specific steps. Yes, day-old rice is perfect for fried rice. It has less moisture, which helps keep the grains separate. Fresh rice can be too sticky and clump together. If you have leftover rice, store it in the fridge overnight. This tip makes your fried rice better and easier to cook. You can use many vegetables for fried rice. Some great options include: - Bell peppers - Carrots - Green peas - Corn - Broccoli - Onions - Spinach Mix and match based on what you have. The more colorful, the better! Yes, vegetable fried rice can be healthy. It is packed with vitamins from the vegetables. You can control the oil and salt used, making it a smart choice. Adding a variety of veggies boosts nutrition and flavor. It's a great way to enjoy a filling meal without excess calories. To enhance the flavor of your fried rice, try these tips: - Use fresh herbs like cilantro or basil for a pop of taste. - Add a splash of lime juice for acidity. - Experiment with different sauces like teriyaki or oyster sauce. - Include protein like tofu or eggs for extra depth. These small changes can make a big difference! In this blog post, we explored how to make delicious vegetable fried rice. We covered essential ingredients, preparation steps, and key cooking techniques. I shared tips for perfect texture and common mistakes to avoid. You can also try different flavors with the variations and learn how to store leftovers. My final thought: vegetable fried rice is flexible and fun. You can easily adapt it to your taste. Enjoy making your own tasty dish!

Vegetable Fried Rice Simple and Tasty Meal Idea

Craving a quick, tasty meal? Look no further than this vegetable fried rice recipe! Packed with fresh veggies and bursting

To make a tasty mushroom risotto, gather these ingredients: - 1 ½ cups Arborio rice - 4 cups low-sodium vegetable broth - 1 cup fresh mushrooms (such as cremini or shiitake), sliced - 1 small onion, finely chopped - 2 cloves garlic, minced - 1 cup fresh spinach, chopped - ½ cup grated Parmesan cheese (substitute with nutritional yeast for a vegan option) - 2 tablespoons olive oil - 1 tablespoon butter (or vegan butter for a dairy-free alternative) - Salt and pepper to taste - Fresh parsley, chopped (for garnish) When choosing mushrooms, I recommend using cremini or shiitake. These mushrooms offer great flavor and texture. You can also try portobello or button mushrooms. Each type brings its unique taste to the dish, enhancing the overall experience. If you have dietary restrictions, there are easy swaps. For a gluten-free option, ensure your broth is gluten-free. Use nutritional yeast instead of Parmesan for a vegan choice. You can also replace butter with a plant-based option to keep it dairy-free. These changes make the dish accessible for everyone. Start with a medium saucepan. Pour in 4 cups of low-sodium vegetable broth. Heat over medium until it simmers gently. Once it simmers, lower the heat to keep it warm. This broth will make your risotto rich and flavorful. Grab a large skillet and add 2 tablespoons of olive oil and 1 tablespoon of butter over medium heat. Once the butter melts, add 1 small finely chopped onion and 2 minced garlic cloves. Sauté for 3 to 4 minutes. You want the onion to turn soft and clear, filling your kitchen with a wonderful smell. Now, it’s time for the star ingredient. Add 1 cup of sliced fresh mushrooms. Stir them often for 5 to 7 minutes. The mushrooms should turn golden brown and tender. This step adds deep flavor to your dish. Next, add 1 ½ cups of Arborio rice to the skillet. Stir the rice into the mix for 1 to 2 minutes. The rice will soak up the flavors and start to toast, giving it a nice nutty taste. Now, the magic begins. Use a ladle to add the warm broth, one scoop at a time. Stir often and let the rice soak up the broth before adding more. This process takes about 18 to 20 minutes. The goal is creamy rice, cooked just right. Once the rice is creamy, fold in 1 cup of chopped fresh spinach and ½ cup of grated Parmesan cheese. Stir gently until the spinach wilts and the cheese melts. This adds a lovely color and depth to your risotto. Time to season! Sprinkle in salt and pepper to taste. After seasoning, remove the skillet from heat. Let it rest for one minute. This helps the risotto to thicken just a bit more. Serve your risotto hot, and don’t forget to garnish it with fresh chopped parsley. The parsley adds a burst of color and freshness to the rich dish. Enjoy your creamy and flavorful Mushroom Risotto! For the complete recipe, check out the [Full Recipe]. To get that creamy risotto texture, you need to stir often. This helps the rice release its starch. Start with warm broth and add it slowly. Each time, let the rice soak it up before adding more. This creates a rich and velvety dish. Use Arborio rice for the best risotto. This rice has a high starch content. It cooks up creamy and soft. Other good options include Carnaroli and Vialone Nano. These types will also give you that perfect texture. Timing is key in making risotto. Keep your heat medium-low. This allows the rice to cook evenly. Stirring often is crucial. It helps avoid burning and keeps the rice from clumping. Follow the [Full Recipe] for detailed steps to get the timing just right. {{image_4}} In a vegetarian mushroom risotto, you keep all the rich flavors. Start with the base recipe. Use vegetable broth and add lots of veggies. You can include peas, bell peppers, or zucchini. This makes the dish colorful and fun. The key is to keep the creaminess with the cheese. This risotto is a great way to enjoy a hearty meal without meat. For a vegan mushroom risotto, swap out the cheese. Use nutritional yeast instead. This gives a cheesy flavor without dairy. Make sure to use vegan butter or skip it entirely. The rest of the recipe stays the same. You will still get a creamy texture from the Arborio rice. This option is perfect for anyone seeking plant-based meals. You can add proteins to your risotto for extra flavor. Cooked chicken, shrimp, or even beans work great. Just stir them in when you add the spinach. For more veggie goodness, try adding broccoli or asparagus. These will cook quickly and add more color. Each addition makes the dish unique. You can mix and match to suit your taste. Explore these variations and find your favorite twist on this creamy dish. For the full recipe, refer to the section above. To store leftover mushroom risotto, first let it cool. Then, transfer it to an airtight container. Make sure to cover it tightly to keep moisture in. You can keep it in the fridge for up to three days. This helps maintain its flavor and texture. When reheating, add a splash of broth or water. This keeps the risotto creamy. Heat it gently in a pan over low heat. Stir often to prevent sticking. You can also use the microwave, but cover it to trap steam. Reheat in short intervals, stirring in between. You can freeze mushroom risotto for later. Scoop it into freezer-safe bags or containers. Leave some space for expansion. It can last up to three months in the freezer. When ready to eat, thaw it in the fridge overnight. Then, reheat as mentioned above for the best texture. For the full recipe, check the section above. Mushroom risotto takes about 30 minutes. You spend 10 minutes prepping and 20 minutes cooking. This time lets the rice soak up the broth and flavors. Yes, you can use many types of mushrooms. Cremini, shiitake, or button mushrooms work well. Mix different kinds for extra flavor. Make sure to slice them thin for even cooking. If your risotto is too watery, cook it a bit longer. Stir it over low heat for about five minutes. This helps the liquid evaporate. You can also add a bit of extra rice to absorb the moisture. You can prepare risotto ahead, but it tastes best fresh. If you make it early, store it in the fridge. Reheat it slowly, adding a splash of broth to restore creaminess. Yes, mushroom risotto is gluten-free when made with Arborio rice and broth. Always check your broth label to ensure it is gluten-free. Using these ingredients makes a safe dish for those with gluten sensitivities. For the full recipe, check out the Mushroom Risotto Delight section. Mushroom risotto is a rich, creamy dish that anyone can make. We covered the main ingredients and alternatives for different diets. I shared step-by-step instructions for making this delicious meal and tips for the perfect texture. We discussed variations, storage solutions, and answered common questions. Experiment with different mushrooms and adapt as needed. With practice, you’ll master this dish. Enjoy your cooking!

Mushroom Risotto Creamy and Flavorful Dish

Are you ready to whip up a creamy and flavorful mushroom risotto? This dish is hearty and full of rich

To make stuffed bell peppers with quinoa, you'll need a few fresh and healthy ingredients. Here’s what you will need: - 4 large bell peppers (any color of your choice) - 1 cup quinoa, thoroughly rinsed - 2 cups vegetable broth - 1 can (15 oz) black beans, drained and rinsed - 1 cup corn kernels (fresh or frozen) - 1 medium onion, finely diced - 2 cloves garlic, minced - 1 tablespoon olive oil - 1 teaspoon ground cumin - 1 teaspoon smoked paprika - Salt and pepper to taste - 1 cup diced tomatoes (fresh or canned) - 1/2 cup shredded cheese (cheddar or Monterey Jack) - Fresh cilantro, for garnish These ingredients create a colorful and tasty dish. The quinoa will add protein, while the black beans and corn bring fiber and flavor. You can use any color of bell pepper you like, which makes it fun and vibrant. If you want to learn how to prepare this dish, check out the Full Recipe for detailed steps. - Preheat oven to 375°F (190°C). - Cook quinoa in vegetable broth according to package instructions. I start by preheating the oven. This ensures my stuffed bell peppers bake evenly. Next, I cook the quinoa. I use vegetable broth instead of water. It adds great flavor to the quinoa. I follow the package instructions carefully. Cooking quinoa usually takes about 15 minutes. - Sauté onion and garlic in olive oil. - Mix in beans, corn, tomatoes, spices, and cooked quinoa. While the quinoa cooks, I heat olive oil in a large skillet. I add diced onion and minced garlic. Sautéing them releases a sweet aroma. I cook them until the onion is soft and clear. Then, I mix in black beans, corn, and diced tomatoes. I also add ground cumin and smoked paprika for depth. The flavors blend nicely after about five minutes. - Prepare bell peppers by removing tops and seeds. - Stuff peppers with quinoa mixture and top with cheese. - Bake covered for 25 minutes, then uncovered for an additional 10-15 minutes. Now, I prepare the bell peppers. I cut off the tops and remove the seeds. This creates a perfect bowl to hold the filling. I stuff each pepper with the quinoa mixture. I press it down gently to pack it in. Finally, I sprinkle cheese on top. I cover the dish with foil and bake it. After 25 minutes, I remove the foil. I let it bake for another 10-15 minutes until the cheese is bubbly. For the full recipe, check out the Quinoa Delight Stuffed Bell Peppers. - Ensure quinoa is rinsed well to remove bitterness. - Use a variety of bell pepper colors for visual appeal. Rinsing quinoa is key. It helps to wash away saponins, which can taste bitter. A quick rinse under cold water is all you need. When it comes to bell peppers, mixing colors—like red, yellow, and green—makes your dish pop. The bright colors make your meal look as good as it tastes. - Serve on a vibrant platter with lime wedges. - Garnish with extra cilantro for added flavor. When serving, a colorful platter adds charm. Lime wedges bring a fresh zing that brightens up the flavors. A sprinkle of fresh cilantro on top adds a burst of color and flavor to each bite. It's a small touch that makes a big difference. - Overcooking or undercooking quinoa. - Not packing filling tightly in the peppers. Quinoa can be tricky. Overcooking makes it mushy, while undercooking leaves it crunchy. Keep an eye on it! Also, when stuffing the peppers, pack the filling tightly. This way, they hold together and are easier to serve. Follow these tips for perfect stuffed bell peppers every time. For the full recipe, check out the Quinoa Delight Stuffed Bell Peppers. {{image_4}} You can easily switch up the protein in your stuffed bell peppers. Substitute black beans for kidney beans or ground turkey. This change gives a new taste and texture. If you want even more protein, add cooked sausage or tofu. These options work well with the other flavors. If you seek a different texture, use lentils instead of quinoa. Lentils offer a hearty bite and are rich in protein. You can also add spinach or kale for extra nutrients. These greens mix well with the other ingredients and boost your meal's healthiness. To kick up the flavor, try adding spices like chili flakes for some heat. This small change can really make your dish pop. You can also experiment with different types of cheese. Cheddar, feta, or pepper jack can all add unique tastes to your stuffed peppers. Enjoy the fun of mixing flavors! Store any uneaten stuffed peppers in an airtight container. This keeps them fresh. Refrigerate for up to 3-4 days. You can enjoy them later as a quick meal option. You can freeze cooked stuffed peppers before baking for later use. This makes meal prep easy. Just thaw them in the refrigerator before cooking. This way, they stay tasty and fresh. To reheat, place the stuffed peppers in the oven at 350°F until warmed through. This method helps keep them moist. If you need a quick option, use the microwave for reheating. Just be sure to check that they heat evenly. - Prep time: 15 minutes | Cook time: 35 minutes | Total: 50 minutes - Yes, they can be assembled and stored in the fridge before baking. - Rice or couscous can be used as alternatives for quinoa. - Add diced jalapeños or a dash of hot sauce to the filling. - Yes, zucchini, hollowed eggplant, or mushrooms make excellent substitutes. Stuffed bell peppers with quinoa combine simple ingredients and easy steps. You learned about preparing, cooking, and storing these tasty dishes. Remember to rinse your quinoa and stuff the peppers tightly. Feel free to explore variations, adding proteins or extra spices to suit your taste. Leftovers can be a quick meal, saving you time later. Overall, these stuffed peppers are a healthy choice for any meal. Enjoy experimenting with flavors and sharing your creations!

Stuffed Bell Peppers with Quinoa Tasty and Nutritious

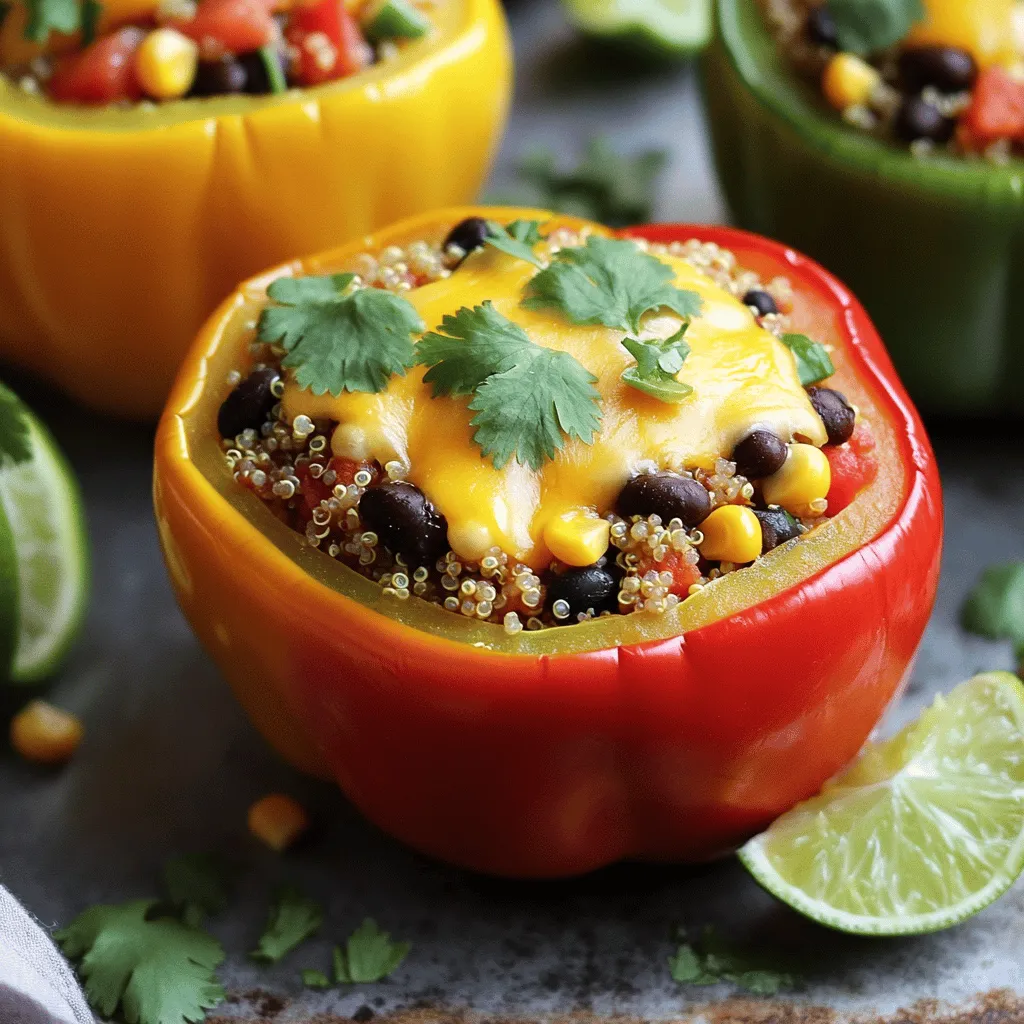
Looking for a healthy and delicious meal? Stuffed bell peppers with quinoa pack a flavorful punch and are simple to

- 1 medium head of cauliflower, grated or processed - 1 cup of mixed bell peppers, diced - 1 cup of snap peas, trimmed - 2 cloves of garlic, finely minced - 1 tablespoon fresh ginger, grated - 3 tablespoons soy sauce (or tamari) - 1 tablespoon sesame oil - 1 tablespoon olive oil - Sesame seeds and fresh herbs for garnish Cauliflower rice stir-fry is a quick and tasty meal. You start with the main ingredients. Grating or processing cauliflower makes it rice-like. This veggie makes a great base. Mixed bell peppers add color and crunch. Snap peas bring a sweet, fresh bite. Next, you add flavor with aromatics. Garlic gives a nice kick, while ginger adds warmth. Soy sauce or tamari enhances the dish with saltiness. I often use tamari for a gluten-free option. For the cooking oils, I like sesame oil for its nutty taste. Olive oil is great for sautéing. Drizzle these oils in your pan to start. Finally, garnish your dish with sesame seeds and fresh herbs. These add final touches and make the dish pop. You can find the full recipe for this vibrant meal above, and I hope you enjoy making it! To make cauliflower rice, start with a medium head of cauliflower. You can either grate it with a box grater or use a food processor. If using a food processor, pulse the florets until they look like tiny rice grains. Once you have the right texture, set the cauliflower rice aside. This step is key for a great stir-fry. Next, heat a tablespoon of olive oil in a large skillet or wok over medium-high heat. Wait until the oil shimmers. Then, add two cloves of finely minced garlic and one tablespoon of grated ginger. Sauté these for about 30 seconds. You want to smell the aroma, but don’t let them burn. This mix adds a lot of flavor to your dish. After the garlic and ginger are fragrant, add one cup of diced mixed bell peppers, one cup of trimmed snap peas, and one medium julienned carrot. Stir-fry these vibrant veggies for about 3 to 4 minutes. They should soften a bit but still be crunchy. Now, it's time to add your cauliflower rice. Stir it in and cook for another 5 to 7 minutes. This helps the rice absorb all the delicious flavors. Once everything is combined, pour in three tablespoons of soy sauce and one tablespoon of sesame oil. Toss everything well to coat. Let it cook for an additional 2 minutes. This will deepen the flavors. Before serving, taste the stir-fry and add salt and pepper as you like. For a perfect finish, garnish with sliced green onions, sesame seeds, and fresh herbs. Enjoy your flavorful veggie delight! For the complete recipe, check the [Full Recipe]. To keep your veggies crisp, cook them in a hot pan. This helps them stay bright and fresh. Stir-fry in small batches. If you crowd the pan, the heat drops. This makes the vegetables steam instead of fry. For even cooking of cauliflower rice, spread it out in the pan. Stir it often to avoid burning. Cook it for 5-7 minutes until it’s tender but not mushy. You can add spices like red pepper flakes for heat. Try adding a splash of lime juice for a zesty kick. Garlic powder or onion powder works well too. Adjust the salt and pepper to fit your taste. Start with a pinch and add more if needed. For a nice look, serve your stir-fry in colorful bowls. You can also use a large platter to show off the colors. Garnish with fresh herbs like cilantro or parsley. A sprinkle of sesame seeds adds a lovely touch. This makes your dish pop with color and taste. For the complete dish, check out the Full Recipe. {{image_4}} You can add protein to your cauliflower rice stir-fry for more nutrition. Try chicken, shrimp, or tofu. These add great taste and texture. For chicken, cut it into bite-sized pieces. Marinate it for 30 minutes in soy sauce, garlic, or ginger. This will make it tasty and tender. If you choose shrimp, go for peeled, deveined shrimp. They cook quickly and soak up flavor well. For a vegan option, use tofu. Press it to remove extra water, then cut it into cubes. Marinate it just like chicken for added flavor. Feel free to mix in other vegetables you love. Broccoli, zucchini, or mushrooms work great in stir-fry. You can also use seasonal veggies. In spring, try asparagus or peas. In fall, add butternut squash or kale. These options keep your stir-fry fresh and exciting. Just remember to cut them into similar sizes for even cooking. This recipe is easy to adapt for different diets. To make it gluten-free, just use tamari instead of soy sauce. If you want a vegan dish, skip any animal proteins. The stir-fry will still be full of flavor. For a low-carb option, you can add more cauliflower rice and less of the other veggies. This keeps your meal light but still satisfying. Check out the Full Recipe for all the details! To keep your cauliflower rice stir-fry fresh, use airtight containers. Glass containers work great, as they don’t absorb odors. You can also use plastic containers if you prefer. Store the leftovers in the fridge for up to three days. After that, the taste and texture may change. When reheating, the goal is to keep the stir-fry tasty and not mushy. The best method is to use a skillet on medium heat. Add a splash of water or oil to help it steam and stay moist. Stir often to heat evenly. If you use a microwave, cover the dish with a damp paper towel. This helps retain moisture. Avoid cooking too long; just heat until warm. Can cauliflower rice be made in advance? Yes, you can make cauliflower rice ahead of time. Grate or process the cauliflower and store it in an airtight container in the fridge. It stays fresh for about 3 days. If you want to prepare it even further in advance, you can freeze it. What's the best way to freeze cauliflower rice? To freeze cauliflower rice, spread it in a single layer on a baking sheet. Freeze it for about an hour until firm, then transfer it to a freezer bag. This method prevents clumping and makes it easy to grab a portion later. Do I need a wok to make stir-fry? You don’t need a wok, but it helps. A large skillet works well too. The key is to use high heat and enough space for the food to move around. This way, you get a nice sear and keep that crisp texture. How do I prevent the stir-fry from becoming soggy? To avoid sogginess, cook the vegetables quickly over high heat. Don’t overcrowd the pan, as this traps steam. Also, add the cauliflower rice last, letting it absorb flavors while avoiding too much moisture. Is this recipe suitable for gluten-free diets? Yes, it can be gluten-free. Use tamari instead of regular soy sauce. Always check labels to ensure all your ingredients are gluten-free. How can I make it vegetarian or vegan-friendly? This recipe is already vegetarian. For a vegan option, just ensure the soy sauce is plant-based. You can also add tofu or tempeh for extra protein and texture. In this post, we explored how to make a delicious cauliflower rice stir-fry. We covered the key ingredients, cooking steps, and how to customize your dish. I shared tips on keeping your veggies crisp and serving ideas for a great look. You can even adjust for dietary needs, making it suitable for everyone. Remember, cooking is about creativity and fun. Enjoy making this easy and healthy meal your own!

Cauliflower Rice Stir-Fry Flavorful Veggie Delight

Looking for a quick, healthy dish? My Cauliflower Rice Stir-Fry is your answer! Bursting with flavor, this veggie delight combines

- 4 large russet potatoes - 2 cups broccoli florets, finely chopped - 1 cup sharp cheddar cheese, grated - 1/2 cup sour cream - 1/4 cup milk (or plant-based alternative) - 2 tablespoons unsalted butter, softened - 1 teaspoon garlic powder - 1/2 teaspoon onion powder - Salt and freshly cracked black pepper to taste - Fresh chives or green onions, finely chopped, for garnish You need fresh ingredients to make these broccoli cheddar stuffed potatoes tasty. The russet potatoes form a cozy shell for the cheesy filling. Choose large potatoes for enough room to stuff. Broccoli adds flavor and nutrition. Sharp cheddar cheese gives that rich taste we all love. Sour cream and milk create a creamy mix. Garlic and onion powders enhance the flavor. Don't forget salt and pepper for seasoning! For a fresh touch, use chives or green onions to garnish your dish. This meal packs a punch with both taste and nutrition. Each stuffed potato has about 400 calories. You get proteins from cheese and broccoli. It also has healthy fats from sour cream. This dish is vegetarian, making it great for meatless meals. - Baking tray - Medium pot - Mixing bowl Having the right tools makes cooking easier. A baking tray holds the potatoes as they bake. A medium pot helps you boil the broccoli quickly. A mixing bowl is key for blending all the tasty filling ingredients. With these tools, you will make perfect stuffed potatoes every time. If you want to dive deeper into this recipe, check out the Full Recipe for more details! - Preheat the oven to 400°F (200°C). - Scrub the russet potatoes under cold water. Pat them dry with a towel. Prick each potato multiple times with a fork. This step helps steam escape while baking. Place the potatoes directly on the oven rack. Bake for 45-60 minutes. You want the skins crispy and the insides soft. - Bring a medium pot of salted water to a boil. - Add the chopped broccoli florets. Cook for 3-4 minutes. This keeps the broccoli bright green and tender. Drain the broccoli and rinse it under cold water. This stops the cooking process and keeps the color nice. - In a large bowl, combine the cooked broccoli, grated cheddar cheese, sour cream, milk, softened butter, garlic powder, and onion powder. - Add salt and pepper to taste. Mix everything well until creamy. This mixture should be smooth and easy to scoop. - When the potatoes are done baking, remove them from the oven. Let them cool for about 5 minutes. Carefully slice each potato lengthwise, but do not cut all the way through. - Use a spoon to scoop out some of the potato flesh. Leave enough to form a solid shell. Add the scooped potato into the bowl with the broccoli filling. Stir to blend them together. - Stuff each potato shell with the creamy mixture. Press it down lightly to pack it in. If you like, sprinkle more cheese on top. - Return the stuffed potatoes to the oven. Bake for an additional 10-15 minutes. You want the cheese to melt and bubble. - When they look golden and delicious, remove the potatoes from the oven. Let them cool slightly before serving. Garnish with chopped chives or green onions. Enjoy this tasty dish! For the complete recipe, check out the Full Recipe. To avoid a soggy filling, make sure to drain the broccoli well. After boiling, rinse it under cold water. This stops the cooking and keeps the broccoli bright. When mixing, use only a small amount of sour cream. This helps the filling stay thick and firm. For spice levels, taste your filling before adding salt and pepper. You can adjust to your liking. If you want a kick, add a pinch of cayenne or crushed red pepper. For a lively taste, try adding fresh herbs like parsley or basil. They bring a fresh note and brighten the dish. You can also experiment with spices like smoked paprika or cumin. As for cheese, sharp cheddar is classic, but try gouda for a smoky flavor. If you want something milder, go for Monterey Jack. Each cheese can change the dish's vibe entirely. These stuffed potatoes pair well with a simple salad. A mix of greens with a light vinaigrette works great. You can also serve them with roasted veggies for a hearty meal. For garnishing, fresh chives or green onions add a nice crunch and color. A dollop of sour cream on top can make it even more special. {{image_4}} You can make this dish lighter by swapping out some ingredients. Instead of sour cream, use Greek yogurt. It adds creaminess and protein. For cheese, try low-fat options or cottage cheese. Want to add more veggies? Try spinach, bell peppers, or carrots. These add flavor and nutrition without extra calories. While sharp cheddar is delicious, many cheeses work well. Try mozzarella for a gooey texture. Gouda adds a smoky flavor. For a twist, use pepper jack for some heat. If you want vegan options, look for plant-based cheese. Many brands offer great flavor and melt well. These stuffed potatoes are perfect for meal prep. Cook them ahead and store in the fridge. They stay fresh for up to five days. To freeze, wrap each potato in foil. They can last up to three months in the freezer. When you're ready to eat, just reheat them in the oven for a tasty meal. For steps on preparing these potatoes, check out the Full Recipe. To keep your broccoli cheddar stuffed potatoes fresh, follow these tips: - Allow the potatoes to cool completely before storing. - Wrap each potato tightly in plastic wrap or aluminum foil. - Place them in an airtight container to prevent moisture loss. - Store in the fridge for up to 3-4 days for the best taste. Reheating your stuffed potatoes can be easy and tasty. Here are the best methods: - Oven: Preheat the oven to 350°F (175°C). Place the potatoes on a baking tray. Heat for about 15-20 minutes. This method keeps the skin crispy and the filling warm. - Microwave: Place a potato on a microwave-safe plate. Heat for 1-2 minutes. This is faster but may make the skin a bit soft. Use these methods to enjoy your cheesy broccoli-stuffed potatoes again! For full details, check the Full Recipe. Stuffed potatoes can last up to four days in the fridge. Be sure to store them in an airtight container. This helps keep them fresh and tasty. If you want to enjoy them later, consider freezing them. Yes, you can use other potatoes. Yukon Gold or red potatoes work well, too. Just make sure they are large enough to hold the filling. Different types can add unique flavors and textures. You can use mozzarella or Monterey Jack cheese instead of cheddar. For a sharper taste, try gouda. If you want a dairy-free option, look for vegan cheese that melts well. Absolutely! You can use plant-based milk and vegan cheese. Substitute sour cream with cashew cream or a soy-based alternative. This keeps the creamy texture while making it vegan-friendly. Yes, you can prepare the filling a day in advance. Store it in the fridge until you're ready to use it. This saves time on busy days and makes the cooking process easier. For the full recipe, check out the detailed instructions. This article covered how to make delicious stuffed potatoes. We discussed key ingredients, including potatoes, broccoli, and cheese. I walked you through the steps, from prepping to baking, ensuring a tasty result. You also learned tips for perfecting flavor and meal prep ideas for quick meals. Enjoy experimenting with flavors and variations. These stuffed potatoes can fit any diet. Use your creativity to make them your own!

Broccoli Cheddar Stuffed Potatoes Tasty and Easy Meal

Looking for an easy, tasty meal that packs a punch? You’ll love these Broccoli Cheddar Stuffed Potatoes! With just a

- 1 pound large shrimp, peeled and deveined - 4 tablespoons unsalted butter - 4 cloves garlic, finely minced - 1 tablespoon lemon zest (freshly grated) - 2 tablespoons freshly squeezed lemon juice - 1 teaspoon red pepper flakes (optional) - Salt and freshly ground black pepper, to taste - 2 tablespoons fresh parsley, chopped (for garnish) When I prepare Lemon Garlic Butter Shrimp, I focus on fresh ingredients. Start with large shrimp. They should be peeled and deveined. This saves you time and makes the dish easier to eat. I use unsalted butter for a rich flavor. It melts quickly and adds creaminess. Fresh garlic is key. I mince it finely to release its strong aroma. Lemon zest brings a bright, zesty note. It makes the dish pop. Fresh lemon juice adds a tangy kick that balances the richness of the butter. For a little heat, I sometimes add red pepper flakes. Adjust these to your liking. Salt and pepper enhance all the flavors. Fresh parsley is the final touch. It adds color and freshness to the plate. You can find the full recipe for this dish to enjoy these bright flavors. - Start by melting unsalted butter in a skillet over medium heat. - Sauté minced garlic until fragrant and lightly golden. First, grab a large skillet and set it on medium heat. Add four tablespoons of unsalted butter. Let it melt slowly. Swirl the pan a bit to help it melt evenly. You don't want it to brown. Next, add four cloves of finely minced garlic. The smell will be amazing! Sauté the garlic for about one to two minutes. Make sure to stir it often. You want it fragrant and just lightly golden. - Add the shrimp to the skillet and season with salt, pepper, and red pepper flakes. - Cook until shrimp turn pink, then flip to finish cooking. Now, it’s time for the shrimp! Add one pound of large shrimp, peeled and deveined, into the skillet. Season them with salt, pepper, and, if you like a kick, red pepper flakes. I usually use about one teaspoon. Let the shrimp cook for two to three minutes on one side. Watch them turn pink and curl up. When they do, gently flip them over to finish cooking. - Pour in lemon zest and juice, stirring to coat shrimp. - Cook until shrimp are fully cooked through, then garnish with parsley. Once the shrimp are nearly done, pour in one tablespoon of lemon zest and two tablespoons of freshly squeezed lemon juice. Stir well to coat all the shrimp in the zesty sauce. Cook for another two to three minutes. The shrimp should look opaque and firm. Now, remove the skillet from heat. Finish by sprinkling two tablespoons of fresh chopped parsley on top. This adds a nice touch! This quick recipe is not just easy but also super tasty! For the full recipe, check out the details above. To avoid overcooking shrimp, watch the color. Cook them until they turn pink. This usually takes 2-3 minutes per side. If they curl tightly, they are overcooked. Keep the heat at medium to medium-high for the best texture. Peeling and deveining shrimp takes practice. Start by holding the shrimp in one hand. Use your other hand to pull off the shell, starting from the head. For deveining, make a shallow cut along the back. Remove the dark vein with a toothpick or your fingers. It’s easier than it sounds! To boost flavor, consider adding spices like paprika or cumin. Fresh herbs like basil or cilantro also work well. Feel free to experiment with flavors that excite you! For a balanced garlic and lemon taste, use fresh ingredients. Fresh lemon juice and zest give a bright flavor. Don’t skimp on garlic; it adds depth. Start with about 4 cloves, but feel free to add more if you love garlic! This shrimp pairs well with many sides. Serve it over fluffy rice or with crusty bread. A fresh salad or steamed veggies also make great sides. For presentation, serve the shrimp in a warm bowl. Garnish it with lemon wedges and parsley. This adds color and makes it look fancy. Your guests will be impressed! {{image_4}} You can easily make this dish gluten-free. Avoid soy sauce or any seasoning with gluten. Use fresh herbs and spices for flavor. Serve the shrimp over rice or a salad for a tasty meal. For those who prefer vegetarian options, replace shrimp with firm tofu or chickpeas. Cook these in the same lemon garlic butter sauce. You will still enjoy that bright flavor! To change the taste, try adding different herbs. Dill adds a fresh touch. Basil brings a sweet aroma. Both can make your dish unique. You can also mix in other seafood. Scallops add a rich flavor, while lobster makes it fancy. These options give a new twist to your dish and impress your guests. If you want to get creative, drizzle a creamy sauce over the shrimp. A simple garlic aioli works great. You can also whip up a spicy sauce with sriracha or chili paste for a kick. To pair with the dish, try a wine-based sauce. Use white wine, garlic, and butter. Simmer until it thickens and then pour over the shrimp. This sauce adds depth and richness to the meal. For the full recipe, check out the details above. To keep leftover Lemon Garlic Butter Shrimp fresh, first cool it to room temperature. Store it in an airtight container. Glass or plastic containers work well for this. Make sure to use a container that seals tightly to avoid any air exposure. This helps keep the shrimp juicy and flavorful. Try to eat it within two days for the best taste. When you reheat shrimp, you want to keep it tender. Heat a skillet over medium heat. Add a bit of butter to the pan. Once melted, add the shrimp. Heat for about 2-3 minutes, stirring gently. You can also use a microwave, but do it in short bursts. Heat in 30-second intervals to avoid overcooking. Aim for an internal temperature of 145°F to ensure it's safe to eat. Can I use frozen shrimp for this recipe? Yes, you can use frozen shrimp. Just thaw them before cooking. Place them in cold water for about 15 minutes. This will help them cook evenly. How do I know when shrimp are fully cooked? Look for a pink color and a firm texture. Shrimp should curl slightly and be opaque. This usually takes about 4-6 minutes of cooking time. Can I replace butter with olive oil? You can! Olive oil gives a nice flavor, but it won't be as rich. Use the same amount of olive oil as butter for cooking. How can I make this dish spicier? Add more red pepper flakes or a dash of hot sauce. You can also try adding chopped jalapeños for an extra kick. What can I use instead of fresh parsley? You can use cilantro or basil as a substitute. Both add a fresh taste. Dried herbs work too, but use less since they are stronger. How do I adjust the recipe for more servings? Simply double or triple the ingredients. Keep the cooking times similar but check for doneness as you cook. This ensures all shrimp are perfectly cooked. In this post, I shared how to make Lemon Garlic Butter Shrimp with ease. You learned about the key ingredients, step-by-step cooking instructions, and helpful tips for perfecting the dish. Don’t forget the many variations and storage tips to keep it fresh. With simple flavors and quick steps, this dish can impress anyone. Embrace your cooking skills and enjoy this tasty meal at your next gathering. Happy cooking!

Lemon Garlic Butter Shrimp Quick and Simple Recipe

Craving a quick and easy seafood dish packed with flavor? Look no further! This Lemon Garlic Butter Shrimp recipe is

- 2 cups rolled oats - 1 cup pecans, roughly chopped - 1/2 cup pure maple syrup These key ingredients create the base for your granola. Rolled oats give it a hearty texture, while chopped pecans add a rich, nutty flavor. The pure maple syrup acts as a natural sweetener. It brings a lovely, warm taste that pairs perfectly with the nuts. - 1/2 cup shredded coconut - 1/2 cup dried cranberries or raisins Adding shredded coconut gives a tropical twist. If you want some sweetness, mix in dried cranberries or raisins. These optional ingredients add texture and bursts of flavor to your granola. Using pure maple syrup is crucial. It enhances flavor and is healthier than processed sugars. Fresh nuts and oats are also important. They provide better taste and crunch. Always check for freshness when you shop. Good ingredients lead to great meals. You can find the full recipe that brings all these flavors together, making your granola truly special. 1. Preheat your oven to 300°F (150°C). This helps the granola bake evenly. 2. Line a large baking sheet with parchment paper. This ensures no sticking. 3. In a large bowl, combine: - 2 cups rolled oats - 1 cup pecans, roughly chopped - 1/2 cup shredded coconut (optional) - 1/2 teaspoon ground cinnamon - 1/4 teaspoon sea salt 4. Mix well until all the dry ingredients are combined. 1. In a separate bowl, whisk together: - 1/2 cup pure maple syrup - 1/4 cup melted coconut oil - 1/2 teaspoon pure vanilla extract 2. Stir until smooth and well mixed. 3. Drizzle this wet mixture over the dry ingredients. 4. Mix thoroughly until everything is coated. 1. Spread the granola mix onto the prepared baking sheet. 2. Press it down gently to form a compact layer. This helps with crunchiness. 3. Bake for 25-30 minutes. Stir halfway through to toast it evenly. 4. Watch for a golden brown color and a rich aroma. 5. Once done, remove it from the oven and let it cool completely. 6. As it cools, it hardens into a satisfying crunch. 7. If using, mix in dried cranberries or raisins once cool. 8. Store your granola in an airtight container for freshness. For the full recipe, check the [Full Recipe]. To get that perfect crunch in your granola, spacing on the baking sheet is key. Spread your granola out in a thin, even layer. This allows hot air to circulate and crisp all the pieces. Stirring the granola while it bakes also helps. At the halfway mark, give it a gentle stir. This ensures every bit gets that golden toast. You can easily adjust the sweetness of your granola. If you like it sweeter, add more maple syrup. If you prefer less, just cut back a bit. Adding nuts or seeds brings more variety to your mix. Try walnuts, almonds, or even pumpkin seeds for a different crunch. Granola is great on its own, but you can make it even better. Pair it with yogurt or milk for a tasty breakfast. You can also sprinkle it on smoothies for added texture. The options are endless! For more ideas, check out the Full Recipe. {{image_4}} You can change up the flavor of your Maple Pecan Granola to keep it exciting. One fun option is to add chocolate chips. Just mix in about 1/2 cup of dark chocolate chips after baking. This gives you a sweet twist. Another idea is to add spices like nutmeg or cardamom. Start with 1/4 teaspoon of each spice. These spices can make your granola warm and cozy. They add depth and make each bite special. If you need a gluten-free option, use certified gluten-free oats. This way, everyone can enjoy your crunchy treat. Just check the label to be sure. For vegan modifications, replace the honey with extra maple syrup. You can also use a plant-based oil. This keeps the recipe vegan and just as delicious. Maple Pecan Granola is very versatile. You can use it as a topping for desserts. Sprinkle it over ice cream or yogurt for added crunch. It makes your desserts feel fancy and fun. Another great way to enjoy granola is to add it to breakfast bowls. Mix it with yogurt and fresh fruit. This creates a tasty and healthy breakfast. You can also enjoy it with milk for a quick snack. Feel free to explore these variations to make your Maple Pecan Granola your own! For the full recipe, check out the steps I shared earlier. To keep your maple pecan granola fresh, use an airtight container. Glass jars work great. They help keep out air and moisture. Store your granola at room temperature. A cool, dry place in your kitchen is best. Avoid direct sunlight to keep the flavors intact. Homemade granola lasts about two weeks when stored properly. After that, it may lose its taste and crunch. Look for signs of spoilage, like a stale smell or off flavors. If you see mold or any color changes, throw it away. If your granola loses its crunch, don’t fret! You can easily fix it. Spread the granola on a baking sheet. Bake it at 300°F (150°C) for about 10 minutes. Keep an eye on it to avoid burning. This method brings back the crunchiness, making your snack enjoyable again! To make this granola, first gather your ingredients. You need rolled oats, chopped pecans, and pure maple syrup. I mix dry ingredients in one bowl and wet ones in another. Then, I combine both and spread them on a baking sheet. Bake at 300°F for 25-30 minutes, stirring halfway. Let it cool completely, and it will get crunchy. You can add many fun mix-ins to your granola! Here are some ideas: - Shredded coconut - Dried cranberries - Raisins - Chocolate chips - Pumpkin seeds Feel free to get creative! You can mix and match to find your favorite combination. Yes, Maple Pecan Granola has many health benefits. Here’s why: - Rolled oats provide fiber, which helps digestion. - Pecans add healthy fats and protein. - Pure maple syrup offers natural sweetness without refined sugar. - Coconut contributes healthy fats and adds flavor. These ingredients make this snack both tasty and good for you. Maple pecan granola is simple and fun to make. We covered key ingredients like rolled oats and pure maple syrup. You learned how to combine them and achieve the right crunch. Remember to store your granola properly for the best taste. Try different flavors and add-ins to make it your own. Enjoy your delicious, homemade granola with yogurt or in snacks. It's a great treat that you can adapt to your style. Happy cooking!

Maple Pecan Granola Crunchy and Flavorful Snack

Are you looking for a crunchy and flavorful snack that’s packed with nutrition? Look no further than my Maple Pecan

Older posts
Newer posts
← Previous Page1 … Page67 Page68 Page69 … Page86 Next →

dsad

© 2026 lazychefmagic • Built with GeneratePress

Our Policies

  • Copyright Policy
  • Cookie Policy
  • GDPR Policy
  • Privacy Policy
  • Disclaimer
  • Terms Of Use

More Information

  • Home
  • About
  • Contact
  • Appetizers
  • Dessert
  • Dinner
  • Drinks
©2026, lazychefmagic About Back To Top