Skip to content
DisclaimerTerms Of UseGDPR PolicyCookie Policy

lazychefmagic

  • Home
  • Drinks
  • Appetizers
  • Dinner
  • Dessert
  • About
  • Contact
  • Privacy Policy
DisclaimerTerms Of UseGDPR PolicyCookie Policy

NO-ING-IMG

To make a delicious Coconut Curry Lentil Soup, gather these simple ingredients: - 1 cup red lentils, thoroughly rinsed - 1 can (13.5 oz) full-fat coconut milk - 4 cups vegetable broth - 1 medium onion, finely diced - 2 cloves garlic, finely minced - 1-inch piece of fresh ginger, grated - 2 tablespoons red curry paste - 1 teaspoon ground turmeric - 1 teaspoon ground cumin - 1 cup diced tomatoes (either fresh or canned) - 1 cup fresh spinach, chopped - 2 tablespoons extra virgin olive oil - Sea salt and freshly cracked black pepper, to taste - Fresh cilantro leaves, for garnishing Using fresh ingredients makes a huge difference. The red lentils bring a lovely texture and protein. Coconut milk adds creaminess and richness. The spices, like turmeric and cumin, give a warm flavor. Fresh ginger and garlic add zest and depth. When you rinse the lentils, it removes any dust and helps them cook better. This small step is vital for a clean taste. You can adjust the spices based on your preference. Want it spicier? Add more red curry paste. Want it milder? Use less. For the best flavor, use high-quality vegetable broth. It creates a solid base for the soup. Fresh spinach adds color and nutrients. The cilantro at the end gives a burst of freshness. For the complete recipe, check out the [Full Recipe]. 1. Heat olive oil over medium heat. Start by pouring 2 tablespoons of extra virgin olive oil into a large pot. Let it warm up, but do not let it smoke. 2. Sauté diced onion until softened. Add 1 medium onion, finely diced. Cook it for about 5 minutes until it becomes soft and turns clear. 1. Add minced garlic and grated ginger. Toss in 2 cloves of minced garlic and 1-inch piece of grated ginger. Stir them for 2 minutes until you smell their lovely aroma. 2. Incorporate red curry paste, turmeric, and cumin. Next, add 2 tablespoons of red curry paste, 1 teaspoon of ground turmeric, and 1 teaspoon of ground cumin. Mix well so the spices blend with the onion mixture. Cook for 1 minute to let the spices release their flavors. 1. Stir in diced tomatoes. Add 1 cup of diced tomatoes, either fresh or canned, to the pot. Stir to combine and let it cook for about 3 minutes. This helps the flavors mix well. 2. Add red lentils and vegetable broth. Pour in 1 cup of thoroughly rinsed red lentils and 4 cups of vegetable broth. Bring it to a gentle boil while stirring occasionally. 3. Bring to a gentle boil, then simmer. Once it boils, lower the heat and let it simmer uncovered for about 20 minutes. The lentils should become soft and fully cooked. 1. Stir in coconut milk and spinach. After the lentils are tender, add 1 can (13.5 oz) of full-fat coconut milk and 1 cup of chopped fresh spinach. Stir and let it heat through for another 5 minutes. 2. Season and serve. Taste the soup and add sea salt and freshly cracked black pepper to your liking. Ladle the hot soup into bowls. Garnish with fresh cilantro leaves for a colorful touch. This Coconut Curry Lentil Soup is not just simple; it's also packed with flavor and nutrients. Check the Full Recipe for additional tips and variations. Rinsing lentils before use is key. It removes dust and debris. Rinsed lentils cook better and taste fresher. Simply place them in a fine mesh strainer and rinse under cold water. Adjusting spice levels is easy. If you want it milder, use less curry paste. You can also add more coconut milk for creaminess. For a spicier kick, add chili flakes or hot sauce. Taste as you go, and you’ll find the right balance for you. Coconut Curry Lentil Soup pairs well with many sides. Serve it with warm naan bread or jasmine rice. These options soak up the soup’s rich flavors. For garnishing, fresh cilantro is a great choice. You can also add lime wedges for a zesty touch. A sprinkle of sesame seeds adds crunch and visual appeal. These details enhance your dish and impress your guests. {{image_4}} You can switch up the coconut milk if you want. Almond milk or cashew cream works great. They both add a nice, nutty flavor. If you're out of red lentils, green lentils or chickpeas are good options. Just remember, cooking times may change. Green lentils take longer to soften, while chickpeas need to be pre-cooked. Want to mix up the taste? Try adding different vegetables. Carrots, sweet potatoes, or bell peppers all fit well. Each adds a unique twist and boosts the nutrition. You could also use a different type of curry paste. Green curry paste gives a fresh, vibrant flavor, while yellow curry paste adds warmth. Experiment to find your favorite! Store leftover soup in airtight containers. Glass containers work best, as they are durable and do not stain. Allow the soup to cool before sealing. This way, it keeps its flavor and texture. The soup stays fresh in the fridge for about 3 to 5 days. For longer-term storage, freeze the soup. Use freezer-safe containers or bags. Make sure to leave some space for expansion. The soup can last up to 3 months in the freezer. To thaw, place the container in the fridge overnight. You can also use the microwave for quick thawing. When ready to eat, reheat the soup on the stove. Stir occasionally until it heats through. If the soup seems thick, add a splash of broth or water to thin it out. If you want the full recipe, check the details above. Coconut Curry Lentil Soup lasts about 4 to 5 days in the fridge. Store it in an airtight container. Make sure it cools down before sealing. This way, it stays fresh and tasty longer. Yes, you can make this soup in advance. It tastes even better the next day. Just let it cool and store it in the fridge. When you’re ready, heat it up on the stove or in the microwave. Absolutely! Coconut Curry Lentil Soup is vegan-friendly. It uses plant-based ingredients like lentils, coconut milk, and vegetables. You can enjoy it while sticking to a vegan diet. You can serve this soup with warm naan bread or rice. A fresh side salad also pairs well. For extra fun, try adding some avocado slices on top. To add spice, mix in extra red curry paste. You can also add chopped jalapeños or red pepper flakes. Start with a small amount, taste, and adjust to your liking. Coconut Curry Lentil Soup combines simple ingredients for rich flavors. You learned to prepare it step-by-step, from sautéing vegetables to incorporating spices. Tips for adjusting spice levels and pairing suggestions enhance your meal. This dish is versatile, great for storage, and packed with nutrients. Enjoy experimenting with different flavors and ingredients. You'll create a comforting soup that friends and family will love. Keep this recipe handy for future meals!

Coconut Curry Lentil Soup Nourishing and Simple Recipe

Warm up your kitchen with my Coconut Curry Lentil Soup! This nourishing recipe is simple, tasty, and perfect for any

- 2 cups fresh strawberries, hulled and sliced - 2 tablespoons granulated sugar - 1 teaspoon vanilla extract - 1 pound store-bought pound cake or sponge cake, cut into bite-sized cubes - 2 cups heavy whipping cream - 1/4 cup powdered sugar - 1 teaspoon vanilla extract - Fresh mint leaves for garnish - Optional: Extra strawberries for garnish - Alternatives for fresh strawberries: You can use frozen strawberries. Just thaw and drain them well. - Options for sugar replacement: Try honey or agave syrup in place of granulated sugar. - Dairy-free cream options: Use coconut cream or almond cream for a dairy-free version. Each ingredient plays a key role in making this tasty trifle. The fresh strawberries give a sweet and juicy burst. Sugar helps those strawberries shine and enhances their flavor. The vanilla adds a warm, inviting note to the cream. The cake forms a soft base, while the whipped cream brings a light, airy touch. If you want to change things up, you can easily swap ingredients. Using frozen strawberries can save you time. Just make sure to let them drain. Honey or agave syrup can keep the sweetness but add a unique twist. For a dairy-free treat, coconut cream works well and adds a nice flavor. These simple swaps let you enjoy this dessert no matter your taste or dietary needs. Each choice still leads to a delightful Strawberry Shortcake Trifle. For the full recipe, check the earlier section. Enjoy! First, grab 2 cups of fresh strawberries. Hull and slice them into thin pieces. Place the sliced strawberries in a large bowl. Add 2 tablespoons of granulated sugar and 1 teaspoon of vanilla extract. Toss the strawberries gently until they are well coated. Let them sit for 15 to 20 minutes. This resting time allows the sugar to draw out the juice from the strawberries. You’ll see the strawberries start to glisten as they macerate. Next, take 2 cups of heavy whipping cream. In a clean mixing bowl, combine the cream with 1/4 cup of powdered sugar and 1 teaspoon of vanilla extract. Use an electric mixer on medium-high speed. Beat the mixture for about 3 to 5 minutes. Stop once you see stiff peaks form. Be careful not to overbeat, or your cream could turn grainy. The goal is fluffy and smooth whipped cream. Now it’s time to layer your trifle. Choose a clear trifle bowl or individual glasses for serving. Start with a layer of bite-sized cubes of pound cake. Spoon a layer of whipped cream over the cake. Then, add a layer of your macerated strawberries along with their juices. Repeat this layering process until you reach the top. Make sure the last layer is a generous amount of whipped cream. The clear dish will show off your beautiful layers. After assembling, cover the trifle with plastic wrap. Place it in the fridge to chill. This chilling time enhances the flavor. I suggest chilling for at least 2 hours. This allows the cake to soak up strawberry juice. The flavors will blend beautifully, making each bite a delight. To make great whipped cream, avoid overbeating. Look for stiff peaks, not grainy lumps. Start with cold cream for the best results. Mix heavy cream, powdered sugar, and vanilla together. Beat on medium-high speed for 3 to 5 minutes. Stop when peaks form and the cream is thick and smooth. This silky texture makes the trifle shine. Use clear glass cups or jars when serving. This way, guests see the beautiful layers inside. Add a sprig of mint on top for color and flavor. You can also place a few extra strawberry slices on the cream. This adds a fun touch and makes the dessert more inviting. Pair your trifle with refreshing summer drinks. Lemonade or iced tea goes well with this treat. Think about serving it at summer picnics or birthday parties. The light, fresh flavors make it perfect for warm days. For a fun twist, serve it at brunch with friends. Everyone will love this delightful dessert! For the complete recipe, check the Full Recipe section. {{image_4}} You can swap strawberries for other berries like blueberries, raspberries, or blackberries. Each fruit brings its own taste and color. For a seasonal twist, try peaches or cherries in summer. These fruits mix well with cream and cake, creating a fun new dessert. Want to change the flavor? Consider adding extracts. Almond or lemon extracts can brighten the taste. You can also add liqueurs like Amaretto or fruit-flavored syrups for extra zest. Just a little can make a big difference in flavor. For gluten-free options, use gluten-free cake or biscuits. There are many great brands to choose from. If you want a vegan version, swap heavy cream for coconut cream. Use vegan cake instead of regular cake. These swaps keep the trifle tasty while meeting dietary needs. Try these variations to create your perfect strawberry shortcake trifle. For the complete recipe, check the Full Recipe section. To keep your Strawberry Shortcake Trifle fresh, store it in the fridge. Use a large, airtight container to prevent it from drying out. If you have a trifle bowl, cover it tightly with plastic wrap. This will keep the flavors intact. If you plan to save single servings, clear glass jars work great, too. Your trifle will stay fresh in the fridge for 2 to 3 days. The flavors blend better over time, but the cake may lose some texture. To avoid sogginess, you can freeze layers before assembly. This way, you can enjoy a fresh trifle anytime you want. Just thaw the layers before putting them together. For best results, assemble the trifle the same day you plan to serve it. A Strawberry Shortcake Trifle lasts about 2-3 days in the fridge. Store it in an airtight container. The layers may soften over time, but the flavors remain tasty. Yes, you can make the trifle a day ahead. Prepare it and chill it in the fridge overnight. This allows the flavors to blend well. Just remember to add any fresh garnishes right before serving. Serve the trifle with light dishes like fruit salad or a simple green salad. Pair it with refreshing drinks such as lemonade or iced tea. These will balance the sweetness of the trifle. Yes, you can use frozen strawberries! Thaw them first and drain any extra juice. They may not be as firm, but they still taste great. Adjust the sugar based on their sweetness. Pound cake is dense and buttery, while sponge cake is light and airy. If you want a rich flavor, use pound cake. For a lighter texture, choose sponge cake. Both work well for this trifle. For the full recipe, check out the details above. This blog post detailed how to make a delicious Strawberry Shortcake Trifle. We covered essential ingredients, step-by-step instructions, and helpful tips for great results. We also explored variations and storage info to enhance your enjoyment. As you create your trifle, remember to have fun and experiment. Each layer can shine with fresh flavors. Enjoy each bite, and share this sweet treat at your next gathering! Your guests will love it, and you’ll feel proud of your creation.

Strawberry Shortcake Trifle Delightful Summer Treat

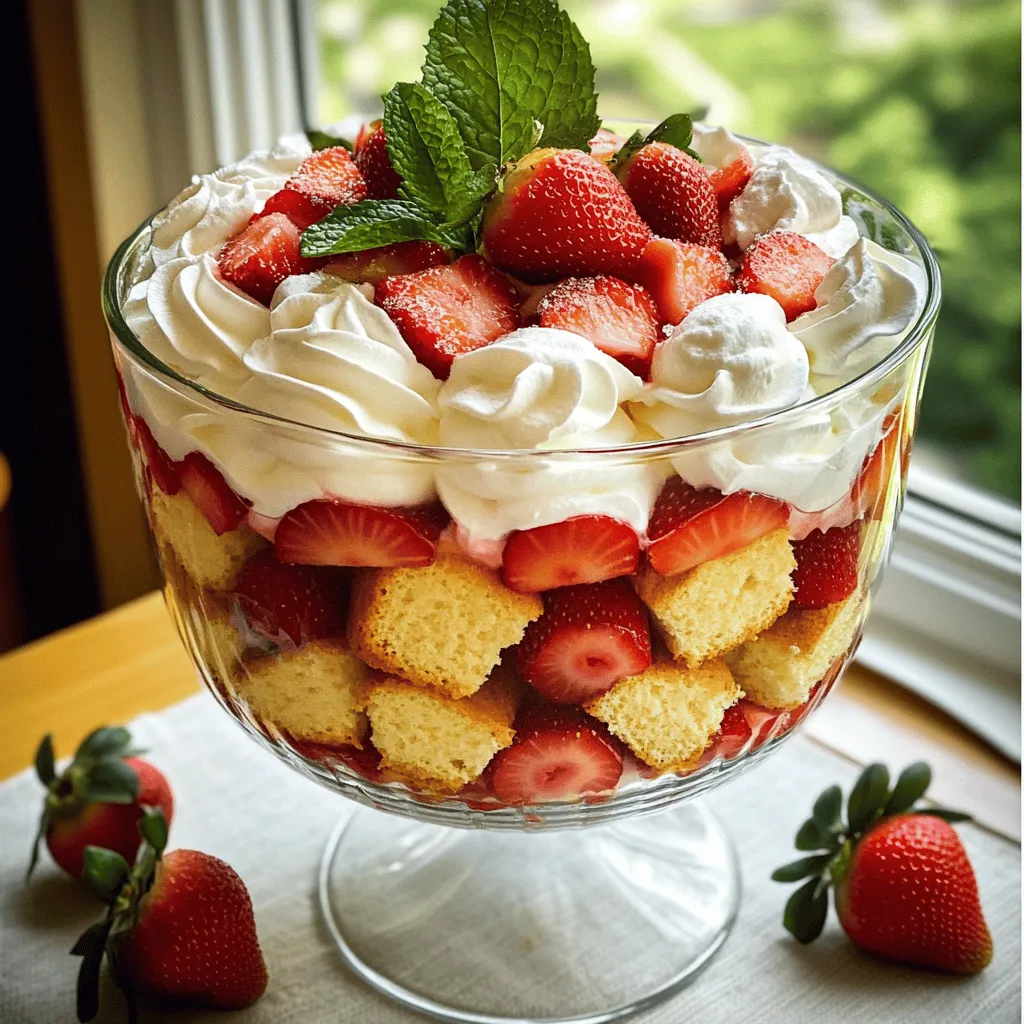
Looking for a fun and easy summer dessert that impresses? You must try my Strawberry Shortcake Trifle! This delightful treat

- 1 cup rolled oats - 2 cups unsweetened almond milk (or preferred milk) - 1 cup fresh blueberries (plus extra for garnishing) - 1 tablespoon chia seeds - Zest of 1 lemon - 2 tablespoons maple syrup (or honey) - 1/2 teaspoon vanilla extract - A pinch of salt - Optional toppings: sliced almonds, coconut flakes, additional lemon zest, fresh mint leaves Blueberry lemon overnight oats are a simple and tasty meal. Each ingredient adds something special. Rolled oats are the base. They make the dish filling and hearty. Almond milk gives it a smooth texture. You can use any milk you like. Fresh blueberries bring a sweet burst of flavor. Chia seeds add a nice crunch and a bit of nutrition. Lemon zest brightens the oats. It gives them a fresh taste. Maple syrup or honey sweetens the dish without being too much. A pinch of salt enhances all the flavors. For a fun twist, consider toppings. Sliced almonds add a nutty flavor. Coconut flakes give a tropical feel. More lemon zest can intensify the citrus aroma. Fresh mint leaves make it look pretty and fresh. To get the full recipe, check out the details above. Each ingredient plays a role in making blueberry lemon overnight oats a delightful and healthy choice! 1. In a spacious mixing bowl, combine: - 1 cup rolled oats - 1 tablespoon chia seeds - Zest of 1 lemon - A pinch of salt 2. Pour in: - 2 cups unsweetened almond milk (or your choice) - 2 tablespoons maple syrup (or honey) - 1/2 teaspoon vanilla extract 3. Use a whisk to mix it all well. You want the oats and chia seeds to soak up the liquid. 1. Gently fold in: - 1 cup fresh blueberries 2. Be careful not to crush them. Reserve a handful for later to make your oats look pretty. 1. Distribute the mixture into jars or containers. I like mason jars for this. 2. Seal them tight and place them in the fridge. Let them chill overnight or for at least 4 hours. Enjoy easy mornings with this quick recipe. For the full details, check the Full Recipe. To get the right texture for your oats, pay attention to the milk. I suggest using almond milk, but any milk works. If your oats seem thick, add a splash more milk. This small change makes a big difference. Soaking time is key, too. Let the oats sit overnight, or at least four hours. This helps them absorb the liquid and flavors. Soaking allows the oats to soften just right. Serve your overnight oats in clear jars. This way, you can show off the bright colors inside. It looks inviting and fresh! For a lovely touch, add a sprig of mint on top. This not only adds charm but also makes it pop visually. You want to make your breakfast look as good as it tastes! To boost the flavor, think about extra toppings. Sliced almonds and coconut flakes add crunch. You can also sprinkle more lemon zest to really enhance the lemon flavor. If you want a twist, mix in some fresh mint leaves. These small changes can elevate your meal. They make every bite exciting and fresh! For the full recipe, check out the [Full Recipe]. {{image_4}} You can switch up the fruit in your overnight oats for fun flavors. Here are two tasty ideas: - Strawberry Banana Overnight Oats Use sliced strawberries and banana for a sweet combo. Mix them in just like blueberries. The strawberries add a fresh taste, while the banana makes it creamy. This pair works well with lemon zest, too. - Mixed Berry Medley Combine blueberries, raspberries, and blackberries. This mix gives a burst of flavor and color. Use equal parts of each berry for a balanced taste. You can even smash some berries for extra juice in the oats. If you have dietary needs, you can tweak this recipe easily. - Vegan-friendly options Just use plant-based milk, like almond or oat milk. Skip the honey and stick with maple syrup for sweetness. This keeps your oats fully vegan and still delicious. - Gluten-free substitutions Make sure to choose gluten-free oats. Most rolled oats are safe, but check the label. This way, everyone can enjoy your yummy overnight oats. You can also get creative with seasonal flavors to change things up. - Fall-inspired with pumpkin spice Add pumpkin puree and pumpkin spice to your oats. This gives a warm, cozy feel perfect for chilly mornings. Pair it with chopped pecans for a crunchy topping. - Tropical version with coconut and pineapple Use coconut milk and fresh pineapple chunks. This version brings summer vibes to your breakfast. Top with shredded coconut for added texture. Enjoy a taste of the tropics all year round. For more ideas, check out the Full Recipe for Blueberry Lemon Overnight Oats! Store your blueberry lemon overnight oats in the fridge. They last for up to five days. Check for signs of spoilage, like a sour smell or odd color. If you see mold, toss them out. Yes, you can freeze overnight oats! Just put them in freezer-safe containers. They last for about three months in the freezer. To thaw, move them to the fridge overnight. If you want to eat them warm, heat them in the microwave. Add a splash of almond milk to help loosen the oats. For the full recipe, check out our complete guide on making blueberry lemon overnight oats! Overnight oats are a no-cook way to prepare oatmeal. You mix oats with liquid and let them sit overnight. This allows the oats to absorb the liquid. In the morning, you have a creamy, tasty meal ready to enjoy. Nutritionally, overnight oats are great. They are high in fiber, which is good for digestion. They also provide protein, especially if you use milk or yogurt. The oats can keep you full and energized. You can add fruits, nuts, and seeds for extra vitamins and minerals. You can store overnight oats in the fridge for up to five days. This makes them perfect for meal prep. Just keep them in airtight containers. If you notice any change in smell or color, it’s best to throw them away. You can freeze overnight oats too, but the texture may change. If you want to freeze them, use a freezer-safe container. When you’re ready to eat, thaw them in the fridge overnight. Stir well before eating. Yes! You can easily customize your overnight oats. Try different milk like coconut or soy. You can also change the sweetener. Maple syrup, honey, or agave work well. For added nutrition, you can include protein powder or Greek yogurt. You can mix in your favorite fruits, nuts, or seeds. This flexibility makes overnight oats fun and personal. They can fit any taste or dietary need. For the full recipe, check the section above. Overnight oats are a simple, tasty way to start your day. We covered key ingredients, easy steps, and helpful tips. You can mix different fruits and toppings to suit your taste. These oats are good for meal prep, saving time in the morning. Remember to store them correctly to maintain freshness. Enjoy your delicious and healthy breakfast on busy mornings!

Blueberry Lemon Overnight Oats Tasty and Healthy Meal

Start your day right with Blueberry Lemon Overnight Oats! This delightful meal is easy to make and packed with nutrients.

- 1 pound baby carrots (or regular carrots, peeled and cut into uniform sticks) - 3 tablespoons high-quality olive oil - 4 cloves fresh garlic, finely minced - 1 teaspoon dried thyme - 1 teaspoon dried rosemary - 1 teaspoon honey (optional, for a touch of sweetness) - Sea salt and freshly cracked black pepper, to taste - Fresh parsley, finely chopped (for an aromatic garnish) When I cook garlic herb roasted carrots, I start with the freshest ingredients. Fresh carrots give the best taste and texture. You can use baby carrots or regular carrots, but make sure to cut them into equal sticks. This helps them cook evenly. Next, I always choose a high-quality olive oil. It adds richness and depth to the dish. The garlic is key here. I finely mince four cloves to pack in that bold flavor. Thyme and rosemary add a lovely aroma that pairs well with the sweetness of the carrots. If you like a hint of sweetness, add honey. It balances the flavors nicely. Don't forget the sea salt and freshly cracked black pepper. These simple seasonings enhance the dish without overpowering it. Finally, fresh parsley not only adds a pop of color but also a bright flavor. The mix of these ingredients creates a delightful side dish. You can find the full recipe above to guide you through the cooking process. Enjoy crafting this vibrant dish! Start by preheating your oven to 425°F (220°C). This is the best temperature for roasting. The high heat helps the carrots to become tender and caramelized. In a large mixing bowl, pour in 3 tablespoons of olive oil. Add 4 finely minced cloves of garlic, 1 teaspoon of dried thyme, and 1 teaspoon of dried rosemary. If you like a hint of sweetness, add 1 teaspoon of honey. Don't forget to sprinkle in some sea salt and freshly cracked black pepper. Whisk everything together until well mixed. Now, take 1 pound of baby carrots and place them in the bowl with the herb mixture. Using your hands or a spatula, toss the carrots well to coat them evenly. This step is important for great flavor. Make sure every carrot gets some of that tasty mixture. Line a baking sheet with parchment paper. This makes cleanup easy later. Spread the seasoned carrots out in a single layer on the sheet. Make sure to space them out. This allows them to cook evenly and get that nice roast. Now, it's time to bake! Place the baking sheet in the preheated oven. Roast the carrots for about 20-25 minutes. Remember to stir or turn them halfway through cooking. This helps them brown evenly. They should be tender when pierced with a fork and have a lovely caramelized color. Once the carrots are done, take the baking sheet out of the oven and let them cool for a few minutes. Transfer the roasted carrots to a pretty serving dish. For a pop of color, sprinkle with finely chopped fresh parsley just before serving. This adds a nice touch to your meal. You can find the Full Recipe for all the details. To get the right tenderness and caramelization, follow these steps: - Cut Uniformly: If you use regular carrots, cut them into even sticks. This helps them cook evenly. - High Heat: Roast at 425°F (220°C). The hot oven creates a beautiful caramelization. - Don’t Overcrowd: Spread the carrots out on the baking sheet. This allows for even heat and browning. - Stir Midway: Halfway through roasting, give them a stir. This ensures all sides get that nice golden color. Selecting the best carrots makes a big difference. Here’s what to consider: - Baby Carrots vs. Regular: Baby carrots are sweeter and tender. Regular carrots have a stronger flavor and are great for roasting. - Freshness Matters: Look for firm, bright carrots with no soft spots. Fresh carrots have the best taste and texture. - Size: Smaller carrots often cook faster. If using larger ones, cut them to match the size of the baby carrots. You can tweak the herbs and spices to fit your taste. Here are some ideas: - Herb Variations: Try basil or oregano if you want a different flavor profile. Each herb brings its unique twist. - Spice It Up: A pinch of cumin or paprika can add warmth. Experiment to find your favorite mix. - Sweetness: If you like a sweeter touch, adjust the honey amount. You can also try maple syrup for a different flavor. Explore the [Full Recipe](#) to see how these tips come together for a delicious side dish! {{image_4}} You can add spices for extra flavor. Consider using cumin or paprika. Cumin gives a warm, earthy taste. Paprika adds a hint of sweetness and color. Just sprinkle a little on your carrots before roasting. This small change can boost the taste greatly. You can play with the sweetness too. Adjust the amount of honey based on your taste. Add a bit more for a sweeter dish. Or, reduce it for a more savory flavor. Balancing honey and herbs changes the whole taste. Finding your perfect mix makes the dish special. Mix in other veggies for a colorful dish. Think about adding bell peppers, zucchini, or onions. These add new textures and tastes. Chop them into similar sizes as the carrots. This helps all the veggies cook evenly. You can create a vibrant, tasty medley that everyone will love. To store leftover garlic herb roasted carrots, place them in an airtight container. Make sure they cool down before sealing. These carrots will stay fresh for about 3 to 5 days. Keep them in the fridge to maintain their flavor and texture. If you notice any moisture, use a paper towel to absorb it before sealing the container. This helps avoid sogginess. When it's time to enjoy your leftovers, reheating is simple. The best way is to use an oven. Preheat it to 350°F (175°C). Spread the carrots on a baking sheet in a single layer. Heat them for about 10 to 15 minutes until warm. This will help keep them crispy. You can also use a microwave, but be careful. Heat them in short bursts, stirring in between. This prevents them from getting mushy. If you have more carrots than you can eat, freezing is a great option. First, let the carrots cool completely. Then, place them in a freezer-safe bag or container. Try to remove as much air as possible. Label the bag with the date. These carrots can last up to 3 months in the freezer. To thaw, move them to the fridge overnight. You can then reheat them as mentioned above. Enjoy your tasty garlic herb roasted carrots later! For the full recipe, make sure to check out the cooking details. Roasted carrots usually last about 3-5 days in the fridge. Store them in an airtight container to keep them fresh. You can also wrap them in plastic wrap if you prefer. When you want to eat them, check for any signs of spoilage first. Yes, you can use frozen carrots, but fresh ones taste better. Frozen carrots may not roast as well as fresh ones. They tend to be softer and may release more water. If you use frozen carrots, adjust the cooking time. Roast them a bit longer to get them tender. Garlic herb roasted carrots pair well with many dishes. Consider serving them with grilled chicken, fish, or steak. You can also add them to a grain bowl with quinoa or rice. For a vegetarian option, serve them with a hearty salad or pasta. You can prep garlic herb roasted carrots ahead of time. Cut and season the carrots, then store them in the fridge. Just remember to roast them within 24 hours for the best flavor. You can also roast them in advance and reheat before serving. To make this recipe vegan, skip the honey. You can use maple syrup or agave syrup instead. Both options add a sweet touch without animal products. This change keeps the dish plant-based while still being delicious. Many herbs work great with roasted carrots. You can try dill, oregano, or basil for a different flavor. Fresh herbs like thyme and rosemary are also excellent choices. Feel free to mix and match to find your favorite blend. Roasting carrots is simple and fun. We covered the important steps, from choosing the right carrots to perfecting flavors. Remember to coat them well and roast at high heat for the best results. Feel free to try different spices or herbs to match your taste. Store any leftovers properly for later enjoyment. With these tips, you’ll create a tasty side dish that everyone will love. Enjoy your cooking, and get ready to impress your friends and family!

Garlic Herb Roasted Carrots Flavorful Side Dish Delight

If you’re looking for a side dish that elevates any meal, you’ve found it! Garlic Herb Roasted Carrots combine vibrant

- 400g spaghetti - 6 cloves garlic, thinly sliced - 1/2 cup extra virgin olive oil - 1/2 teaspoon red pepper flakes - Zest and juice of 1 lemon - 1/4 cup fresh parsley, finely chopped - 1/4 cup grated Parmesan cheese (optional) - 1 cup cherry tomatoes, halved To make spaghetti aglio e olio, you need a few key ingredients. First, the spaghetti acts as the base. I like to use 400g for a hearty meal. Garlic is essential. Six cloves, thinly sliced, bring the dish to life. The olive oil is your sauce. Use 1/2 cup of good extra virgin olive oil for the best taste. If you want to spice things up, add optional ingredients. A little red pepper flakes, about 1/2 teaspoon, gives a nice kick. You can also add the zest and juice of one lemon to make the dish bright. Fresh parsley, finely chopped, adds color and freshness. For serving, I like to top my dish with grated Parmesan cheese. About 1/4 cup is a good amount. Cherry tomatoes, halved, also work great. They add sweetness and extra flavor. Check out the Full Recipe for more details! 1. Bring a large pot of salted water to a boil. 2. Add the spaghetti and cook until it is al dente, about 8-10 minutes. 3. Save about 1 cup of the pasta water before draining. 1. In a large pan, heat the olive oil over medium heat. 2. Add the sliced garlic and sauté until golden, about 2-3 minutes. 3. Stir in the red pepper flakes and cook for another 30 seconds. 1. Add the drained spaghetti to the pan with garlic oil. 2. Toss the spaghetti to coat it fully in the oil. 3. Mix in the lemon zest, lemon juice, and about 1/2 cup of reserved pasta water. 1. Fold in the chopped parsley and halved cherry tomatoes. 2. Season with salt to taste. This dish is all about simplicity and flavor. For the full recipe, check out the detailed version. Enjoy your cooking adventure! To make your spaghetti aglio e olio shine, focus on the garlic. Sauté garlic carefully to avoid burning. Burnt garlic tastes bitter and ruins the dish. I recommend using fresh garlic for the best flavor. Fresh garlic has a bright, pungent taste that dried garlic can't match. Slice it thinly for even cooking. The sauce consistency is key to a great dish. Utilize reserved pasta water effectively. This starchy water helps bind the sauce to the spaghetti. Start with half a cup and stir in more if needed. Adjust thickness based on personal preference. Some like it light and runny, while others prefer a thicker sauce. Serving can elevate your dish even more. Consider garnishing with fresh herbs like parsley for color and taste. It adds freshness to the meal. I also suggest offering lemon wedges on the side. A squeeze of lemon brightens the flavors and adds extra zing. Enjoy your pasta with these simple yet effective tips! {{image_4}} You can easily make this dish vegetarian or vegan. Simply omit the Parmesan cheese. This small change makes the meal plant-based. If you want extra nutrients, add sautéed vegetables. Zucchini, bell peppers, or spinach work great. They add color and flavor. Want to switch things up? Incorporate sun-dried tomatoes or olives. Both add a rich, savory flavor. You can also experiment with different herbs. Fresh basil or oregano can elevate your dish. Just sprinkle some in while cooking. If you like heat, use garlic chili oil for a spicy kick. It adds depth and flavor. You can also increase the red pepper flakes. Adjust it to your spice level. More heat can make this dish even more exciting. This gives you a spicy twist on a classic recipe. For the full recipe, check out the details above. After enjoying your spaghetti, store any leftovers in an airtight container. This keeps the pasta fresh and stops it from drying out. I recommend eating it within 2-3 days for the best flavor. The taste is best when the pasta is fresh. You can freeze spaghetti Aglio e Olio, but do it right. First, let the pasta cool completely. Then, place it in a freezer-safe bag. Try to remove as much air as possible. It lasts up to three months. When you’re ready to eat, thaw it in the fridge overnight. Reheat your spaghetti gently. The best way is to use a pan over low heat. Add a splash of olive oil or a bit of pasta water. This helps keep the pasta moist. Stir it often to avoid overcooking. You want your pasta warm, not mushy. Enjoy your meal again just as you did the first time! Spaghetti Aglio e Olio is a simple Italian dish. It comes from the Naples region. The name means "spaghetti with garlic and oil." The main ingredients are spaghetti, garlic, and olive oil. You can add red pepper flakes for a bit of spice. This dish is easy to make and perfect for busy nights. It highlights the flavors of garlic and olive oil. You can find the full recipe to make it at home. Yes, you can make Spaghetti Aglio e Olio ahead of time. Cook the spaghetti and prepare the garlic oil. Store them separately in airtight containers. Keep the spaghetti in the fridge for 2-3 days. When you're ready to eat, just reheat the garlic oil and toss it with the pasta. This will keep the dish fresh and tasty. To adjust the spice level, change the amount of red pepper flakes. If you like it mild, use less. For more heat, add more flakes. You can also use fresh chili peppers if you prefer. Sauté them with the garlic for a stronger kick. Always taste as you go to find your perfect balance. Spaghetti Aglio e Olio can be a healthy meal. It uses simple ingredients like garlic and olive oil. Garlic has health benefits, like boosting the immune system. Olive oil is good for heart health. Just be mindful of the portion size. Using whole-grain spaghetti can add more fiber and nutrients. Absolutely! You can add protein to Spaghetti Aglio e Olio. Grilled chicken or shrimp works well. Just cook the protein separately and mix it in. For a plant-based option, try chickpeas or tofu. This adds flavor and makes the dish more filling. Mixing in protein makes it a complete meal. Spaghetti Aglio e Olio is a simple yet classic dish. You learned about essential ingredients, like garlic and olive oil, and optional ones to boost flavor. Step-by-step instructions helped you understand cooking tips and variations to suit your taste. Remember to store leftovers properly and reheat wisely. This dish is easy to make and can be adjusted to fit your needs. Whether you prefer it spicy or mild, Spaghetti Aglio e Olio can be your go-to meal. Enjoy creating this delightful pasta dish!

Irresistible Spaghetti Aglio e Olio Simple Pasta Meal

Welcome to the delicious world of Spaghetti Aglio e Olio! This simple pasta dish relies on just a few key

- Pretzel rods - Chocolate choices (semi-sweet, dark, white) - Optional toppings (nuts, sprinkles, sea salt) The first step to making chocolate dipped pretzel rods is gathering your ingredients. You can choose pretzel rods that are sturdy and crunchy. Next, pick your chocolate. I love semi-sweet chocolate chips, but dark or white chocolate works well too. For toppings, the sky is the limit! You can use crushed nuts like almonds or pistachios for crunch. Colorful sprinkles add fun and flair. If you like a salty-sweet combo, sprinkle some sea salt on top right before serving. You might not have all the chocolate types at home. That's okay! You can use any chocolate you have. Milk chocolate is a great option if you prefer it sweeter. When it comes to toppings, nuts are not your only choice. You can use seeds like sunflower seeds for a nut-free option. Get creative and use your favorite treats! To make this treat, you need a few simple tools. First, grab some microwave-safe bowls. These are perfect for melting your chocolate. You will also need parchment paper to line your baking sheet. This helps the pretzels not stick when they cool. Lastly, a baking sheet is essential for setting your chocolate-dipped pretzel rods. Once you have all your ingredients and tools ready, you're set for a fun and easy cooking adventure. For the full recipe, check out the detailed steps in our guide! First, line a baking sheet with parchment paper. This is key! It helps the pretzels not stick when the chocolate cools. Using parchment paper makes clean-up easy too. Make sure the paper covers the entire sheet. This creates a smooth surface for your pretzels. For melting chocolate, use a microwave-safe bowl. Combine the chocolate chips and coconut oil. Set the microwave to medium power. Heat in 30-second bursts. Stir well after each burst. You want the chocolate to be smooth and shiny. If it looks thick or clumpy, it’s not ready yet. Be careful not to overheat it. Hold a pretzel by one end. Dip it into the melted chocolate. Submerge about two-thirds of the pretzel. Let the extra chocolate drip back into the bowl. This creates a nice finish. While the chocolate is still wet, add your toppings. Use crushed nuts or sprinkles and sprinkle them on generously. If you want even coverage, use a spoon to help you. Place the dipped pretzels on the parchment paper. Repeat the steps until all pretzels are coated. Once done, put the baking sheet in the fridge. Let them chill for about 20-30 minutes. This helps the chocolate set well. After they cool, sprinkle a little sea salt on top for flavor. Arrange the pretzel rods in a fun glass or jar. This makes a great display for parties or gifts. To melt chocolate, avoid overheating. Heat it in short bursts. Start with 30 seconds in the microwave. Stir well between each round. Stop when the chocolate is smooth. If you prefer, use a double boiler. Fill a pot with water and bring it to a simmer. Place a heat-safe bowl on top. The steam gently melts the chocolate. This method helps keep the chocolate from burning. For even coating, dip the pretzel rod straight down. Submerge it about two-thirds of the way. Let the excess chocolate drip back into the bowl. This gives a clean look. Keep the chocolate warm. If it cools too much, it will thicken. You may need to reheat it slightly if it hardens. Use decorative jars to serve your pretzel rods. They look great and keep them fresh. You can also arrange them by theme. For a party, group them by color or topping. Use fun trays or stand them in foam for a stylish touch. This adds flair to your treat and makes it a great gift too. For more details, check out the Full Recipe. {{image_4}} You can choose from dark chocolate, milk chocolate, or white chocolate. Each gives a unique taste. Dark chocolate has a rich flavor. It pairs well with nuts. Milk chocolate offers a creamy sweetness. It appeals to those who love a classic treat. White chocolate is sweet and smooth. You can even add flavors like vanilla or peppermint for extra fun. Toppings can change your pretzel rods a lot. For sweet options, try M&Ms, crushed cookies, or candy sprinkles. They add color and fun. If you want something savory, think about cheese or spices. A sprinkle of chili powder or garlic salt can give a tasty twist. Mix and match to find your favorite combo! If you need gluten-free options, look for gluten-free pretzel rods. They taste just as good. For vegan chocolate, use dairy-free chocolate chips. They melt well and taste great. These adjustments make this treat fun for everyone, no matter their diet! Check the [Full Recipe] for all the details on how to make these delicious treats. Store your chocolate-dipped pretzel rods in an airtight container. This keeps them fresh and crunchy. If you leave them out in the open, they might get soft or stale. Make sure to place a piece of parchment paper between layers. This prevents sticking. If the weather is hot, refrigeration is a good idea. It keeps the chocolate from melting and helps the pretzels stay crisp. Chocolate-dipped pretzel rods last about one week at room temperature. If you want them to last longer, you can freeze them. Wrap each pretzel rod in plastic wrap or foil first. Then, place them in a freezer-safe bag. They can stay in the freezer for up to three months. When you're ready to eat them, thaw them in the fridge. This keeps the chocolate from getting too soft too quickly. For the full recipe, check out the instructions above. Yes, you can use many types of pretzels. Pretzel shapes can change your treat. You can use small pretzel twists, flat pretzel chips, or even pretzel bites. Each type gives a unique crunch and taste. If you want a sweeter treat, use chocolate-covered pretzels. They add a fun twist and save time. If you don't have a microwave, you can use a stove. Start by filling a pot with water and bring it to a simmer. Then, place a heat-safe bowl on top of the pot. Make sure the bowl does not touch the water. Add the chocolate chips and coconut oil to the bowl. Stir often until melted. This method gives you smooth chocolate without burning. There are many fun flavor pairings for your chocolate-dipped pretzel rods. Here are a few ideas: - Semi-sweet chocolate with crushed almonds - White chocolate with colorful sprinkles - Dark chocolate with sea salt and chopped pistachios - Milk chocolate with crushed candy bars or M&Ms Mix and match to find your favorite! You can find pre-made chocolate-dipped pretzel rods at many stores. Check local grocery stores or specialty candy shops. Stores like Target or Walmart often carry them. Online, you can find them on Amazon or sites like Etsy. Always check the reviews to ensure quality. If your chocolate hardens, don't worry! You can fix it easily. Simply reheat it. Place the bowl back on the stove or microwave for short bursts. Stir it often until it melts again. You can add a bit of coconut oil to help it stay smooth. This way, you can keep dipping those pretzel rods perfectly! You can create delicious chocolate-dipped pretzel rods with ease. We covered the key ingredients, tools, and step-by-step instructions to guide you. I also shared useful tips for melting chocolate and creative ways to present your treats. Remember to explore different flavors and toppings to make each batch unique. With these simple techniques, you can impress friends and family. Enjoy the sweet and salty combination that makes these treats so special!

Chocolate Dipped Pretzel Rods Deliciously Simple Treat

If you’re craving a sweet-and-salty snack, you’ve come to the right place! Chocolate-dipped pretzel rods are easy to make and

To make the teriyaki salmon bowls, you need: - 2 salmon fillets (approximately 6 oz each) - 1/4 cup low-sodium soy sauce - 2 tablespoons honey or maple syrup - 1 tablespoon rice vinegar - 1 tablespoon sesame oil - 1 teaspoon freshly grated ginger - 2 garlic cloves, minced - 1 cup cooked jasmine rice - 1 cup steamed broccoli florets - 1/2 cup shredded carrots - 1 avocado, sliced - 1 tablespoon sesame seeds, for garnish - 2 green onions, chopped, for garnish These ingredients create a flavorful dish that balances sweet and savory notes. You can add a few items to enhance the bowl’s look and taste: - Lime wedges for a zesty kick - Fresh cilantro leaves for added freshness - Red pepper flakes for a spicy touch These garnishes make your bowls even more appealing and tasty. If you lack some ingredients, don't worry! Here are some ideas: - Replace salmon with chicken or tofu for a different protein. - Use tamari instead of soy sauce for a gluten-free option. - Swap jasmine rice with brown rice or quinoa for a healthier grain. - Try agave syrup if you don’t have honey or maple syrup. These substitutions keep the dish tasty while catering to your needs and preferences. To start, make the teriyaki sauce. In a small bowl, mix the soy sauce, honey, rice vinegar, sesame oil, grated ginger, and minced garlic. Whisk everything together until it’s smooth. This sauce adds a sweet and savory kick to your salmon. You can save half of the sauce for later. Next, it’s time to marinate the salmon. Place the salmon fillets in a shallow dish or a resealable bag. Pour half of the teriyaki sauce over the fillets. Make sure each fillet is well-coated. Cover the dish with plastic wrap or seal the bag. Let it sit in the fridge for at least 15 minutes. Marinating helps the salmon soak up all that yummy flavor. Now, let’s cook the salmon. Heat a non-stick skillet or grill pan over medium-high heat. Once it’s hot, take the salmon out of the marinade, and throw away any leftover sauce. Place the fillets in the pan. Cook each side for about 4 to 5 minutes. You know it’s done when the salmon flakes easily with a fork. Finally, assemble your bowls. In two serving bowls, put the cooked jasmine rice as the base. On top of the rice, arrange the steamed broccoli, shredded carrots, and sliced avocado. Carefully place a salmon fillet on each bowl. Drizzle the remaining teriyaki sauce over the salmon and veggies for extra flavor. Finish by sprinkling sesame seeds and chopped green onions on top. For the full recipe, check out the detailed instructions provided earlier. Enjoy your colorful and tasty teriyaki salmon bowls! To cook salmon just right, use a non-stick skillet. Heat it to medium-high. This helps to sear the fish nicely. Cook the salmon for about 4 to 5 minutes on each side. You want it to flake easily with a fork. If you like it less cooked, check it earlier. Fresh salmon has a rich flavor, so don’t overcook it. When serving Teriyaki Salmon Bowls, think about color and texture. Start with a base of fluffy jasmine rice. Add vibrant steamed broccoli and crunchy shredded carrots. Sliced avocado gives a creamy touch. You can also add pickled vegetables for a tangy bite. For a final touch, sprinkle sesame seeds and green onions. This adds flavor and makes the dish look great. Drizzling extra teriyaki sauce boosts the taste. After cooking, save some sauce from marinating. Spoon it over the salmon and veggies. This adds a sweet and salty kick. If you want more heat, add a dash of chili oil. This small step makes a big difference in flavor. For more options, try different sauces or garnishes. It’s fun to mix and match! For the complete recipe, check out the Full Recipe section above. {{image_4}} If you want a plant-based option, try tofu. Tofu soaks up flavor well. Use firm tofu for the best texture. Press it to remove extra water. Cut it into cubes and marinate in the teriyaki sauce just like the salmon. Cook it in the same way and enjoy the tasty results. Chicken is also a great choice. Use boneless, skinless chicken thighs or breasts. Marinate and cook until they reach a safe internal temperature. Both options keep the dish flavorful and satisfying. While broccoli and carrots are classic choices, feel free to mix it up. Snow peas, bell peppers, and bok choy add a crunch and color. You can also try zucchini or snap peas for a fresh twist. Just make sure to steam or sauté them until tender. This allows the veggies to blend well with the teriyaki flavor. Use whatever you have on hand or what is in season for the best taste. For a low-carb meal, skip the rice. Instead, use cauliflower rice. It’s easy to prepare. Simply pulse cauliflower florets in a food processor until they resemble rice. You can also sauté it for a few minutes. To make it gluten-free, choose a gluten-free soy sauce or tamari. This keeps all the flavors intact while accommodating dietary needs. Enjoy your teriyaki salmon bowls with these simple swaps! To store your leftover teriyaki salmon bowls, place them in an airtight container. Make sure the salmon, rice, and veggies are all included. This helps keep everything fresh. You can keep the bowls in the fridge for up to three days. Storing them separately can help maintain the texture of the rice and veggies. When you're ready to enjoy your leftovers, take them out of the fridge. You can use a microwave or a skillet to reheat them. If using a microwave, place the bowl in for about 1-2 minutes. Stir halfway through for even heating. If using a skillet, heat over medium heat. Add a splash of water to help steam the veggies, and cover with a lid. This helps keep everything moist. If you want to save your teriyaki salmon bowls for longer, freezing is a great option. Place the bowls in a freezer-safe container. Make sure to leave some space at the top because food expands when frozen. They can stay fresh for up to two months. To thaw, move the container to the fridge overnight. Reheat as mentioned above. Enjoy your delicious meal again! If you need a soy sauce substitute, try tamari or coconut aminos. Both options have a similar flavor but are gluten-free. You can also use liquid aminos, which give a nice taste too. If you want a sweeter option, try using teriyaki sauce. Just keep in mind that it may change the flavor a bit. Marinate the salmon for at least 15 minutes. This time allows the fish to absorb the teriyaki flavors. You can let it sit for up to an hour for a stronger taste. Just don’t marinate for too long, as the acid from the marinade can make the salmon mushy. Yes, you can prepare some parts ahead of time. Cook the rice and steam the veggies early in the day. You can also marinate the salmon in the morning. Just cook the salmon right before you serve the bowls to keep it fresh. The best way to cook salmon for these bowls is to pan-sear it in a non-stick skillet. Heat the pan over medium-high heat. Cook each side for 4-5 minutes until it flakes easily. This method keeps the fish moist and full of flavor. You can also grill the salmon if you prefer a smoky taste. For the full recipe, check out the earlier section! This blog covered how to make teriyaki salmon bowls from scratch. You learned about the main ingredients and optional garnishes. The guide also included how to prepare the teriyaki sauce and marinate the salmon. I shared tips for perfect cooking and ideas for variations. Don't forget to store leftovers properly for later! Whether you make it traditional or switch to tofu, have fun with this dish. Cooking should be enjoyable, so get creative and try out new flavors. Enjoy your teriyaki salmon bowls!

Teriyaki Salmon Bowls Flavorful and Satisfying Meal

Are you ready to dive into a delicious and healthy meal? Teriyaki salmon bowls are both flavorful and satisfying, making

To make sweet and sour chicken stir fry, you will need: - 1 lb (450g) boneless, skinless chicken breast, thinly sliced - 2 tablespoons cornstarch - 2 tablespoons vegetable oil, divided - 1 red bell pepper, thinly sliced - 1 green bell pepper, thinly sliced - 1 cup pineapple chunks (fresh or canned, drained if canned) - 1 cup broccoli florets - 1 medium carrot, peeled and julienned - 4 cloves garlic, minced - 1 tablespoon fresh ginger, grated - 4 tablespoons soy sauce - 3 tablespoons rice vinegar - 3 tablespoons honey (adjust to taste) - 1 teaspoon sesame oil - Salt and pepper, to taste - 2 green onions, finely chopped (for garnish) - Sesame seeds (optional, for garnish) When buying ingredients, focus on freshness. Choose chicken that looks pink and moist. For vegetables, select ones that are firm and vibrant. The bell peppers should have a shiny skin, and the broccoli should be bright green. You can swap the chicken for shrimp or tofu if you want. This dish is flexible! Use fresh pineapple for a brighter flavor, but canned works well too. In one serving of sweet and sour chicken stir fry, you get about 300 calories. The dish packs in protein from the chicken and fiber from the veggies. You also get vitamins A and C from the bell peppers and broccoli. This meal is both tasty and nutritious! For the full recipe, check out the detailed instructions to make this dish come alive. Start by slicing the chicken breast thinly. This helps it cook fast and evenly. In a mixing bowl, coat the chicken pieces with cornstarch. Ensure each piece is well covered. This cornstarch layer gives the chicken a crispy texture when seared. For the best results, let it sit for a few minutes before cooking. This allows the cornstarch to stick better. Heat a large skillet or wok over medium-high heat. Add 1 tablespoon of vegetable oil. Wait until the oil shimmers, then add the chicken slices. It is important to lay them out in a single layer. This step ensures even cooking. Sear the chicken for 5-7 minutes, turning it occasionally. You want it to turn golden brown and be fully cooked. Once done, remove the chicken from the pan and set it aside. In the same skillet, add the remaining tablespoon of vegetable oil. Next, toss in the minced garlic and grated ginger. Stir them for about 30 seconds until they smell nice. Be careful not to burn them. After that, add the sliced bell peppers, broccoli, and julienned carrot. Cook these vegetables for 3-5 minutes. You want them to be colorful and slightly tender but still crisp. This keeps them vibrant and tasty in the stir fry. To adjust the taste of your sweet and sour chicken, start with the sauce. If you want it sweeter, add more honey. For extra saltiness, a splash of soy sauce works well. Taste as you go. It helps you find the right balance that you enjoy. For crispy chicken, make sure to coat it well with cornstarch. When you sear the chicken, do it in a hot pan. This helps lock in juices and gives a nice crunch. Keep your vegetables crisp by not overcooking them. Stir-fry them just until they are bright and tender. This dish pairs great with rice or noodles. For a classic touch, serve it over steamed jasmine rice. If you prefer noodles, try soba or rice noodles. Both options soak up the sauce well. You can also add fresh herbs like cilantro or basil for extra flavor. If you want the full details, check out the Full Recipe. {{image_4}} You can change the protein in this dish easily. Shrimp, tofu, or beef work well. Shrimp adds a nice ocean flavor, while tofu makes it vegetarian. If you choose beef, use tender cuts like flank steak. Just cook it until it’s brown and juicy. Each option brings a new taste. Feel free to mix proteins or use what you have on hand. Switching up the veggies can make your stir fry unique. Use seasonal produce for the best flavor. Try snap peas, zucchini, or mushrooms if you want something different. You can also add baby corn or bok choy for extra crunch. Think about your favorites or what is fresh at the market. It’s fun to experiment with colors and textures in your dish. You can play with the sauce to suit your taste. Homemade sauce can be healthier and fresher. Mix soy sauce, vinegar, and honey to your liking. If you’re short on time, store-bought sauces work too. Just check the label for sugar content. You might want to add some chili flakes for heat or garlic powder for extra flavor. The key is to find what you love and make it your own. Try the Full Recipe for a great starting point! To store leftovers safely, let your sweet and sour chicken stir fry cool down first. Place it in an airtight container. You can keep it in the fridge for up to three days. Make sure to label it with the date, so you know how long it’s been sitting. If you notice any off smells or changes in texture, it's best to throw it out. Freezing is a great option if you want to save some for later. First, let the stir fry cool completely. Then, transfer it to a freezer-safe container or bag. Remove as much air as possible to prevent freezer burn. You can freeze it for up to three months. Just remember to label the container with the date so you won't forget. When you’re ready to enjoy your stir fry again, there are a couple of good methods to reheat it. For the best quality, use a skillet over medium heat. Add a splash of water or broth to keep it moist. Stir every few minutes until heated through. If you're short on time, you can use the microwave. Place it in a microwave-safe bowl and cover it with a damp paper towel. Heat in short bursts, stirring in between, until it's hot. Enjoy your tasty meal! Sweet and sour chicken stir fry is a colorful dish that mixes chicken, veggies, and sauce. The chicken is tender, and the sauce gives it a tangy yet sweet flavor. You taste the bright notes of pineapple, the crunch of bell peppers, and the warmth of garlic and ginger. This dish is quick to cook, making it a favorite for busy nights. Yes, you can make sweet and sour chicken stir fry ahead of time. Cook it as normal, then let it cool. Store it in an airtight container in the fridge. It will stay fresh for up to three days. When you're ready to eat, just reheat it on the stove. This keeps the flavors intact, and you can enjoy a delicious meal with little effort. Absolutely! To make a vegetarian version, swap the chicken for tofu or tempeh. Both options soak up flavors well. You can also add more veggies, like snap peas or mushrooms, for extra taste. Use the same sauce for a sweet and tangy kick. This way, you still get the same great flavor without meat. In this blog post, we explored how to make sweet and sour chicken stir fry. We covered key ingredients, cooking methods, and tips for perfect texture and flavor. You learned about variations like different proteins and vegetable substitutes. I also shared storage tips to keep your dish fresh. Experiment with flavors and enjoy your meals. Happy cooking!

Sweet and Sour Chicken Stir Fry Quick and Easy Recipe

Are you craving a quick and tasty meal? This Sweet and Sour Chicken Stir Fry is just what you need!

- 2 ripe avocados - 1/3 cup unsweetened cocoa powder - 1/4 cup maple syrup (or honey) - 1/4 cup almond milk (or any milk of your choice) - 1 teaspoon vanilla extract - A pinch of sea salt - Fresh berries and mint leaves for garnish To make this chocolate avocado mousse, you need just a few key ingredients. Ripe avocados give the mousse a rich and creamy texture. Unsweetened cocoa powder provides that deep chocolate flavor we all love. Maple syrup or honey adds the perfect touch of sweetness. Almond milk—or any milk you prefer—helps blend everything smoothly. Optional ingredients like vanilla extract enhance the flavor. A pinch of sea salt balances the sweetness and deepens the taste. For a beautiful touch, fresh berries and mint leaves make great garnishes. You can find the full recipe to guide you through each step and enjoy this delightful treat. - Halve and pit the avocados; scoop flesh into a food processor. - Add cocoa powder, maple syrup, almond milk, vanilla extract, and sea salt. Start by cutting the ripe avocados in half. Remove the pit carefully with a spoon. Scoop out the creamy flesh and place it in your food processor. This step is key; the avocado gives the mousse its rich and creamy texture. Next, you will add your other ingredients. Pour in the cocoa powder for that deep chocolate flavor. Then, add the maple syrup for sweetness, almond milk for creaminess, vanilla for aroma, and a pinch of sea salt to enhance the flavors. - Blend until smooth and creamy, scraping down the sides as needed. - Taste and adjust sweetness with extra maple syrup if desired. Now it’s time to blend! Start your food processor and let it run until the mixture is smooth and creamy. You may need to stop and scrape down the sides. This ensures all ingredients mix well. Once blended, taste your mousse. If it needs more sweetness, add a little more maple syrup and blend again. This step allows you to customize the sweetness to your liking. - Spoon mousse into individual dishes and chill for 30 minutes. - Garnish with fresh berries and mint leaves before serving. Spoon the mousse into small individual dishes. This gives each person their own serving, making it feel special. Chill the mousse in the fridge for at least 30 minutes. This cooling time helps the mousse set and lets the flavors blend. Just before serving, add a few fresh berries on top for color and a sprig of mint for a fresh touch. If you want, drizzle a bit more maple syrup on top for extra sweetness. This mousse is not just a treat; it’s a rich and creamy delight! For the full recipe, check out the details above. To make a smooth chocolate avocado mousse, use ripe avocados. Ripe avocados are soft and creamy. They blend better and create a rich texture. You want that silky, luscious feel in every bite. When blending, start on low speed. Gradually increase to high. This helps mix all the ingredients evenly. Stop to scrape down the sides. This ensures everything gets blended well. If your mousse feels thick, add a splash of almond milk. This will help achieve that perfect creaminess. Want to add extra flavor? Try mixing in a bit of espresso. It will deepen the chocolate taste. A dash of cinnamon can also add warmth. These flavors work well with the chocolate and avocado. For serving, think about pairing the mousse with cookies or fresh fruit. Chocolate chip cookies add a nice crunch. Fresh berries like raspberries or strawberries bring a bright touch. They complement the mousse and make it look pretty. For the full recipe, check out the details above. {{image_4}} You can easily make this mousse vegan. Just use maple syrup instead of honey. Maple syrup gives the mousse a nice, sweet flavor. It keeps everything plant-based. If you need a gluten-free option, you’re in luck! All the main ingredients are naturally gluten-free. Just make sure to check your labels on any milk alternatives. Some brands may add gluten. Get creative with your milk! Try almond milk, coconut milk, or oat milk. Each type will bring a unique flavor to your mousse. You might enjoy the creaminess of coconut milk the most. Want to add a twist? Consider adding spices or extracts. A drop of peppermint extract will make it fresh and cool. A sprinkle of cinnamon can add warmth and depth to the taste. These little changes can make a big difference in flavor. To keep your chocolate avocado mousse fresh, store it in the fridge. Use an airtight container. This method prevents the mousse from absorbing other smells. Plus, it helps it stay creamy. Make sure the lid seals tightly. If you leave it uncovered, it may dry out or get hard. Your mousse will stay good in the fridge for about three days. After that, it may lose its taste and texture. If you want to keep it longer, you can freeze it. To freeze, spoon the mousse into a freezer-safe container. Leave some space at the top, as it may expand. It can last up to a month in the freezer. When you want to eat it, move it to the fridge to thaw overnight for the best taste and texture. If you’re in a hurry, you can thaw it at room temperature for a few hours. If you don’t have avocados, you can use silken tofu. It gives a creamy texture similar to avocado. You can also try ripe bananas, but they will change the flavor slightly. Another option is unsweetened applesauce, which adds moisture, but lacks the richness. Yes, you can use honey or agave syrup. Both sweeteners work well with cocoa. Coconut sugar is another option. It has a lower glycemic index and adds a nice depth of flavor. Just remember to adjust the amount based on your taste. To make this mousse nut-free, choose oat milk or soy milk instead of almond milk. Both options give the same creamy texture without nuts. You can also use coconut milk for a richer taste. Just make sure it is unsweetened for best results. Absolutely! Chocolate avocado mousse is a hit with kids. It is rich in healthy fats from avocados, which are good for their growth. The cocoa adds a delicious chocolate flavor that kids love. Plus, it’s a fun way to sneak in some nutrition while they enjoy dessert. This mousse combines ripe avocados, cocoa, and maple syrup for a rich treat. You learned how to blend these ingredients for a smooth, creamy texture. Don’t forget the optional vanilla and sea salt to enhance the flavor. You can store leftovers or explore different milk and sweetener options. This recipe is fun and easy, perfect for any occasion. Enjoy it with fresh berries for extra delight. I hope you feel inspired to try making this delicious and healthy dessert!

Chocolate Avocado Mousse Rich and Creamy Delight

Looking for a dessert that satisfies your sweet tooth and is healthy too? Try my Chocolate Avocado Mousse! This rich

- 1 lb Brussels sprouts, trimmed and halved - 4 cloves garlic, minced - 3 tablespoons olive oil - 1/2 cup Parmesan cheese, freshly grated - 1 teaspoon garlic powder - 1/2 teaspoon red pepper flakes (optional) - Sea salt and black pepper to taste - Fresh parsley for garnish (optional) Using fresh ingredients makes a big difference. Brussels sprouts bring a lovely crunch. Garlic adds wonderful flavor, while Parmesan gives a cheesy touch. The olive oil helps everything roast well. I often add red pepper flakes for a little kick, but you can skip them if you prefer. Fresh parsley adds a nice pop of color and freshness at the end. - Mixing bowl - Baking sheet - Parchment paper or cooking spray - Spatula Having the right tools makes cooking easier. A mixing bowl helps you combine everything well. A baking sheet is perfect for roasting. Lining it with parchment paper keeps the sprouts from sticking. A spatula helps you toss the Brussels sprouts, ensuring even coating with those tasty seasonings. For the full recipe, check out the section above! - Preheat the oven to 400°F (200°C). - Trim and halve the Brussels sprouts. - In a bowl, mix the Brussels sprouts with minced garlic, olive oil, garlic powder, red pepper flakes, sea salt, and black pepper. - Toss well to coat the sprouts evenly. - Spread the Brussels sprouts on a baking sheet in one layer, cut sides down. - Roast for 20 minutes, until they start to soften and brown. - Take the baking sheet out and sprinkle the grated Parmesan cheese over the sprouts. - Return the baking sheet to the oven and roast for an extra 10-15 minutes, until golden brown and crispy. Enjoy the full recipe for more details! Roasting Brussels sprouts right makes a big difference. Use a single layer on the baking sheet. This helps them roast evenly. Place the cut sides down for that perfect brown edge. Turning them halfway can also help. For crispy edges, roast at a high heat. Aim for 400°F (200°C). This temperature works magic, making them golden and crunchy. You can easily boost the flavor of your Brussels sprouts. Lemon juice adds a bright zing. Try drizzling some balsamic vinegar too for a sweet twist. If you like spice, add more red pepper flakes. Adjust the amount based on your taste. A hint of smoked paprika can also add depth. Experimenting is key! Serving your dish well makes it even more appetizing. Use a stylish bowl to show off those roasted sprouts. Drizzle a bit of olive oil on top for shine. A lemon wedge on the side adds a pop of color. Fresh parsley makes a lovely garnish too. It not only looks nice but adds freshness. Consider using a warm serving dish to keep them hot longer. {{image_4}} You can switch up the cheese for this dish. Asiago offers a nice, sharp taste. Cheddar can add a creamy texture and rich flavor. For those avoiding dairy, try vegan cheese. Brands like Daiya or nutritional yeast give a great cheesy vibe without the milk. Brussels sprouts are fantastic, but you can add more veggies. Carrots bring sweetness and color. Radishes add a nice crunch and peppery bite. Don’t forget about nuts or seeds! Almonds or pumpkin seeds can give a delightful crunch and boost nutrition. Changing herbs can give new life to your dish. Thyme has a lovely earthy taste, while rosemary adds a bold flavor. For a touch of sweetness, consider honey or maple syrup. If you like heat, throw in some chili flakes or sriracha. These changes make this dish exciting and versatile. For the full recipe, check out the main article. To keep your Garlic Parmesan Roasted Brussels Sprouts fresh, store them in an airtight container. Place them in the fridge after they cool down. They can last for about 3 to 5 days. Just make sure to seal the container tightly to avoid moisture. To enjoy your leftovers, reheating them properly is key. The oven is your best friend here. Preheat it to 350°F (175°C). Spread the sprouts on a baking sheet and heat for about 10 minutes. This way, they stay crispy. If you’re short on time, you can use the microwave. But be careful! Microwaving can make them soggy. If you choose this method, heat them in short bursts. Check every 30 seconds until warm. Enjoy the crunch again! For crispy Brussels sprouts, roast them for 30 to 35 minutes. Start with 20 minutes at 400°F (200°C) to let them soften. Then, add Parmesan and roast for another 10 to 15 minutes. This gives you that nice golden brown color and crunch. Yes, you can use frozen Brussels sprouts! But you need to change your cooking time. First, thaw them and drain any excess water. Then, roast them for about 5 to 10 minutes longer than fresh ones. This helps them cook through and get crispy. Garlic Parmesan Roasted Brussels sprouts go great with many dishes. Pair them with baked chicken or grilled fish for a tasty meal. They also work well as a side for steak or pork chops. You can even serve them with pasta for a veggie boost. For more ideas, check the Full Recipe for tips on sides! Roasting Brussels sprouts is simple and fun. You learned about key ingredients and tools, and I shared easy steps to roast them perfectly. Tips for flavor and presentation can elevate your dish. You can also explore variations with different cheeses and add-ins. Lastly, I covered how to store and reheat leftovers. Enjoy making these crispy, tasty Brussels sprouts!

Garlic Parmesan Roasted Brussels Sprouts Delight

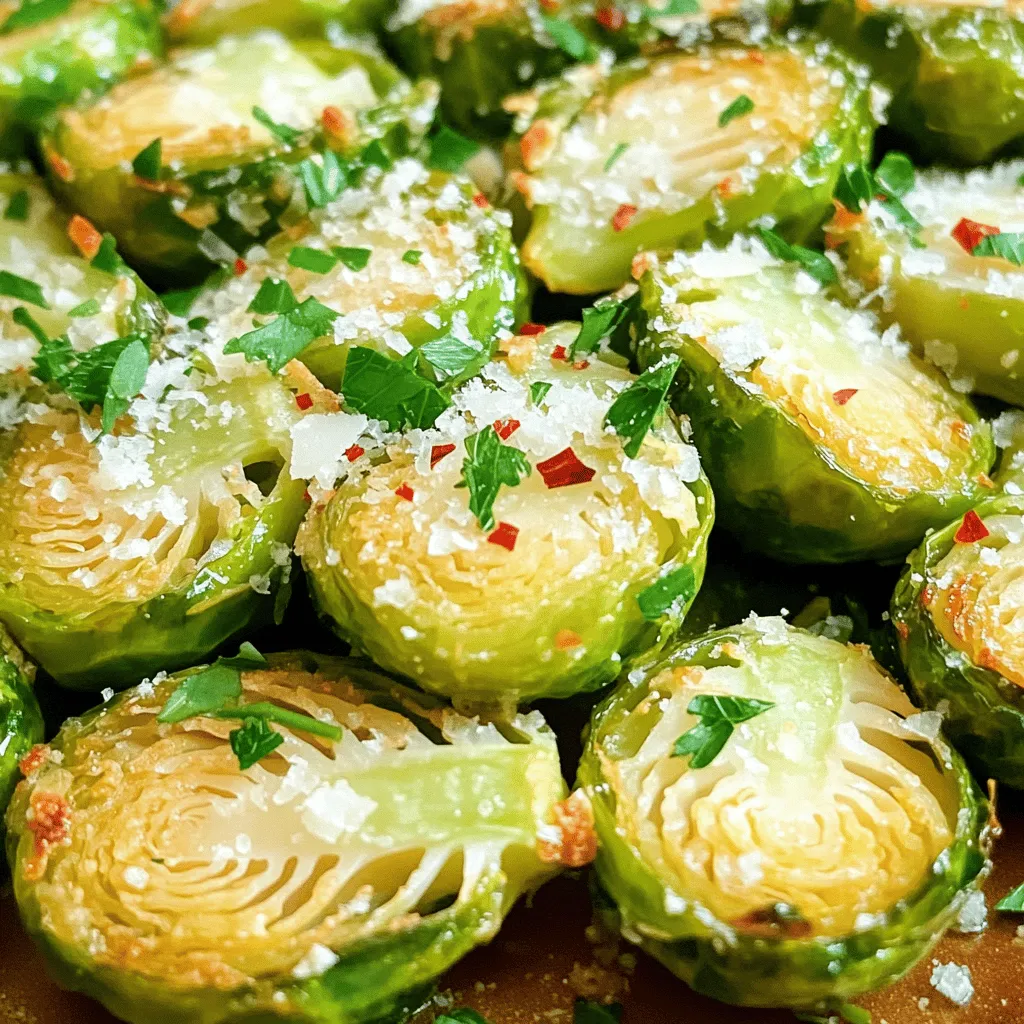
Are you ready to elevate your vegetable game? Garlic Parmesan Roasted Brussels Sprouts are a crispy, cheesy delight that will

Older posts
Newer posts
← Previous Page1 … Page68 Page69 Page70 … Page86 Next →

dsad

© 2026 lazychefmagic • Built with GeneratePress

Our Policies

  • Copyright Policy
  • Cookie Policy
  • GDPR Policy
  • Privacy Policy
  • Disclaimer
  • Terms Of Use

More Information

  • Home
  • About
  • Contact
  • Appetizers
  • Dessert
  • Dinner
  • Drinks
©2026, lazychefmagic About Back To Top