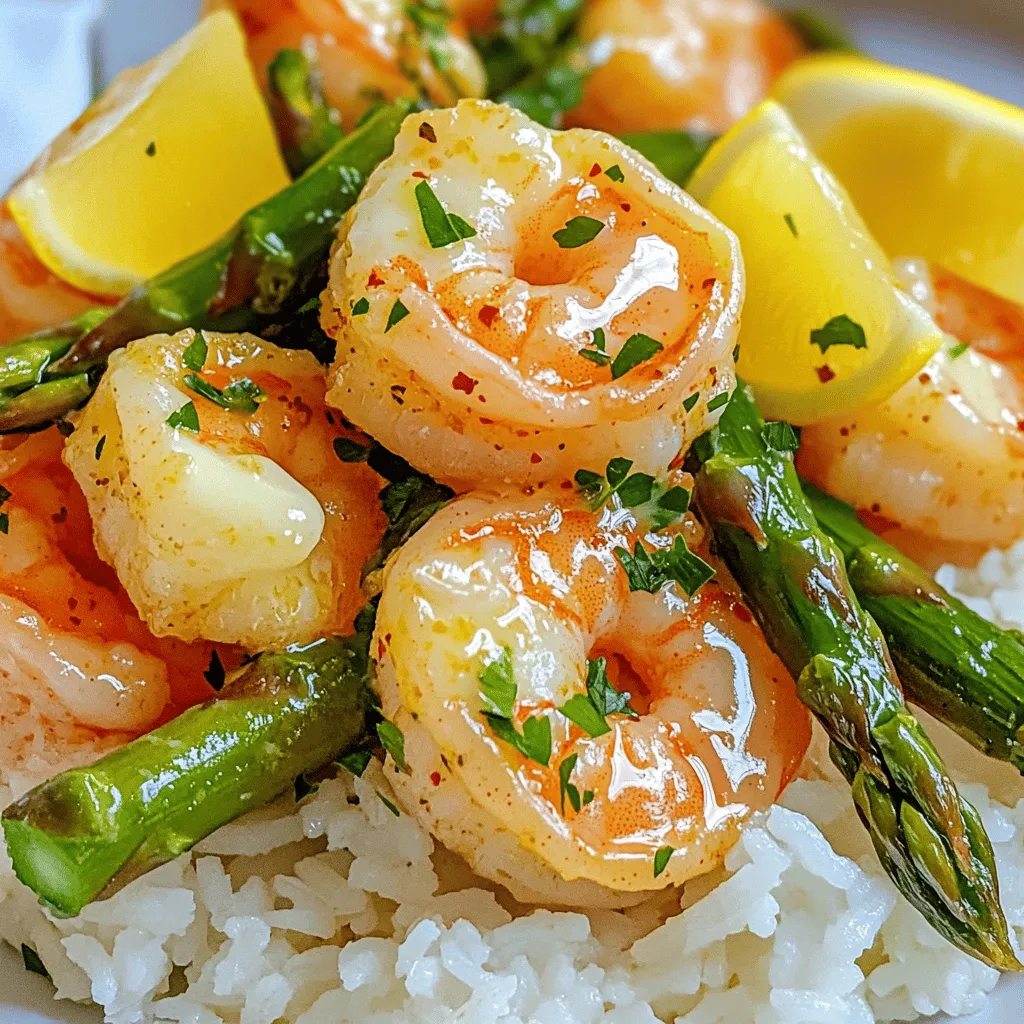
Garlic Butter Shrimp and Asparagus Quick Dinner Recipe
If you’re looking for a quick and tasty dinner idea, you’ve come to the right place! This Garlic Butter Shrimp
If you’re looking for a quick and tasty dinner idea, you’ve come to the right place! This Garlic Butter Shrimp
![To make Lemon Herb Grilled Salmon, gather these essential items: - 4 salmon fillets (approximately 6 ounces each) - 1 large lemon (zested and juiced) - 3 tablespoons extra virgin olive oil - 2 cloves garlic, finely minced - 1 teaspoon dried oregano - 1 teaspoon dried thyme - 1 teaspoon dried parsley - Salt and freshly ground black pepper, to taste These ingredients create a bright and zesty flavor. The salmon fillets provide a tasty and healthy base. Lemon adds freshness, while olive oil keeps the fish moist. Garlic and herbs bring depth to the dish. You can enhance your dish with these optional garnishes: - Fresh herbs like dill or parsley - Lemon wedges for serving These add a lovely touch and make your dish look appealing. Fresh herbs give a pop of color and flavor. Lemon Herb Grilled Salmon is not only delicious but also good for you. Here are some health benefits: - Salmon is rich in omega-3 fatty acids. These support heart health and brain function. - Lemon is high in vitamin C, which boosts the immune system. - Olive oil contains healthy fats that lower bad cholesterol. - Garlic may help reduce blood pressure and improve heart health. These ingredients work together to create a meal that is both tasty and nutritious. Eating this dish helps you stay healthy while enjoying great flavors. For the complete recipe, check out the Full Recipe. To start, you need to make the marinade. In a small bowl, add the lemon juice, lemon zest, olive oil, minced garlic, oregano, thyme, parsley, salt, and pepper. Whisk these together until they blend well. This mix brings bright flavors to the salmon. Next, take your salmon fillets and place them in a shallow dish or a resealable bag. Pour the marinade over the fillets, ensuring they are well-coated. Cover the dish with plastic wrap or seal the bag. Refrigerate the salmon for at least 30 minutes. For the best taste, let it marinate for up to 2 hours. Now, it’s time to prepare your grill. Heat your grill to medium-high. If you’re using a grill pan on the stove, set it to medium heat. Let it warm up until it reaches a steady temperature. This step is key for getting the perfect grill marks and flavor. Once your grill is hot, carefully remove the salmon from the marinade. Let any extra liquid drip off. Place the fillets on the grill, skin-side down. Grill for about 5-7 minutes on each side. The salmon is ready when it turns opaque and flakes easily with a fork. Make sure to watch the salmon closely while grilling. Each grill can cook a bit differently, so adjust the time if needed. After grilling, transfer the salmon to a serving platter. You can drizzle it with leftover marinade or fresh lemon juice for added flavor. Enjoy your Lemon Herb Grilled Salmon! For the complete recipe, check out the [Full Recipe]. Marinating salmon adds flavor and keeps it moist. Start with a good mix of ingredients. Use fresh lemon juice and zest for a bright taste. Olive oil helps the marinade stick and adds richness. I suggest marinating for at least 30 minutes. For deeper flavor, try marinating for up to 2 hours. Always cover the dish or seal the bag to lock in those flavors. To know when your salmon is ready, look for its color. Cook it until it turns from bright pink to a lighter shade. You can also use a fork to test it. Gently flake the salmon; it should come apart easily. If it does, it’s done! The internal temperature should reach 145°F for safe eating. Grilled salmon pairs well with many sides. Consider serving it with a fresh salad or grilled veggies. You can also add a side of rice or quinoa for a heartier meal. Drizzle with extra lemon juice or any leftover marinade for added flavor. Garnish with fresh herbs for a beautiful finish. For the full recipe, check out the details provided above. {{image_4}} You can switch up the herbs in this recipe. Instead of oregano, try basil or cilantro. If you want a spicy kick, add some red pepper flakes. Dill gives a fresh taste that pairs well with salmon. Each herb brings its own flavor, making each dish unique. Feel free to get creative with marinades. A soy sauce and ginger mix works great. You can also try a maple syrup and mustard blend for a sweet touch. For a tangy flavor, use yogurt and lemon. Each marinade changes the taste, so have fun experimenting! Pair your salmon with simple sides. Steamed asparagus or a fresh salad works well. You can also serve it with roasted potatoes or quinoa. These sides add color and nutrients to your plate. They make the meal more balanced and enjoyable. For the full recipe, check the link. To keep your grilled salmon fresh, place it in an airtight container. Make sure it cools down to room temperature first. Cover it tightly to avoid air exposure. This helps maintain flavor and texture. Store the container in the fridge. Leftover salmon lasts for up to three days in the fridge. When you're ready to enjoy your leftovers, you can reheat the salmon. Preheat your oven to 350°F (175°C). Place the salmon on a baking sheet. Cover it with foil to retain moisture. Heat for about 10-15 minutes, or until it’s warmed through. You can also use a microwave. Place the salmon on a microwave-safe plate. Heat on medium power for about 1-2 minutes. Check for warmth and avoid overcooking. If you want to store salmon for a longer time, freezing is a great option. Wrap each piece tightly in plastic wrap. Then, place the wrapped salmon in a freezer bag. Remove as much air as possible before sealing. It can stay in the freezer for up to three months. When you're ready to eat it, thaw the salmon in the fridge overnight. This keeps the taste and quality intact. For the full recipe, you can check out the Lemon Herb Grilled Salmon recipe. I recommend marinating the salmon for at least 30 minutes. For more flavor, you can marinate it for up to 2 hours. The lemon and herbs will soak into the fish, making it taste great. Yes, you can grill salmon without skin. Just be careful while grilling, as skinless fillets can break apart more easily. Use a grill basket or foil to keep the fish intact and prevent it from sticking. The best way to check if salmon is done is by using a fork. Gently press the fish, and if it flakes easily, it’s ready. The thickest part should also be opaque and warm throughout. Yes, grilled salmon is very healthy. It is packed with omega-3 fatty acids, which are good for your heart. Salmon also provides high-quality protein and essential vitamins. You can serve Lemon Herb Grilled Salmon with many sides. Here are a few options: - Grilled vegetables - Quinoa salad - Garlic mashed potatoes - Steamed asparagus - Rice with herbs For the complete recipe, check out the Full Recipe. Lemon herb grilled salmon is easy to make and full of flavor. You learned about the key ingredients and how to marinate and grill salmon to perfection. I shared tips for checking doneness and serving ideas. You can even explore different herbs and sides. Remember to store your leftovers to enjoy later. This dish not only tastes great but is also healthy. With these steps, you can impress family and friends with your cooking skills. Enjoy every bite of your tasty creation!](https://lazychefmagic.com/wp-content/uploads/2025/05/3ffbb6f3-c093-456e-b642-17a7c771c530.webp)
Are you ready to cook a dish that impresses? This Lemon Herb Grilled Salmon recipe offers fresh and bright flavors
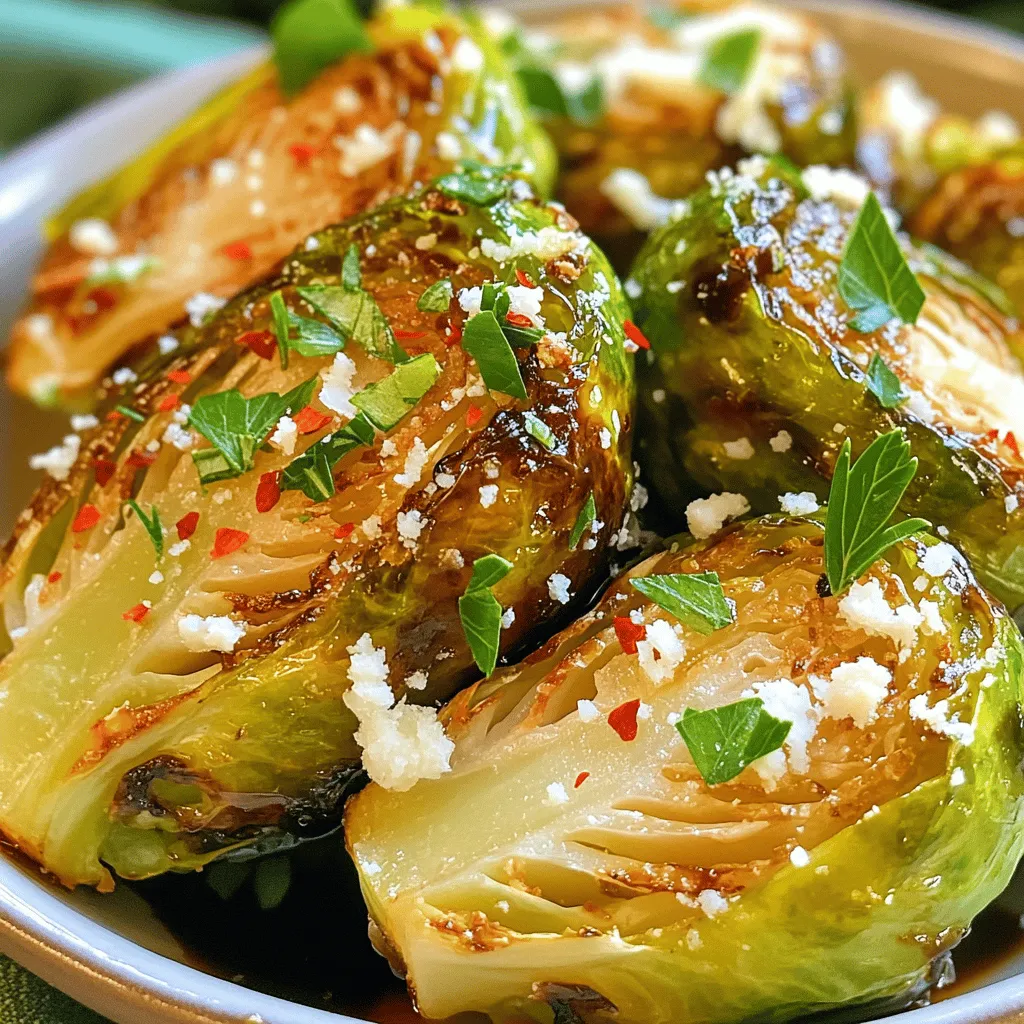
Looking for a tasty side dish that steals the show? Balsamic Glazed Brussels Sprouts are your answer! This simple yet
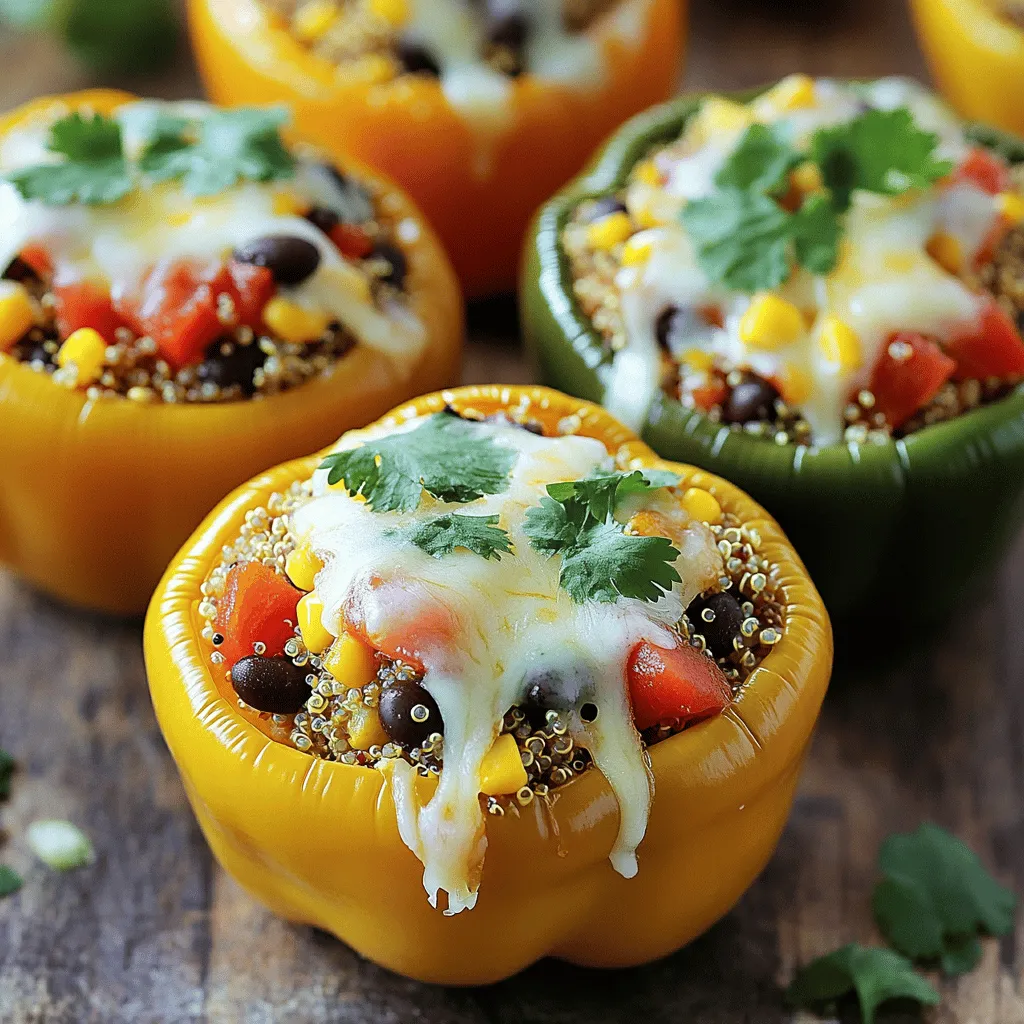
Are you ready to whip up a dish that’s as tasty as it is healthy? Stuffed bell peppers with quinoa
![To make honey mustard chicken skewers, you need simple and fresh ingredients. Here’s what you’ll need: - Chicken - 1 lb (450g) boneless, skinless chicken breasts, cut into 1-inch cubes - Marinade Components - 1/4 cup honey - 1/4 cup Dijon mustard - 2 tablespoons olive oil - 2 cloves garlic, minced - 1 teaspoon smoked paprika - 1/2 teaspoon salt - 1/4 teaspoon freshly ground black pepper - Garnishing Elements - 1 tablespoon fresh parsley, finely chopped (for garnish) - Skewers (soaked in water for at least 30 minutes if wooden) With these ingredients, you can create a dish that bursts with flavor. The honey and mustard blend gives the chicken a sweet and tangy taste. The smoked paprika adds depth, while the parsley brightens the dish. You can find the full recipe to guide you through the steps. First, gather your ingredients. You need honey, Dijon mustard, olive oil, minced garlic, smoked paprika, salt, and black pepper. In a medium mixing bowl, whisk these ingredients together. This forms a smooth marinade. The honey adds sweetness, while the mustard gives a nice tang. This balance makes the chicken flavorful. Next, take the boneless chicken breasts and cut them into 1-inch cubes. Add these cubes to the marinade. Use a spatula to mix well. Make sure every piece is coated. Cover the bowl with plastic wrap and put it in the fridge. Let it marinate for at least 30 minutes. For even better flavor, you can marinate it for up to 2 hours. This step is key for juicy, tasty chicken. Now it's time to prepare the grill. Preheat it to medium-high heat. If you are using wooden skewers, soak them in water for at least 30 minutes. This helps prevent burning. Retrieve your marinated chicken from the fridge. Carefully thread the chicken onto the soaked skewers. Leave some space between each piece. This helps them cook evenly. Place the skewers on the grill. Cook for about 10 to 12 minutes. Turn them occasionally to ensure even cooking. The chicken should be golden brown and reach an internal temperature of 165°F. Once done, take the skewers off the grill. Let them rest for a couple of minutes. For a nice touch, sprinkle finely chopped parsley on top. Your honey mustard chicken skewers are ready to enjoy! For the complete recipe, check the Full Recipe section. Marinating chicken adds flavor and keeps it juicy. Use a mix of honey and Dijon mustard. This combo gives a nice sweet and tangy taste. Make sure to coat all the chicken pieces well. Cover the bowl and chill it in the fridge. Aim for at least 30 minutes, but two hours is even better. This longer time lets the flavors soak in more deeply. Grilling chicken skewers takes some care. Start by preheating your grill to medium-high heat. This ensures even cooking and great grill marks. If using wooden skewers, soak them in water first. This step helps avoid burning. When placing the skewers on the grill, give them space. This allows the heat to circulate. Turn the skewers every few minutes. Cook them for about 10 to 12 minutes. Check the internal temperature; it should reach 165°F (75°C) for safety. Serve your honey mustard chicken skewers on a large platter. Adding lemon wedges gives a fresh twist. A garden salad pairs nicely, too. You can also serve with a dipping sauce for extra flavor. Consider a simple yogurt sauce or a spicy aioli. For presentation, sprinkle fresh parsley on top. This adds a pop of color and freshness. Enjoy your meal with family and friends! For the full recipe, refer back to the [Full Recipe]. {{image_4}} You can easily change the taste of your honey mustard chicken skewers. Swap honey for maple syrup for a richer sweetness. Use yellow mustard instead of Dijon for a milder flavor. You can also add a splash of soy sauce for a hint of saltiness. Want some heat? Toss in a little chili powder or red pepper flakes. Each swap offers a new taste experience! Grilling is great, but you can make these skewers in an oven or air fryer too. For the oven, preheat it to 400°F (200°C). Place the skewers on a baking sheet. Bake for 15-20 minutes, flipping halfway through. In the air fryer, set it to 375°F (190°C) and cook for about 10-12 minutes. Both methods keep the chicken juicy and delicious. To add a twist, try different sauces. Barbecue sauce gives a smoky flavor, while teriyaki sauce adds sweetness. You can also sprinkle some lemon juice or lime juice for brightness. Fresh herbs like cilantro or basil can enhance flavor too. These extras make your skewers even tastier! Enjoy experimenting with flavors! After enjoying your honey mustard chicken skewers, let any leftovers cool completely. Store them in an airtight container. This keeps the skewers fresh. Place the container in the fridge. They will last for about 3 to 4 days. If you want to keep them longer, freezing is a good option. When you're ready to eat the leftovers, reheating is simple. You can use the microwave for quick warming. Place the skewers on a microwave-safe plate and cover them with a damp paper towel. Heat in short bursts, checking often to avoid overcooking. Alternatively, you can reheat them on a grill or stovetop. This will help maintain their texture and flavor. To freeze your honey mustard chicken skewers, first, let them cool. Wrap each skewer tightly in plastic wrap. Then, place them in a freezer bag or airtight container. Label it with the date. Frozen skewers can last for up to 3 months. When you’re ready to enjoy them, thaw in the fridge overnight before reheating. You can also cook them directly from frozen, but this may take a bit longer. For the full recipe, check out the detailed instructions above. You should marinate the chicken for at least 30 minutes. This allows the flavors to soak in. For better taste, try marinating for up to 2 hours. The longer you marinate, the better the chicken will taste. Yes, you can use different meats for skewers. Chicken, beef, pork, or shrimp all work well. Each type of meat adds its unique flavor. Just make sure to adjust the cooking time based on the meat you choose. Serve honey mustard chicken skewers with fresh garden salad or grilled veggies. Rice or quinoa also makes a great side. For a light touch, add a fruit salad. Pairing these sides makes a fun and balanced meal. For the full recipe, check out the details above. To sum up, we covered how to make tasty honey mustard chicken skewers. You learned about the key ingredients, marinating methods, and grilling techniques. I shared tips for juicy results and suggested flavor variations. I also explained how to store leftovers and answered common questions about the dish. Now, it's your turn to try this easy recipe. Enjoy the delightful flavors and the fun of cooking!](https://lazychefmagic.com/wp-content/uploads/2025/05/1c9aac9e-582a-495b-847d-93be561b92a6.webp)
Ready to elevate your grilling game? This easy Honey Mustard Chicken Skewers recipe is a must-try! With just a handful
![To make the best banana bread overnight oats, you need a few key ingredients. Here’s what to gather: - 1 cup rolled oats - 1 ripe banana, mashed - 1 cup almond milk (or any milk of your choice) - 1 tablespoon chia seeds - 1 teaspoon vanilla extract - 1 teaspoon ground cinnamon - 1 tablespoon maple syrup (optional, for added sweetness) - 2 tablespoons chopped walnuts (or pecans) - A pinch of salt These ingredients create a creamy and tasty blend that tastes just like banana bread. The oats soak up the milk and flavors overnight, making them soft and delicious. You can customize your oats with some fun add-ins. Here are a few ideas to enhance flavor and texture: - A handful of dried fruit, like raisins or cranberries - A scoop of nut butter, such as almond or peanut - A sprinkle of cocoa powder for a chocolate twist - Fresh berries for a refreshing touch - A scoop of protein powder for an energy boost Feel free to mix and match based on what you like. These options make your breakfast even more exciting! If you don’t have all the ingredients, don’t worry. Here are some easy swaps: - Use quick oats instead of rolled oats for a softer texture. - Replace almond milk with cow's milk, soy milk, or oat milk. - Swap chia seeds for flaxseeds if you prefer. - Substitute maple syrup with honey or agave syrup. - Use pecans instead of walnuts for a different nutty flavor. These substitutions will keep your oats delicious while using what you have on hand. Enjoy experimenting! For the full recipe, check the link. To make banana bread overnight oats, you need just a few simple steps. First, gather all your ingredients. This makes the process smooth and easy. You will mix everything in one bowl, so keep it simple. Then, let the mixture sit overnight in the fridge. This allows the oats to soak and soften. 1. Start by mashing one ripe banana in a medium bowl. Use a fork until it is nice and smooth. 2. Add 1 cup of rolled oats and 1 cup of almond milk to the bowl. Stir gently so the oats get well coated with the banana. 3. Next, mix in 1 tablespoon of chia seeds, 1 teaspoon of vanilla extract, and 1 teaspoon of ground cinnamon. If you like it sweeter, add 1 tablespoon of maple syrup. Don’t forget a pinch of salt! 4. Fold in 2 tablespoons of chopped walnuts. This gives your oats a nice crunch. 5. Divide the mixture into two airtight jars. Make sure they are sealed tight for freshness. 6. Cover the jars and place them in the fridge overnight. Let them sit for at least 4-5 hours. 7. In the morning, take the jars out and stir the oats well. If they seem too thick, add a splash of almond milk. 8. For a pretty presentation, top the oats with extra banana slices, a sprinkle of cinnamon, and more walnuts. Serve your banana bread overnight oats in clear jars. This way, you can show off the nice layers. Garnish with fresh banana slices and a sprinkle of cinnamon. This not only looks good but also tastes great. Enjoy your healthy and tasty breakfast! You can find the full recipe [here]. To get the best texture for your banana bread overnight oats, you need to soak them well. Use rolled oats; they absorb liquid and get creamy. Make sure to mash the banana until smooth. This helps mix the flavors evenly. Chia seeds also help thicken the mix while adding a nice crunch. If you want a creamier texture, add more almond milk before serving. Store your overnight oats in airtight jars. This keeps them fresh and tasty. Make sure the lids are sealed tightly. They last well in the fridge for up to five days. If you want to prep ahead, make a few jars at once. You can enjoy them for breakfast all week long! A few common mistakes can ruin your oats. Don’t skip the chia seeds; they help with texture. Avoid using quick oats; they won’t soak properly. If your mixture looks too dry, add more milk. Remember to stir well before serving. This ensures all the flavors are mixed nicely. Lastly, don't forget to taste! Adjust sweetness with maple syrup if needed. For the full recipe, check out the detailed instructions above! {{image_4}} You can easily make nut-free banana bread overnight oats. Just skip the walnuts or pecans. Instead, try using seeds like sunflower or pumpkin seeds. They add crunch and nutrition without nuts. You can also add extra banana or a sprinkle of coconut flakes for more flavor. For a dairy-free and vegan option, choose almond milk or any plant-based milk. My favorite is oat milk for its creaminess. You can also use maple syrup instead of honey for sweetness. This way, everyone can enjoy this tasty breakfast treat. Get creative with flavors! You can add a tablespoon of cocoa powder for a chocolate twist. Or try mixing in a spoonful of peanut butter for richness. Even a dash of nutmeg can enhance the banana flavor. You can also top your oats with fresh berries or sliced apples for added sweetness. These variations make banana bread overnight oats fun and unique. With just a few tweaks, you can enjoy this dish a new way every time. For the complete recipe, check here: [Full Recipe]. You can keep your banana bread overnight oats in the fridge for up to five days. They stay fresh and tasty, so don’t worry if you make extra. Store them in airtight jars to lock in flavor and moisture. If you want to keep them longer, freeze the oats. Pour the mixture into freezer-safe containers or jars. They will last up to three months. When you want to eat them, just thaw them overnight in the fridge. To enjoy your oats warm, microwave them for about 30 seconds. Stir well and add a splash of almond milk for creaminess. You can also enjoy them cold straight from the fridge. Top with banana slices, cinnamon, or nuts for extra flavor. For a special touch, try adding a drizzle of maple syrup just before serving. Rolled oats are the best for overnight oats. They soak up liquid well and become soft. Quick oats can work too, but they may get mushy. Steel-cut oats don’t absorb liquid as well and stay chewy. Yes, you can use any milk you like. Almond milk, soy milk, or oat milk all work great. If you prefer dairy, regular milk is also fine. The choice of milk can change the flavor but keeps it creamy. To make overnight oats without chia seeds, simply leave them out. You can add extra oats or a spoonful of yogurt for creaminess. The recipe will still taste great even without the chia seeds. Absolutely! You can make banana bread overnight oats ahead of time. Prepare them up to five days in advance. Just store them in the fridge in airtight jars, ready to grab in the morning. Banana bread overnight oats offer many health benefits. They provide fiber from oats and bananas, which helps digestion. Oats also supply energy and keep you full longer. Nuts add healthy fats and protein, making this a balanced meal. Banana bread overnight oats are simple to make and full of flavor. We discussed key ingredients, optional additions, and even substitutions. You learned step-by-step instructions for preparing and serving. Tips helped you avoid common mistakes and achieve the best texture. Variations allow for nut-free or dairy-free options, making this dish versatile. Remember to store them correctly for lasting freshness. Enjoy your tasty, healthy creation, and feel free to explore new flavors!](https://lazychefmagic.com/wp-content/uploads/2025/05/f257e97e-12e1-4112-bc6c-3f3a684f0d22.webp)
Start your morning right with a bowl of Banana Bread Overnight Oats! This simple recipe combines sweet bananas, warm spices,

Looking for a crowd-pleaser that will make your next party unforgettable? Let me introduce you to Cheesy Spinach Artichoke Dip,
![To make savory oatmeal with a fried egg, gather these fresh ingredients: - 1 cup rolled oats - 2 cups vegetable broth - 1 tablespoon olive oil - 1 clove garlic, minced - 1 small onion, finely chopped - 1 cup spinach or kale, chopped - 1 large egg - 1 teaspoon soy sauce (or tamari for a gluten-free option) - 1 tablespoon nutritional yeast (optional, for a cheesy flavor) - Salt and pepper to taste - Sliced avocado for topping - Red pepper flakes for an extra kick You can boost the flavor of your savory oatmeal with these optional items: - Fresh herbs like parsley or cilantro - A splash of lemon juice for brightness - Crumbled feta cheese for added creaminess - Sautéed mushrooms for a rich taste - Hot sauce for extra heat Savory oatmeal is not just tasty; it is also nutritious. Here’s a quick breakdown: - Calories: About 300-350 per serving - Protein: 10-12 grams - Carbohydrates: 50-55 grams - Fiber: 8-10 grams - Fat: 10-15 grams, depending on toppings This dish is packed with vitamins and minerals from the greens and provides a good balance of carbs, protein, and healthy fats. The egg adds protein and richness, making it a filling breakfast option. Enjoy this dish as part of a balanced diet. For the full recipe, check out the details above. To start, grab a medium saucepan. Pour in 2 cups of vegetable broth. Heat it on medium until it boils. Once boiling, stir in 1 cup of rolled oats. Reduce the heat to low. Let the oats simmer for about 5 minutes. Stir occasionally to keep them from sticking. The goal is creamy and tender oats. While the oats cook, take a skillet and heat 1 tablespoon of olive oil over medium heat. Add 1 small finely chopped onion and 1 clove of minced garlic. Sauté for about 3-4 minutes. You want the onion to turn soft and clear. Next, toss in 1 cup of chopped spinach or kale. Cook for another 2-3 minutes. Stir until the greens wilt. Now, season with salt and pepper to taste. For the fried egg, use a small non-stick pan. Crack in 1 large egg and cook it as you like. If you want it over easy, let it cook until the whites set but the yolk stays runny. This adds a nice touch to your dish. Once your oats are cooked, mix in the sautéed veggies and 1 teaspoon of soy sauce. Stir to blend all the flavors. Now, spoon the savory oatmeal into bowls. Top each with the fried egg, some sliced avocado, and a sprinkle of nutritional yeast if you want a cheesy taste. Add red pepper flakes for a spicy kick. For the full recipe, check out the complete details. To make a great fried egg, start with a hot pan. Use a non-stick skillet, and add a bit of oil. Crack the egg gently into the pan. Cook it for about three minutes. The whites should be set, but the yolk should remain runny. If you like it more cooked, let it fry longer. For a twist, add some herbs or spices while it cooks. This small touch adds great flavor to your breakfast dish. Seasoning can change the whole dish. Start with salt and pepper. These two spices enhance the flavors of the oatmeal and egg. You can also add soy sauce or nutritional yeast for depth. If you want heat, sprinkle in some red pepper flakes. Taste your dish as you go. This helps you find the balance you like best. Feel free to swap in your favorite herbs too. Fresh herbs like chives or parsley can brighten up the dish. For creamier oatmeal, use vegetable broth instead of water. It adds flavor and helps make the oats rich. Stir in a splash of olive oil or a pat of butter while cooking. This adds smoothness and richness to the oats. If you want it even creamier, try adding a splash of milk or a non-dairy milk. Mixing in some nutritional yeast can also give a creamy, cheesy taste. Remember, the key is to stir frequently as the oats cook. This helps them absorb all the flavors and become nice and creamy. For the full recipe, check out the previous section. {{image_4}} You can swap spinach or kale for other greens. Try Swiss chard or arugula. Both add unique flavors. You can also use collard greens for a heartier taste. Each green brings its own nutrients and color. Experimenting with greens keeps your dish fresh and exciting. Want to boost protein? Add cooked chicken, tofu, or beans. They mix well and add texture. For a savory kick, sprinkle in some crumbled feta or goat cheese. You can also toss in nuts or seeds for crunch. These extras make your savory oatmeal even more filling and tasty. To make this dish gluten-free, use tamari instead of soy sauce. For a vegan version, skip the egg and add avocado or tofu instead. Nutritional yeast gives a cheesy flavor without dairy. You can also add extra veggies like mushrooms or bell peppers for more nutrition. Enjoy customizing your savory oatmeal to fit your diet! For the full recipe, check out [Full Recipe]. To store your savory oatmeal, let it cool down first. Place the leftovers in an airtight container. You can keep them in the fridge for up to three days. If you want to save it longer, consider freezing. When reheating, add a splash of water or broth to your oatmeal. This helps it regain its creamy texture. Heat in the microwave for about one to two minutes, stirring halfway through. You can also use a saucepan on low heat. Stir often to prevent sticking. If you want to freeze the oatmeal, portion it into freezer-safe containers. Leave some space at the top for expansion. The oatmeal can last in the freezer for up to three months. When ready to eat, thaw it overnight in the fridge before reheating. This method keeps the flavors intact. For the full recipe, check out the [Full Recipe]. You can add many tasty ingredients to savory oatmeal. Some great options include: - Chopped tomatoes - Cooked bacon or sausage - Grated cheese - Sautéed mushrooms - Fresh herbs like basil or parsley - A drizzle of hot sauce These additions can enhance the flavor and texture of your dish. Feel free to mix and match based on your taste! To get the perfect consistency, use the right water-to-oat ratio. For creamy oats, I suggest using two cups of broth for every cup of oats. Stir the oats while they cook. This helps them absorb the liquid evenly. If you want a thicker texture, let the oats cook a bit longer. For a thinner consistency, add a bit more broth or water. Yes, you can meal prep savory oatmeal! Cook a larger batch of oats and store them in airtight containers. You can keep them in the fridge for up to five days. When you are ready to eat, simply reheat the oats. Fry an egg fresh for each serving to keep it nice and warm. This way, you have a quick and tasty breakfast ready to go. For the full recipe, check out the earlier sections! This blog post covered how to make a delicious savory oatmeal dish. We discussed the key ingredients and optional flavors to make it shine. You learned step-by-step cooking methods for oats, veggies, and that perfect fried egg. Tips helped you tweak the taste and texture. We explored tasty variations and smart storage tips. Try this dish for a filling meal that is both nutritious and fun. Enjoy experimenting!](https://lazychefmagic.com/wp-content/uploads/2025/05/079865c1-eb76-4e96-bac1-f164bd3b3fa7.webp)
Are you ready to transform your breakfast routine? Savory oatmeal is the answer! This comforting dish, topped with a perfectly
![To make this dish, you will need: - 4 boneless, skinless chicken breasts - 1 bunch of fresh asparagus, trimmed - 4 cloves of garlic, minced - 1 lemon, zested and juiced - 2 tablespoons olive oil - 1 teaspoon dried thyme - 1 teaspoon smoked paprika - Salt and freshly ground black pepper to taste - Fresh parsley, chopped for garnish - Lemon slices for serving You can easily swap some ingredients. If you don’t have chicken breasts, try thighs or even turkey. For asparagus, green beans or broccoli work too. If you lack fresh garlic, garlic powder can stand in. If you want a different flavor, use fresh herbs like rosemary or basil instead of thyme. Using fresh herbs makes a big difference. They add bright, vibrant flavors. Fresh thyme or parsley can elevate your dish. Dried herbs are great when fresh isn’t available. However, dried can lose some flavor over time. Always check the expiry date. For this recipe, fresh herbs will give you the best taste and aroma. 1. Preheat your oven to 400°F (200°C). This step warms up the oven for perfect cooking. 2. Mix your marinade in a bowl. Combine olive oil, minced garlic, lemon juice, and lemon zest. Add dried thyme, smoked paprika, salt, and pepper. Whisk until well blended. 3. Coat the chicken in the marinade. Place the chicken breasts in the bowl and turn them to coat well. Marinate for at least 10 minutes, or up to 2 hours in the fridge. 4. Arrange the chicken in an oven-safe skillet. Lay the marinated chicken breasts in a single layer for even cooking. 5. Add the asparagus around the chicken. Place the trimmed asparagus alongside the chicken. Drizzle leftover marinade over the asparagus for added taste. 6. Bake in the oven for 20-25 minutes. Check that the chicken reaches an internal temperature of 165°F (75°C). The asparagus should be tender but still firm. 7. Broil for a golden finish. For the last 2-3 minutes, switch to broil. Watch carefully to avoid burning. This gives the chicken a nice crust. 8. Rest and garnish. Remove the skillet from the oven and let it rest for a few minutes. Sprinkle fresh parsley on top before serving. For this recipe, the cooking time is crucial. Bake at 400°F (200°C) for 20-25 minutes. The chicken must reach 165°F (75°C) to be safe to eat. The asparagus should be bright green and crisp-tender. If you want a nice brown crust, broil for 2-3 minutes at the end. Keep an eye on it to prevent burning. To check if your chicken is done, use a meat thermometer. Insert it into the thickest part of the chicken breast. It should read 165°F (75°C). If you don't have a thermometer, cut into the chicken. The juices should run clear, not pink. Proper doneness means juicy chicken and safe eating. Marinating chicken is key to great flavor. I suggest using a mix of olive oil, lemon juice, and garlic. This blend gives the chicken a fresh taste. Make sure each piece gets coated well. For best results, let the chicken marinate for at least 10 minutes. If you can wait, try marinating for up to 2 hours. This extra time lets the flavors soak in deeply. Asparagus should be tender yet crisp. To get this, look for bright green stalks. When preparing, trim the ends to remove any tough parts. When cooking, add the asparagus to the pan alongside the chicken. This way, it cooks in the same juices. Bake until just tender, around 20 to 25 minutes. For a little extra crunch, you can add the asparagus later in the cooking process. One common mistake is overcrowding the pan. If the pan is too full, the chicken and vegetables might steam instead of roast. This makes them less flavorful. Another mistake is not checking the chicken's doneness. Always use a meat thermometer. The chicken should reach 165°F (75°C) to be safe. Lastly, don’t skip the resting time after cooking. Letting the chicken rest helps keep it juicy. Use these tips to make your One-Pan Lemon Garlic Chicken and Asparagus a hit. For a full recipe, check out the [Full Recipe]. {{image_4}} You can easily change the flavors in this dish. Add different vegetables like bell peppers, zucchini, or cherry tomatoes. These will add color and taste. You can also use herbs like rosemary or basil to mix things up. If you like heat, try adding red pepper flakes. A pinch of cayenne can also spice things up. If you want to switch proteins, try using salmon or shrimp. Both cook quickly and add their unique flavor. You can even use tofu for a plant-based option. Just make sure to adjust the cooking time. Fish needs less time, while tofu may take a bit longer to brown nicely. Pair this dish with simple sides for a complete meal. Quinoa or brown rice makes a great choice. They soak up the delicious juices from the chicken and asparagus. A fresh green salad with lemon vinaigrette also works well. It adds crunch and brightness to your plate. You can find the full recipe for One-Pan Lemon Garlic Chicken and Asparagus to create this delightful meal. To keep your One-Pan Lemon Garlic Chicken and Asparagus fresh, store leftovers in an airtight container. This helps keep moisture in and air out. Place it in the fridge for up to three days. If you want to enjoy it later, consider freezing it. When reheating, aim for gentle heat. The best way is to use the oven. Preheat it to 350°F (175°C). Place the chicken and asparagus in a baking dish. Add a splash of water or broth to keep it moist. Cover with foil and heat for about 15-20 minutes. This keeps the chicken juicy and the asparagus crisp. For meal prep, freezing works well. Cut the chicken into pieces for quicker thawing. Place it in freezer-safe bags or containers. Add a label with the date for easy tracking. It can last up to three months in the freezer. To thaw, move it to the fridge overnight before reheating. This way, you retain the best flavors and textures. You can enjoy your One-Pan Lemon Garlic Chicken and Asparagus anytime! Yes, you can use frozen chicken and vegetables. Just know that frozen chicken may need extra time to cook. Ensure the chicken reaches 165°F (75°C) for safety. For frozen vegetables, they will release some water as they cook. This may make the dish a bit watery. If you use frozen veggies, cook them a little longer to get them nice and tender. This recipe is already dairy-free. It does not use any butter or cream. If you want to add creaminess, consider using coconut milk or a dairy-free yogurt. These options add richness without dairy. This dish pairs well with many sides. Here are some great options: - Fluffy quinoa - Steamed rice - Roasted potatoes - Mixed green salad - Garlic bread These sides will enhance your meal and make it more filling. Feel free to mix and match based on what you like! For the Full Recipe, check out the detailed instructions. In this blog post, I covered a simple recipe for One-Pan Lemon Garlic Chicken and Asparagus. You learned about key ingredients and smart substitutes. I shared the best methods to cook chicken properly and tips to get tender asparagus. Remember to try different flavors and proteins for variety. Store leftovers carefully, and I answered common questions to help you succeed. Enjoy making this dish that is easy and full of flavor! Your cooking skills will shine, and your family will love it.](https://lazychefmagic.com/wp-content/uploads/2025/05/922d952b-be24-4a46-bd60-839dad88b2ab.webp)
Are you ready to impress your family or friends with a quick and tasty meal? This One-Pan Lemon Garlic Chicken
![- 8 tomatillos, husked and thoroughly rinsed - 2 jalapeño peppers, stems removed (keep seeds for extra heat) - 1 small onion, coarsely chopped - 2 cloves garlic, peeled - 1 cup fresh cilantro, finely chopped - Juice of 1 lime - Salt, to taste - 1 tablespoon extra virgin olive oil When making salsa verde, pick fresh ingredients. Tomatillos are key; they add a tangy taste. Their bright green color makes your salsa pop. Jalapeños give heat. You can keep the seeds for a spicy kick or remove them for a milder dish. Onions add sweetness. I love using small onions for a more balanced flavor. Garlic brings a rich depth. Use fresh cloves for the best result. Fresh cilantro is crucial. If you don’t like cilantro, try parsley for a different flavor profile. Lime juice adds brightness and balances the flavors. Salt enhances all the tastes. Lastly, extra virgin olive oil helps blend everything smoothly. - Alternative peppers: You can swap jalapeños for serrano peppers. They are spicier but add great flavor. - Substitutes for cilantro: If you dislike cilantro, use parsley or basil. Each brings its own unique taste. - Options for lime juice: If you don't have fresh lime, use lemon juice. It won’t taste the same, but it works in a pinch. For the full recipe, please refer to [Full Recipe]. 1. Preheat your oven to 425°F (220°C). This heat will help the flavors pop. 2. Arrange the tomatillos, jalapeños, onion, and garlic on a large baking sheet. 3. Drizzle with olive oil and toss gently. Make sure everything is covered. 1. Roast the mixture for about 15-20 minutes. You want the tomatillos to be soft. 2. Keep an eye on them. You need a nice char on the edges. This adds flavor. 1. After roasting, let the veggies cool for a few minutes. 2. Transfer them to a blender or food processor. Add the cilantro, lime juice, and salt. 3. Blend until smooth or chunky, based on your preference. 4. Taste your salsa verde. Adjust the salt or lime juice if needed. 5. For the best flavor, let it sit for at least 30 minutes before serving. Check out the Full Recipe for more details! To create the best salsa verde, you need to focus on balancing flavors. Start with the right amount of tomatillos. They should be tangy but not overpowering. Add jalapeños for heat. Adjust the number based on your spice preference. You also want to add enough salt and lime juice to bring out the flavors. Serve your salsa at room temperature. This enhances the taste, making each bite more enjoyable. Be careful not to over or under-roast your vegetables. Over-roasting can burn the garlic, giving the salsa a bitter taste. Under-roasting leaves the tomatillos tough. Also, don’t skip on seasoning. Salsa verde often needs a good pinch of salt. Taste as you go to ensure your salsa is flavorful. You can add spices like cumin or smoked paprika for a different twist. They can deepen the flavor and add warmth. Experimenting with herbs can also change the vibe. Try adding mint or oregano for a fresh touch. Each small change can make your salsa verde unique and exciting! {{image_4}} To make your salsa verde spicier, you can add more jalapeños. Remove the seeds for less heat or keep them for more kick. You can also mix in other hot peppers, like serrano or habanero, to personalize the spice level. Each pepper has its own flavor, so feel free to experiment. Roasted salsa verde has a deeper, smokier flavor. The roasting process brings out natural sweetness in the tomatillos and peppers. Fresh salsa verde, on the other hand, tastes bright and vibrant. It has a crisp texture that can be refreshing. Choose roasted salsa for tacos or grilled meats, and fresh salsa for chips or salads. You can add fruits like mango or peach for a sweet twist. These fruits add a nice contrast to the tangy tomatillos. Incorporating different herbs also creates new flavors. Try using mint or basil instead of cilantro for a unique taste. These small changes can make your salsa verde truly special. Check out the Full Recipe to get started! To keep your salsa verde fresh, store it in an airtight container. Place it in the fridge right after you make it. This keeps its bright taste and color. Use a glass jar for best results. If you want to store it long-term, you can freeze it. Divide the salsa into small portions and put them in freezer bags. Squeeze out excess air before sealing. This helps prevent freezer burn. Homemade salsa verde lasts about 5 to 7 days in the fridge. If you freeze it, it can last up to 3 months. Always check for signs of spoilage. If you see mold or notice an off smell, throw it away. Freshness is key to enjoying your salsa. You can get creative with leftover salsa verde! Try using it as a topping for grilled chicken or fish. It also works great in tacos or burritos. You can even mix it into soups for added flavor. Salsa verde can brighten up many dishes, so don’t let it go to waste! Salsa verde is a green sauce made from tomatillos, peppers, and herbs. Its name means "green sauce" in Spanish. It hails from Mexico, where it adds zest to meals. Tomatillos are key and give salsa verde its unique flavor. You can use it with tacos, grilled meats, or chips. It’s fresh and bright, perfect for any gathering. Yes, you can make salsa verde ahead of time. In fact, it often tastes better after sitting for a while. The flavors blend and deepen, making each bite more delicious. I suggest making it a day ahead if you can. Just store it in the fridge in a sealed container. Let it sit at room temp for a bit before serving to enhance the flavors. The heat level of salsa verde can vary. It depends on how many jalapeños you use and if you keep the seeds. Jalapeños offer a mild to medium heat. If you want more spice, add more jalapeños or switch to hotter peppers. Always taste as you go, so you can adjust to your heat preference. This guide covered everything about making salsa verde, from ingredients to storage. You learned about key ingredients like tomatillos and jalapeños, plus useful substitutions. I shared tips for perfecting flavor, avoiding common mistakes, and exploring variations. Salsa verde is versatile and fun to make. The right technique can boost any meal. Don’t hesitate to experiment and create your own twist. With practice, you'll master this tasty sauce. Enjoy making your salsa verde!](https://lazychefmagic.com/wp-content/uploads/2025/05/3f356c18-4e49-41ee-8573-04d901754bd3.webp)
If you’re searching for a fresh and zesty way to spice up your meals, homemade salsa verde is the answer!
