Skip to content
DisclaimerTerms Of UseGDPR PolicyCookie Policy

lazychefmagic

  • Home
  • Drinks
  • Appetizers
  • Dinner
  • Dessert
  • About
  • Contact
  • Privacy Policy
DisclaimerTerms Of UseGDPR PolicyCookie Policy

NO-ING-IMG

To make a delicious Mediterranean couscous salad, gather these ingredients: - 1 cup couscous - 1 1/4 cups vegetable broth - 1/2 cup cherry tomatoes, halved - 1/2 cucumber, diced - 1/2 red onion, finely chopped - 1/2 cup kalamata olives, pitted and sliced - 1/4 cup feta cheese, crumbled - 1/4 cup fresh parsley, finely chopped - Juice of 1 lemon - 2 tablespoons extra virgin olive oil - 1 teaspoon dried oregano - Salt and pepper to taste For the best salad, choose fresh ingredients carefully. Here are some tips: - Couscous: Look for fine or whole wheat couscous for great texture. - Tomatoes: Choose firm, vibrant cherry tomatoes. They should smell sweet and fragrant. - Cucumber: Pick a crisp cucumber. English cucumbers are ideal; they have fewer seeds. - Onion: Go for a fresh red onion. It should feel firm and have no blemishes. - Olives: Select kalamata olives in brine for a rich, tangy taste. - Feta Cheese: Find a quality feta that is creamy and crumbly. This adds great flavor. - Parsley: Fresh parsley should be bright green with no yellow leaves. If you don’t have an ingredient, here are some easy swaps: - Couscous: Use quinoa or bulgur for a gluten-free option. - Vegetable Broth: Chicken broth works well if you prefer a non-vegetarian option. - Feta Cheese: Goat cheese is a good alternative if you want a different flavor. - Olive Oil: Avocado oil can replace olive oil for a lighter taste. - Lemon Juice: Lime juice can add a zesty twist to your dressing. You can find the complete recipe for this salad in the Full Recipe section. Enjoy making this fresh and flavorful dish! To prepare the couscous, start by boiling 1 1/4 cups of vegetable broth in a medium saucepan. Once it bubbles, take it off the heat. Add 1 cup of couscous and stir it gently. Cover the saucepan with a lid and let it sit for 5 minutes. This allows the couscous to soak up all the flavor. After 5 minutes, fluff the couscous with a fork to separate the grains. In a large bowl, mix together the fresh ingredients. Use 1/2 cup of halved cherry tomatoes, 1/2 diced cucumber, and 1/2 finely chopped red onion. Add 1/2 cup of sliced kalamata olives and 1/4 cup of crumbled feta cheese. Finally, stir in 1/4 cup of finely chopped parsley. Gently mix so all the flavors combine nicely. Grab a small bowl to make the dressing. Whisk together the juice of 1 lemon, 2 tablespoons of extra virgin olive oil, and 1 teaspoon of dried oregano. Add a pinch of salt and pepper for taste. Make sure to taste the dressing and adjust if needed. The dressing should be bright and flavorful. Once the dressing is ready, pour the fluffed couscous into the bowl with the fresh ingredients. Drizzle the dressing over the top. Toss everything gently until all the ingredients are well coated. Let the salad rest for 15 minutes at room temperature before serving. This time helps the flavors blend beautifully. For the full recipe, check the details above. To make a great couscous salad, start with quality ingredients. Use fresh vegetables like ripe cherry tomatoes and crisp cucumbers. Opt for a good vegetable broth to cook the couscous. This adds depth and flavor to the dish. Always fluff the couscous after it cooks. This helps separate the grains and keeps your salad light. When mixing your salad, add the dressing just before serving. This keeps the vegetables fresh and crunchy. Letting the salad sit for a bit helps the flavors blend well. Aim for about 15 minutes to allow the ingredients to mingle. Serve your Mediterranean couscous salad in a large bowl. This showcases the colorful ingredients beautifully. For a fun twist, try using individual bowls for each guest. Garnish the top with extra parsley or whole olives. A light drizzle of olive oil adds a nice shine. Pair this salad with grilled meats or fish. It makes a great side dish for summer barbecues. You can also enjoy it on its own for a light lunch. To boost flavor, consider adding spices like cumin or smoked paprika. These give a warm, earthy taste. Fresh herbs like mint or basil can brighten the dish. If you like a bit of heat, sprinkle in some red pepper flakes. Lemon zest is another great addition. It adds a fresh, citrusy note. You can mix and match spices based on your taste. Experimenting with flavors makes the salad exciting. For the full recipe, check out the Mediterranean Couscous Salad Delight. {{image_4}} You can boost your Mediterranean couscous salad with protein. I love adding chickpeas for a plant-based option. They add great texture and a nutty flavor. Simply rinse and drain a can of chickpeas, then mix them in. If you prefer meat, grilled chicken works well too. Just slice it into strips and toss it with the salad. This makes the dish heartier and filling. To make this salad vegan, skip the feta cheese and use a dairy-free cheese instead. You can also add avocado for creaminess. For gluten-free options, replace couscous with quinoa or rice. Both choices keep the salad light and fresh while ensuring everyone can enjoy it. Seasonal produce can change the flavor profile of your salad. In summer, add sweet corn or bell peppers for crunch and color. In autumn, roasted butternut squash adds warmth. You can also switch up herbs; use basil in summer and sage in fall. These changes keep the salad vibrant and exciting based on what’s fresh and available. Remember, you can find the full recipe for the Mediterranean couscous salad in the earlier section. Enjoy experimenting with these variations! To keep your Mediterranean couscous salad fresh, store it in an airtight container. Make sure it’s cooled down before sealing it up. This helps keep the flavors and textures intact. I recommend using glass containers or BPA-free plastic ones. Glass is great because it doesn’t absorb smells and keeps the salad safe. Choose a container that fits your salad snugly to avoid excess air. Your salad will last in the fridge for about 3 to 5 days. If you want to enjoy it warm, simply heat it gently in the microwave. Add a splash of olive oil or a bit of broth to keep it moist. Remember, it’s best served cold, so enjoy it as a refreshing dish! For the full recipe, check out the Mediterranean Couscous Salad Delight. You can use quinoa or bulgur as a substitute for couscous. Both are healthy grains. Quinoa is gluten-free and full of protein. Bulgur has a nutty taste and cooks quickly. You can also try orzo pasta for a fun twist. Just make sure to adjust cooking times. Yes, you can make this salad ahead of time. It tastes even better after the flavors mix. Store it in the fridge for up to two days. Just add the dressing just before serving to keep it fresh and tasty. This salad is packed with nutrients. Here’s a quick breakdown: - Couscous provides energy and carbs. - Fresh veggies add vitamins and minerals. - Feta cheese gives protein and calcium. - Olives provide healthy fats. Overall, it is a balanced dish. Enjoy it as a meal or side. For the complete recipe, check out the Full Recipe link. This blog post covered a complete guide for making Mediterranean Couscous Salad. We looked at fresh ingredients, preparation steps, and tips for flavor. You learned about variations to suit your taste, storage tips, and answers to common questions. This salad is easy to make and versatile. It’s healthy and packed with flavor. Remember, you can mix and match ingredients to make it your own. Enjoy making this dish, and share it with friends and family. Don’t hesitate to get creative!

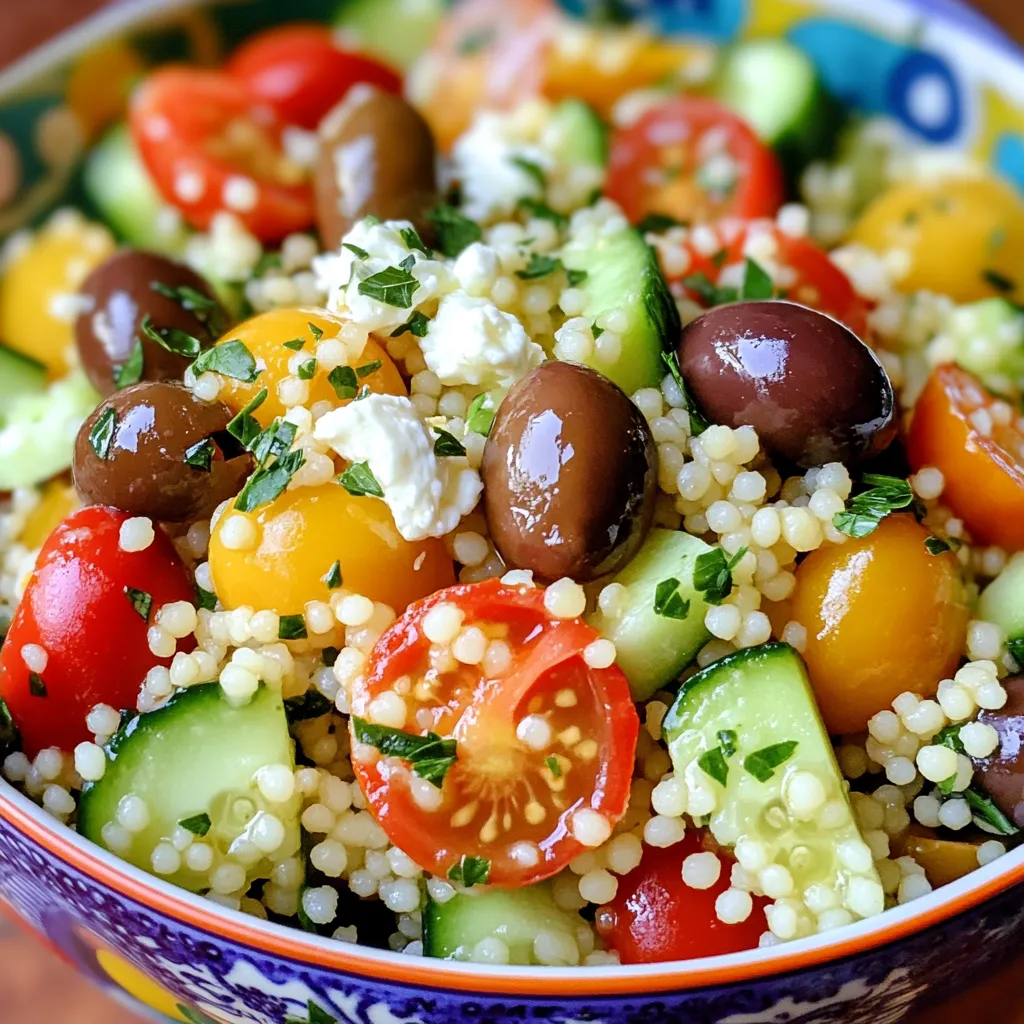
Mediterranean Couscous Salad Fresh and Flavorful Recipe

Get ready to enjoy a delicious Mediterranean Couscous Salad! This fresh and flavorful recipe is packed with bright veggies, tasty

- Ripe peaches: These fruits bring sweetness and juiciness. They are the star of the show. Choose peaches that smell sweet and feel slightly soft. This ensures they burst with flavor in your salsa. - Red bell pepper: This adds crunch and a mild sweetness. Its bright color makes the salsa more appealing. It pairs well with peaches and enhances the flavor. - Jalapeño: This pepper brings heat. You can adjust it based on your spice level. Removing the seeds makes it milder. A little goes a long way in adding zest. - Red onion: This ingredient adds a sharp bite. It balances the sweetness of peaches. Mince it finely for even flavor distribution. - Fresh cilantro: It adds a fresh, herbal note. This herb brightens the flavors in the salsa. Chop it finely for the best effect. - Fresh lime juice: This gives the salsa a tangy kick. It enhances all the other flavors. Using fresh lime is key to a bright taste. - Honey: This is optional. It can add a touch of sweetness if desired. Use it sparingly to keep the balance. - Salt and black pepper: These are essential for seasoning. They enhance the overall flavor of the salsa. Adjust them to your taste for the best results. For the complete recipe, check out the full recipe. 1. Start by gathering all your fresh ingredients. You need ripe peaches, red bell pepper, red onion, jalapeño, cilantro, lime juice, honey, salt, and black pepper. 2. Dice the peaches into small cubes. Make sure they are ripe and sweet. Next, finely chop the red bell pepper and mince the red onion. This adds great color and crunch. 3. Mince the jalapeño. Adjust the heat to your liking. If you want more spice, leave some seeds. For less heat, remove all the seeds. 4. Now, combine all the diced fruits and veggies in a medium mixing bowl. Add the chopped cilantro. This herb gives the salsa a fresh taste. 5. Drizzle fresh lime juice over the mixture. If you like it sweeter, add honey now. Stir well to blend the flavors together. 6. Use a spatula or large spoon to gently toss everything. Be careful not to mash the peaches. They should remain chunky for the best texture. 7. Season your salsa with salt and black pepper. Taste it and adjust the lime juice and honey if needed. 8. Cover the bowl with plastic wrap. Refrigerate the salsa for at least 30 minutes. This helps the flavors mix well and taste better. For the best peach salsa, follow these steps carefully. This recipe is not just tasty; it’s also fun to make! You can find the full recipe for more details. - Adjusting heat levels with jalapeño: If you like spice, add more jalapeño. For milder salsa, use less or remove the seeds. This gives you control over the heat. - Adding fruits or herbs for variation: You can mix in diced mango or pineapple for a sweet twist. Fresh mint or basil can also add a unique flavor. Experiment and find your favorite mix! - Using alternative sweeteners: If you want less sugar, try agave syrup or maple syrup. You can even skip sweeteners altogether if you prefer a tangy salsa. - Choosing ripe peaches: Always pick peaches that are firm but slightly soft when you press gently. This ensures they are sweet and juicy. Look for a nice golden color too! - Chilling for optimal flavor: After mixing, let the salsa chill in the fridge for at least 30 minutes. This step allows the flavors to blend well and taste even better. - Serving suggestions and pairings: Serve the salsa with tortilla chips, grilled fish, or chicken. It also adds a fresh touch to tacos or salads. You can use it as a topping or a side. Enjoy the burst of flavors! For the complete recipe, visit [Full Recipe]. {{image_4}} You can make peach salsa even better by adding other fruits. Try using ripe mango or juicy pineapple. Both fruits add a nice sweetness and tropical flair. Just chop them small and mix them in! You can also use berries for a twist. Avocado is another great addition. It brings a creamy texture to the salsa. Just dice the avocado and fold it in gently. Be careful not to mash it. This makes your salsa rich and smooth, giving it a delightful taste. You can play with the flavors of your peach salsa. If you like it spicy, add more jalapeño or even some diced serrano peppers. For a milder version, skip the heat or use just a little jalapeño. Adding garlic or cumin can change the whole taste. Garlic gives a bold flavor, while cumin adds warmth. Just a pinch goes a long way. Experiment with these ingredients to find your perfect mix. Always taste and adjust the spices to suit your liking. For the full recipe, check out the [Full Recipe]. To keep your peach salsa fresh, refrigerate it right after making. Place it in an airtight container. This helps seal in the flavors and keep it crisp. If you don’t have a container, cover the bowl tightly with plastic wrap. Make sure no air can get in. Peach salsa lasts up to five days in the fridge. After that, it may lose its taste and crunch. If you want to save some for later, freezing is a great option. Scoop the salsa into freezer-safe bags or containers. Leave some space at the top for expansion. It can stay in the freezer for up to three months. For the best results, thaw it in the fridge overnight before using. The texture may change a bit, but the flavor will still be tasty. Enjoy your fresh peach salsa anytime! You can find the full recipe above to make this delightful summer treat. How to make peach salsa from canned peaches? To make peach salsa with canned peaches, start by draining the peaches well. Chop them into small pieces. Follow the same steps as the fresh recipe. Mix with red bell pepper, onion, jalapeño, cilantro, lime juice, and honey if you like it sweet. This option works well if fresh peaches aren’t available. Can you use frozen peaches in the recipe? Yes, you can use frozen peaches! Just thaw them first. Drain any extra liquid after thawing. Chop them into small pieces. Use them just like fresh peaches. The salsa will still taste great, but the texture might be a bit softer. What are the health benefits of peaches? Peaches are juicy and full of good things. They are low in calories and high in vitamins A and C. They also have fiber, which helps digestion. Eating peaches can keep your skin healthy and support your immune system. Enjoying peach salsa adds these benefits to your meals! This blog post showed you how to make tasty peach salsa. You learned about ingredients like ripe peaches, red bell peppers, and jalapeños. We covered step-by-step instructions, tips for customization, and best practices for serving. You also discovered storage ideas and answers to common questions. Now, it's time to try your own twist on this recipe. Experiment with flavors and share with friends. Enjoy the fresh taste of peach salsa at your next meal!

Peach Salsa Fresh and Flavorful Summer Delight

Are you ready for a summer treat that’s fresh and bursting with flavor? Peach salsa is your answer! This vibrant

- 2 medium sweet potatoes - 1 red bell pepper - 1 yellow bell pepper - 1 small red onion - 2 cloves garlic - 3 tablespoons olive oil Sweet potatoes are the star here. They bring a natural sweetness and great texture. Both bell peppers add color and crunch. The red onion gives a nice bite, while garlic provides a fragrant kick. Olive oil is key for sautéing and adds healthy fats. - 1 teaspoon smoked paprika - 1 teaspoon ground cumin - ½ teaspoon cayenne pepper (optional) - Salt and black pepper Spices elevate the dish. Smoked paprika adds depth. Ground cumin brings warmth and earthiness. Cayenne pepper gives it a little heat if you choose. Salt and black pepper enhance all the flavors. - 1 cup kale (or spinach) - 4 large eggs - Fresh cilantro or parsley for garnish For a healthy twist, add kale or spinach. They wilt nicely and boost nutrition. Eggs provide protein and richness. You can fry them right in the hash. A sprinkle of fresh herbs adds brightness to the dish. If you want the full recipe, check it out! - Heat the olive oil in a skillet over medium heat until it shimmers. - Add the diced sweet potatoes and spread them evenly. Season with salt and black pepper. Sauté for about 10-12 minutes. Stir occasionally until they are tender and golden. - Incorporate the diced red onion and minced garlic into the skillet. - Sauté for 3-4 minutes until the onion turns translucent and fragrant. - Stir in the chopped red and yellow bell peppers. - Add the smoked paprika, ground cumin, and cayenne pepper if using. Cook for 5-7 minutes until the peppers soften but still have some crunch. - Fold in the chopped kale and mix it through the hash. - Let it wilt down for about 2 minutes. Taste and adjust seasoning with more salt and pepper as needed. - If you want eggs, create four small wells in the mixture. - Crack an egg into each well. Cover the skillet and cook for about 5-6 minutes. The egg whites should set, while the yolks stay runny. - Once done, gently stir the hash to mix all ingredients. - Serve hot and garnish with freshly chopped cilantro or parsley for a fresh touch. This hearty sweet potato hash is perfect for any meal! For the full recipe, check out the detailed instructions above. To cook sweet potatoes perfectly, start by cutting them into even pieces. Aim for 1/2-inch cubes. This size helps them cook evenly and stay tender. To avoid mushiness in your hash, do not overcrowd the pan. If needed, cook in batches. Sauté the sweet potatoes over medium heat, allowing them to caramelize slightly. This adds great flavor and texture. For a tasty hash, use spices like smoked paprika and cumin. These give warmth and depth. Add herbs like fresh cilantro or parsley for a fresh twist. When sautéing, heat the olive oil until it shimmers. This means it’s hot enough to cook the sweet potatoes without sticking. Stir the ingredients often to prevent burning. You can cook eggs in many ways for this dish. Try poaching, frying, or even scrambling them. Each method gives a unique taste. For doneness, if you like runny yolks, cook the eggs for about 5-6 minutes. If you prefer firm yolks, add a few extra minutes. Just make sure the whites are set. For the full recipe, refer to the detailed instructions provided above. {{image_4}} You can mix it up with many vegetables. Try adding zucchini, mushrooms, or carrots. Seasonal swaps are great too. Use squash in fall or asparagus in spring. Each swap brings new flavors. For protein, think about meat or plant-based options. You can add cooked sausage or bacon for a savory taste. If you prefer plant-based, try black beans or chickpeas. These legumes boost nutrition and flavor. Sweet potato hash shines at any meal. For breakfast, serve it with eggs sunny-side up. At lunch, pair it with a fresh salad. It also works well for brunch with mimosas. You can even enjoy it as a side dish at dinner. The options are endless! To store leftover sweet potato hash, let it cool first. Place it in an airtight container. This helps keep it fresh. You can store it in the fridge for up to five days. Make sure to label it with the date. Can you freeze sweet potato hash? Yes, you can! To freeze, let it cool completely. Then, transfer it to a freezer-safe container. Seal it tightly to avoid freezer burn. It can last up to three months in the freezer. For thawing, move the container to the fridge overnight. This helps it thaw slowly and safely. When ready to eat, reheat it on the stove for best results. The best methods for reheating sweet potato hash are on the stove or in the oven. For the stove, place it in a skillet over medium heat. Stir occasionally until it is heated through. If using the oven, preheat it to 350°F (175°C). Spread the hash on a baking sheet and heat for about 15 minutes. This keeps the texture and flavor intact. Always taste before serving to adjust seasoning if needed. Yes, you can make sweet potato hash ahead of time. To prepare for meal prep, follow these steps: - Cook the hash as per the recipe. - Let it cool completely before storing. - Place it in an airtight container. - Store it in the fridge for up to four days. Reheat it on the stove or in the microwave. This way, you save time and enjoy a quick meal later. You can add many ingredients to sweet potato hash. Some popular combinations include: - Black beans for protein. - Zucchini for extra veggies. - Corn for sweetness. - Chorizo or sausage for a meaty kick. - Cheese for creaminess. Feel free to mix and match based on your taste and what you have on hand. To make sweet potato hash crispy, follow these tips: - Cut sweet potatoes into small, even cubes for uniform cooking. - Don't overcrowd the pan; cook in batches if needed. - Use enough oil to help with crisping. - Let the potatoes sit without stirring for a few minutes. These steps will help you achieve that golden, crispy texture everyone loves. Yes, sweet potato hash is healthy. Sweet potatoes are rich in vitamins and minerals. They provide: - Vitamin A for eye health. - Fiber for digestive health. - Antioxidants that fight inflammation. Adding veggies and protein boosts the nutritional value. Enjoy this dish knowing it’s good for you! This sweet potato hash is simple yet full of flavor. You learned how to prepare it step by step, starting with fresh sweet potatoes and vibrant peppers. I shared tips for cooking and flavoring, plus ways to customize your dish. Remember, leftovers store well and reheat nicely. Enjoy this hearty meal for breakfast, lunch, or dinner. It's healthy, tasty, and versatile. Embrace your creativity and make it your own. You won’t regret trying this dish!

Sweet Potato Hash Perfect for Any Meal

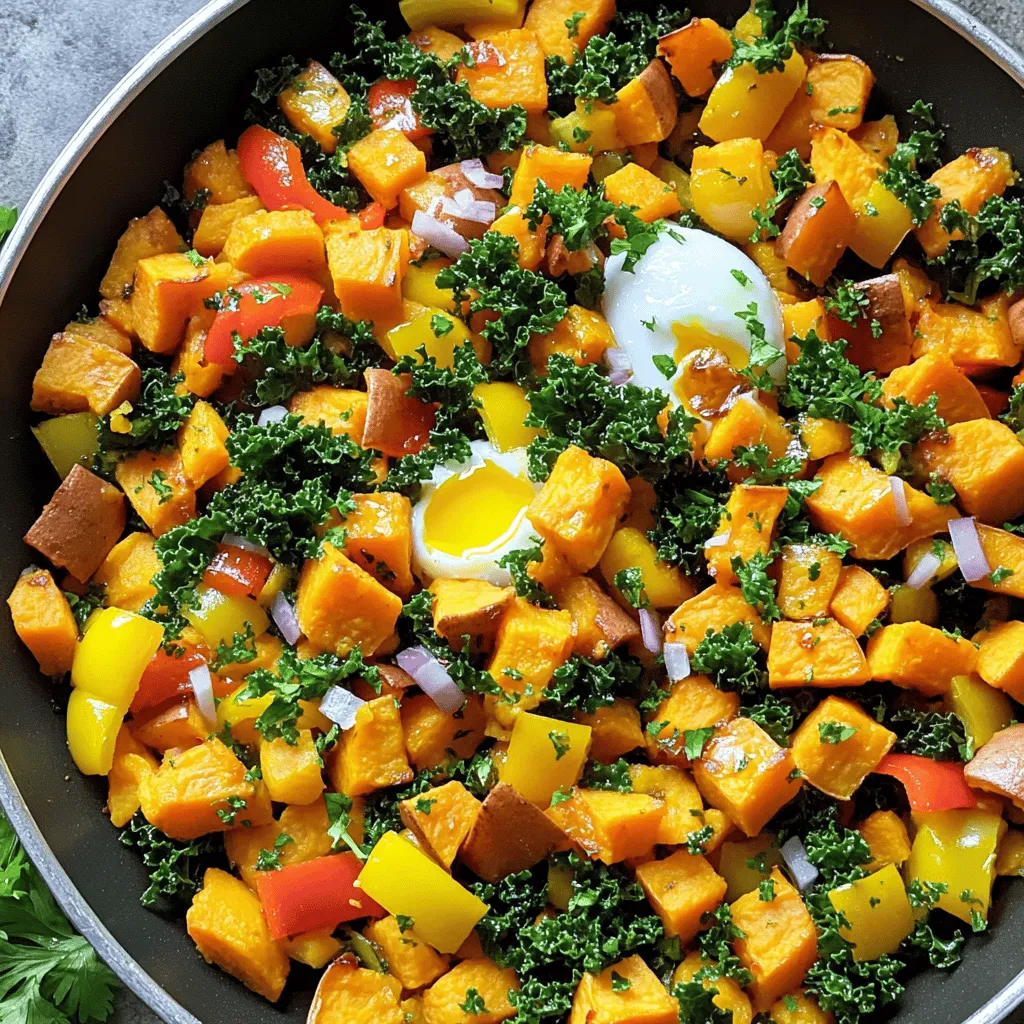
If you’re looking for a versatile dish that shines at any meal, sweet potato hash is your answer. Packed with

To make these delicious raspberry lemon bars, you need the following ingredients: - 1 cup all-purpose flour - 1/2 cup powdered sugar, plus extra for dusting (optional) - 1/4 teaspoon salt - 1/2 cup unsalted butter, melted - 2 large eggs - 1 cup granulated sugar - 1/4 cup freshly squeezed lemon juice (about 2 medium lemons) - Zest of 1 lemon - 1 cup fresh raspberries (or frozen raspberries, thawed and drained) Using high-quality ingredients makes a big difference. Choose fresh lemons for the best flavor. Their zest adds a bright note to the bars. Fresh raspberries are ideal, but frozen can work too. Just ensure they are thawed and drained well. For the crust, use unsalted butter for better control of salt levels. Opt for organic flour and sugar whenever possible. You can easily adapt this recipe to fit different diets: - For a gluten-free option, use a 1:1 gluten-free flour blend. - If you need a dairy-free version, replace unsalted butter with coconut oil or vegan butter. - For a lower sugar version, consider using a sugar substitute like stevia or monk fruit. - If you want to skip eggs, try a flaxseed or chia seed mixture as a binding agent. By making these swaps, you can enjoy raspberry lemon bars that fit your needs. For the full recipe, check out the detailed instructions provided! Start by preheating your oven to 350°F (175°C). Take an 8x8 inch baking dish. You can grease it lightly or line it with parchment paper. Leave some paper hanging over the edges. This makes it easy to lift out later. In a medium bowl, mix together the flour, powdered sugar, and salt. Whisk these dry ingredients until they blend well. Next, pour in the melted butter. Use a fork or spatula to stir until it looks like wet sand. Now, press the mixture evenly into the bottom of the dish. Make sure it covers the whole base. Bake this crust for about 15 minutes. You want it to be golden brown. While your crust bakes, it’s time to make the filling. In a large bowl, whisk the eggs, granulated sugar, lemon juice, and lemon zest. Keep whisking until it’s smooth and creamy. Now, gently add the raspberries. Fold them in carefully. You don’t want to crush them. The berries give a nice pop of color and flavor. When the crust is ready, pour the lemon and raspberry filling on top. Spread it out evenly. Return the dish to the oven and bake for another 20-25 minutes. The filling should be set but still a bit jiggly in the middle. Once done, take it out and let it cool on a wire rack. After it cools to room temperature, put it in the fridge for at least an hour. This helps the filling firm up. When you’re ready to serve, dust the top with some powdered sugar. It adds a nice touch! Enjoy these tasty raspberry lemon bars. For the full recipe, check the section above. Baking can be tricky. Here are some mistakes to watch out for: - Not measuring ingredients: Use measuring cups and spoons for accuracy. - Overmixing the batter: Mix just until combined to keep bars light. - Skipping the chill time: Refrigerating helps the bars set properly. Layering is key for these bars. Follow these tips: - Press the crust firmly: Use your fingers or a flat bottomed glass to pack it. - Pour filling gently: To keep layers separate, pour slowly over the crust. - Use a toothpick: Check doneness by inserting a toothpick into the center. If it comes out clean, it’s ready. Want more flavor? Try these ideas: - Add zest: Use more lemon zest for a stronger citrus taste. - Use herbs: A hint of fresh mint or basil can add depth. - Drizzle sauce: Top with a berry sauce for extra sweetness and flair. For the full recipe, check out the details above. Enjoy your baking! {{image_4}} You can have fun with this recipe. Instead of raspberries, try using blueberries or strawberries. These fruits give a sweet taste. You can also use blackberries for a tart twist. If you want a tropical feel, use mango puree. Adjust the lemon juice based on the fruit's sweetness. This keeps the balance of tangy and sweet. You can make these bars gluten-free easily. Substitute all-purpose flour with almond or oat flour. For a vegan option, replace eggs with flax eggs. Mix one tablespoon of ground flaxseed with three tablespoons of water. Let it sit for a few minutes until it thickens. Use coconut oil instead of butter for a dairy-free version. These swaps keep the flavor rich and delicious. Presentation matters! Cut the bars into fun shapes with cookie cutters. Serve them on a bright platter. Top each bar with whipped cream for extra delight. You can also pair them with a scoop of vanilla ice cream. Fresh mint leaves add a nice touch too. For a fancy twist, drizzle with a lemon glaze. You’ll impress everyone with these simple ideas. Try the full recipe to explore all these variations and more! To keep your raspberry lemon bars fresh, store them in the fridge. Place the bars in an airtight container. This will help them last up to one week. If you need to store them longer, freezing is a great option. To freeze your raspberry lemon bars, first, let them cool completely. Then, cut them into squares. Wrap each square tightly in plastic wrap. After that, place the wrapped bars in a freezer-safe bag or container. They can stay fresh for up to three months in the freezer. If your bars were frozen, let them thaw in the fridge overnight. This keeps them cool and tasty. Before serving, dust them with powdered sugar for a sweet touch. You can also add fresh raspberries on top for a colorful look. Enjoying these bars fresh makes every bite a delight. To cut the bars, use a sharp knife. Make sure the bars are cold. This helps keep the filling intact. Start by slicing down the middle. Then, cut each half into equal pieces. If you want clean edges, wipe the knife between cuts. A little patience here makes a big difference. Yes, you can use frozen raspberries. Just make sure to thaw and drain them first. Frozen fruit tends to hold more water. This can make the filling too wet. Gently fold the thawed raspberries into the filling. Be careful not to crush them too much. You can make these bars up to two days in advance. Store them in the fridge. This allows the flavors to develop. If you want to keep them longer, consider freezing. Just wrap them well in plastic wrap. Then, place them in an airtight container. In this post, we covered how to make delicious raspberry lemon bars. We went through the ingredients, from special notes on quality to substitutions. The step-by-step guide detailed prepping, filling, baking, and cooling. We shared tips for avoiding mistakes and creating perfect layers. You also learned about fun variations and how to store your treats correctly. With these clear instructions, you can bake confidently. Enjoy your baking and make these bars shine!

Raspberry Lemon Bars Tangy and Sweet Delight

Are you ready to indulge in a treat that is both tangy and sweet? My Raspberry Lemon Bars are the

- 1 medium head of cauliflower - Flour and milk for batter - Seasonings: garlic powder, onion powder, smoked paprika, salt, and pepper The main ingredient in this dish is cauliflower. I love using a medium head of cauliflower because it gives the perfect amount for tacos. The batter is simple but key. You need flour and milk to make it stick. I add garlic powder, onion powder, smoked paprika, salt, and pepper for flavor. These seasonings make the cauliflower pop with taste. - Tortillas (corn or flour) - Fresh toppings: lettuce, tomatoes, blue cheese, cilantro, avocado For the tacos, you can use corn or flour tortillas. Both are great, but I prefer corn for a nice crunch. The fresh toppings are what make your tacos shine. I like to use shredded lettuce, diced tomatoes, and crumbled blue cheese. If you want a lighter option, you can use a dairy-free cheese. Adding chopped cilantro and sliced avocado brings freshness and creaminess to the dish. - Lime wedges for garnish - Alternative proteins or toppings to consider Serve your Buffalo Cauliflower Tacos with lime wedges on the side. Squeezing lime juice adds a zesty kick. If you want to mix it up, consider alternative proteins. You can try chickpeas or lentils for a heartier option. These suggestions help you customize your tacos and make them even more delicious. 1. Preheat your oven to 425°F (220°C). This high heat gives a nice crisp. 2. Line a baking sheet with parchment paper. This keeps the cauliflower from sticking. 3. In a large bowl, whisk together the flour, milk, garlic powder, onion powder, smoked paprika, salt, and pepper. Mix until the batter is thick but pourable. This helps the batter stick well. 1. Dip each cauliflower floret into the batter. Make sure they are fully coated. 2. Shake off any extra batter. Place the florets in a single layer on the baking sheet. 3. Bake for 25-30 minutes. Flip the florets halfway through. They should look golden brown and crispy. 1. Warm the tortillas in a dry skillet over medium heat for about 30 seconds on each side. This makes them soft and easy to fold. 2. Take a warm tortilla and fill it with the baked cauliflower. Don’t overfill, or it will be messy. 3. Top with shredded lettuce, diced tomatoes, and crumbled blue cheese. Add sliced avocado for creaminess. 4. Sprinkle with chopped cilantro and serve with lime wedges on the side for a zesty touch. For the full recipe, check the details above. To get the best buffalo cauliflower tacos, start with the batter. Ensure you coat each floret evenly. Dip the cauliflower into the batter, letting the excess drip off. This step is key for a crispy texture. I recommend shaking the florets gently. This helps the batter stick well. For extra crispiness, bake the cauliflower at a high heat. A preheated oven at 425°F (220°C) works wonders. Flip the florets halfway through to allow even cooking. Look for a golden brown color. That means they are ready and crispy! To boost flavor, add toppings to your tacos. Consider using creamy sauces like ranch or a spicy aioli. Fresh herbs like cilantro brighten the dish. You can also add sliced jalapeños for heat. Adjusting the spice level is easy with buffalo sauce. If you like it mild, use less sauce or mix in some butter. For extra heat, add more buffalo sauce. Taste as you go to find your perfect balance. When making these tacos, use a sturdy baking sheet. A non-stick option is best for easy cleanup. I also recommend parchment paper to prevent sticking. For mixing, a large bowl works well for the batter. Use a whisk to blend the ingredients smoothly. When it comes to assembly, have a flat surface ready. This makes filling the tortillas easy and fun! For the full recipe, check out the detailed instructions to make these delicious buffalo cauliflower tacos. {{image_4}} If you need gluten-free options, use almond flour or chickpea flour for the batter. These flours keep the same texture and taste. For a vegan twist, swap out dairy milk with almond or oat milk. You can also use a plant-based cheese instead of blue cheese. These changes make the dish friendly for more diets. You can play with flavors by using other sauces. Try BBQ sauce for a sweet kick or honey mustard for a tangy taste. If you want to mix it up, use other veggies like broccoli or zucchini. Each choice adds a unique flavor to your tacos. Think about wraps versus tacos. Wraps can hold more fillings and are great for lunch. Tacos, on the other hand, make for a fun, casual dinner. You can also add a side dish or salad to round out your meal. A fresh coleslaw would pair well and add crunch. For the complete recipe, check [Full Recipe]. To keep your Buffalo Cauliflower Tacos fresh, use airtight containers. Glass or plastic containers work well. Make sure to let the tacos cool down before storing. This helps prevent sogginess. You can store them in the fridge for up to three days. For longer storage, freeze the filling and tortillas separately. Wrap them tightly in plastic wrap and then place them in a freezer bag. When it's time to enjoy leftovers, you want to keep that crispy texture. The best way is to use an oven. Preheat it to 350°F (175°C). Place the tacos on a baking sheet and heat for about 10 minutes. If you want to reheat just the cauliflower, use a skillet over medium heat. Stir often for about five minutes to warm them. This way, they stay crunchy and delicious. The shelf life for the ingredients varies. Fresh cauliflower can last up to a week in the fridge. Keep it in a dry place, away from moisture. The flour and spices will last for months if stored in a cool, dark spot. Once you prepare the tacos, eat them within three days for the best flavor. If you have separate components, this helps keep everything fresh longer. To make the cauliflower extra crispy, follow these steps: - Dry the florets: Pat the cauliflower dry with a towel. Removing moisture helps achieve crispiness. - Use a cornstarch coating: Add cornstarch to the batter. This creates a crunchier texture. - Bake at high heat: Preheat your oven to 425°F. The high heat helps the batter crisp up quickly. - Space the florets: Place the florets on the baking sheet with space in between. This allows hot air to circulate. - Flip halfway: Turn the florets halfway through baking. This ensures they brown evenly on all sides. These techniques will give you delicious, crispy bites for your tacos. Yes, you can prepare Buffalo Cauliflower Tacos in advance. Here’s how: - Prep the cauliflower: Coat the florets in the batter and bake them. Let them cool completely. - Store in the fridge: Place the baked florets in an airtight container. They will keep well for 2-3 days. - Reheat before serving: When ready to eat, reheat the florets in the oven at 375°F for 10-15 minutes. This keeps them crispy. - Warm the tortillas: You can warm the tortillas right before serving. This keeps them fresh and pliable. Making tacos ahead of time can save you stress on busy days. If you want a different cheese or a dairy-free option, try these: - Feta cheese: Crumbled feta gives a salty, tangy flavor. - Goat cheese: Soft goat cheese adds a creamy texture. - Vegan cheese: Look for dairy-free cheese that melts well for a similar taste. - Creamy tahini dressing: This can add a nutty flavor while keeping it plant-based. These substitutes will work great in your tacos. Buffalo Cauliflower Tacos can be spicy, but you can adjust the heat. Here’s how: - Choose your buffalo sauce: Some brands are milder than others. Pick one based on your spice level. - Mix with butter or oil: If the sauce is too hot, mix it with melted butter or oil to tone it down. - Serve with cooling toppings: Add avocado or yogurt to balance the heat in your tacos. This way, you can enjoy the flavor without too much heat. In this post, we covered how to make Buffalo Cauliflower Tacos. You learned about the main ingredients, including cauliflower, seasonings, and fresh toppings. The step-by-step instructions guided you through preparing, baking, and assembling your tacos. We shared tips for crispiness and alternatives for dietary needs. Finally, we discussed storage and reheating for leftovers. You can enjoy these tasty tacos while mixing flavors and toppings. Happy cooking!

Buffalo Cauliflower Tacos Flavorful Plant-Based Dish

Welcome to your new favorite meal: Buffalo Cauliflower Tacos! This tasty dish is perfect for anyone seeking a flavorful, plant-based

- 1 can (15 oz) chickpeas, drained and rinsed - 1 tablespoon extra virgin olive oil - 1 teaspoon garlic powder - 1 teaspoon smoked paprika - 1/2 teaspoon ground cumin - 1/2 teaspoon fine sea salt - 1/4 teaspoon freshly ground black pepper - Optional: 1/4 teaspoon cayenne pepper - Oven - Baking sheet - Parchment paper - Mixing bowl - Paper towels Crispy baked chickpeas need just a few simple ingredients. First, grab a can of chickpeas. Make sure you drain and rinse them well. This helps remove excess salt and starch. Next, gather extra virgin olive oil and some spices. Garlic powder adds a nice flavor. Smoked paprika gives a smoky touch. Ground cumin adds warmth, while sea salt and black pepper balance the taste. If you like heat, add cayenne pepper. For tools, you will need an oven to bake the chickpeas until crispy. A baking sheet lined with parchment paper makes clean-up easy. A mixing bowl helps you combine everything, and paper towels are key for drying the chickpeas. These ingredients and tools set you up for a tasty and crunchy snack. For the full recipe, check out the detailed steps in the next section. Set the oven to 400°F (200°C). This hot temperature helps the chickpeas turn crispy. Start by draining and rinsing the chickpeas. After that, pat them dry with paper towels. It is key to remove the moisture. The drier the chickpeas, the crispier they will be. In a bowl, mix the chickpeas with olive oil and spices. Use: - 1 tablespoon extra virgin olive oil - 1 teaspoon garlic powder - 1 teaspoon smoked paprika - 1/2 teaspoon ground cumin - 1/2 teaspoon fine sea salt - 1/4 teaspoon freshly ground black pepper - Optional: 1/4 teaspoon cayenne pepper for a spicy kick Toss the chickpeas until they are well coated with the flavorful mix. Spread the seasoned chickpeas on a baking sheet lined with parchment paper. Make sure they are in a single layer. Overcrowding will make them soggy. Bake for 25-30 minutes. Shake the baking sheet halfway through. This helps them cook evenly. They will look golden brown when they are ready. Once they are baked, take them out of the oven. Let the chickpeas cool for a few minutes. This will help them get even crispier. Enjoy your crispy baked chickpeas as a snack or use them on salads. For the full recipe, check out the details above. To get the best texture, dry the chickpeas well. After rinsing, use paper towels to soak up all moisture. This step is key for crispiness. If the chickpeas are wet, they will steam instead of bake. Also, avoid overcrowding the baking sheet. Spread the chickpeas in a single layer. This helps hot air reach all sides and makes them crispy. You can add more spices to boost flavor. Try adding chili powder for heat or curry powder for warmth. A little lemon zest brings freshness. To balance flavors, use herbs like thyme or rosemary. They add depth and make the snack more complex. Don't be afraid to experiment with what you like best! For a nice look, serve your crispy baked chickpeas in a cute bowl. You can line it with parchment paper. This adds charm and keeps it neat. Consider garnishing with fresh herbs like parsley. It adds a splash of color and a fresh taste. These tasty bites are not just a snack; they can also dress up a salad! For the full recipe, check out the link. {{image_4}} You can easily change the flavor of crispy baked chickpeas. For a spicy twist, try adding different peppers. You might use chili powder, cayenne, or even jalapeños. Each pepper adds a unique heat level. If you prefer sweet, sprinkle cinnamon or a touch of brown sugar. This gives a fun contrast to the chickpeas' natural taste. Looking for gluten-free options? You're in luck! Chickpeas are naturally gluten-free. You can add any herbs or spices without worry. For a vegan-friendly snack, just stick with the chickpeas and spices. No animal products are needed, making this snack perfect for everyone. Crispy baked chickpeas work well in many dishes. Add them to salads for a crunchy topping. They also make a great snack with dips like hummus or guacamole. If you want a hearty bowl, toss them into grain bowls with quinoa or rice. They add protein and texture, making meals more filling. To keep your crispy chickpeas fresh, store them in an airtight container. This method prevents moisture from softening your snack. I suggest using glass jars or plastic containers with tight lids. You can also use a resealable bag. Just make sure to squeeze out excess air before sealing. When it comes to reheating, I recommend using the oven. Preheat it to 350°F (175°C) and spread the chickpeas on a baking sheet. Heat them for about 5 to 10 minutes. This method helps restore their crispiness. Avoid using the microwave. It makes them soft and chewy, which isn’t what you want. Crispy baked chickpeas will stay fresh for about 3 to 5 days when stored properly. Look for signs of spoilage, like a stale smell or soft texture. If they lose their crunch, it's time to toss them out. Enjoy them while they’re at their best! For the full recipe, check the earlier section. To make crispy baked chickpeas, you start by preheating your oven to 400°F (200°C). Drain and rinse the chickpeas, then dry them with paper towels. This is key for crispiness! Next, mix the chickpeas with olive oil and spices in a bowl. Spread them on a baking sheet lined with parchment paper. Bake for 25-30 minutes, shaking the sheet halfway through. They should be golden and crunchy when done. For the full recipe, check out the section above! Yes, you can use dried chickpeas! First, soak them overnight in water. The next day, cook them until soft. Once cooked, drain and dry them well before seasoning and baking. This process takes longer, but the flavor will be rich and fresh. Just ensure they are dry for that perfect crunch! Chickpeas are a great source of protein and fiber. They help you feel full and satisfied. They are low in calories, making them a smart snack. Chickpeas also contain vitamins and minerals, like iron and magnesium. Eating them can benefit your heart health and help control blood sugar levels. To add spice, use cayenne pepper or chili powder. Start with a little and taste as you go. You can also mix in other spices like crushed red pepper or paprika for a smoky flavor. Adjust the heat to your liking, and don’t be afraid to experiment! Absolutely! You can customize the chickpeas with various seasonings. Try adding Italian herbs like oregano and basil for an Italian twist. For a sweet version, mix in cinnamon or sugar. The options are endless! Just remember to keep a balance of flavors for the best results. Baking crispy chickpeas is simple and rewarding. We covered key ingredients and tools, plus step-by-step instructions for perfect texture. Remember to dry chickpeas well and experiment with spices for extra flavor. Enjoy your tasty snack on its own or add it to salads and bowls for a crunch. Store any leftovers properly to keep them fresh. Experimenting with different variations can keep your chickpea dishes exciting. Dive in, have fun, and discover how easy it is to enjoy this nutritious treat!

Crispy Baked Chickpeas Flavorful and Easy Snack Recipe

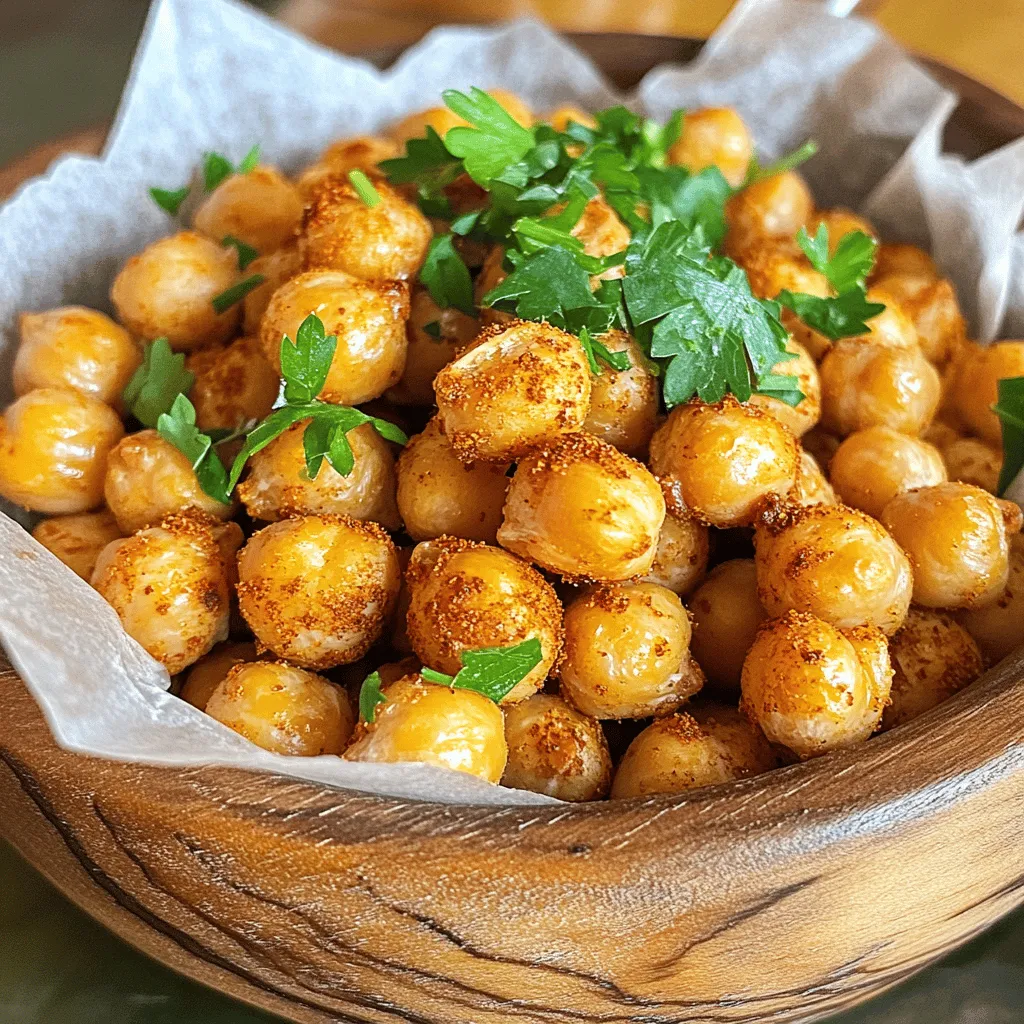
Looking for a tasty snack that’s both easy and healthy? You’re in the right place! Crispy baked chickpeas are crunchy,

- 4 cups cranberry juice - 4 cups apple juice - 2 cups sparkling water (chilled) - 1 cup freshly squeezed orange juice - 1/2 cup simple syrup - 1 teaspoon pure vanilla extract - 1 cup fresh blueberries - 1 cup fresh cranberries - 1 medium orange, sliced - 1 medium apple, sliced - Fresh mint leaves (for garnish) To create the Midnight Frost Christmas Punch, gather your ingredients first. You need a mix of juices and fresh fruits. The cranberry juice gives a tart flavor. The apple juice adds sweetness, while the orange juice offers a bright citrus note. You will also use simple syrup to sweeten the drink. Adjusting the syrup amount lets you control the sweetness. A dash of vanilla extract adds depth to the flavor. Fresh blueberries and cranberries not only taste great but also make the punch look festive. You can use sliced oranges and apples for added color and taste. Finally, mint leaves make a lovely garnish. They add a fresh scent to the punch. Now that you have the ingredients, you are ready to make a delightful drink that will impress your guests. {{ingredient_image_2}} In a large punch bowl, start by combining the juices. Pour in the 4 cups of cranberry juice, 4 cups of apple juice, and 1 cup of freshly squeezed orange juice. Stir well to mix them evenly. This blend forms the punch's fruity base. Next, add 1/2 cup of simple syrup to sweeten the mix. If you like it sweeter, you can add more syrup later. Finally, stir in 1 teaspoon of pure vanilla extract for a warm, cozy flavor that ties everything together. Now it's time to make this punch pop with color! Carefully fold in 1 cup of fresh blueberries and 1 cup of fresh cranberries. These fruits not only look great but also add a burst of flavor. Just before serving, introduce 2 cups of chilled sparkling water to the mix. Pour it in slowly to keep the fizz. Gently stir to combine the ingredients while keeping that bubbly texture. Chilling the mixture is key for the best taste. Let the punch sit in the fridge for at least 1 hour. This helps the flavors blend nicely. When you're ready to serve, fill each glass with ice. Ladle the fragrant punch over the ice, filling each glass to the brim. For a festive touch, add a garnish of fresh mint leaves on top. You can also decorate the punch bowl with sliced orange rounds and apple wedges for extra flair. Enjoy this refreshing drink with friends and family! You can adjust the sweetness of your punch with simple syrup. Start with the 1/2 cup in the recipe. After mixing, taste it. If you want it sweeter, add more syrup, a little at a time. You can also use other sweeteners, like honey or agave. These offer different flavors and can change the punch's taste too. To make your punch even better, try adding spices or herbs. A pinch of cinnamon or a sprig of rosemary can add warmth and depth. If you want a kick, think about infusing your punch with alcohol. Vodka or rum work well. Just add 1 to 2 cups, depending on your taste. Serving your punch in festive glassware makes it special. Use clear glasses to show off the vibrant colors. You can even rim the glasses with sugar for a fun touch. Add themed decorations, like small ornaments or twinkling lights around the punch bowl. These little details can create a festive atmosphere everyone will love. Pro Tips Chill Your Ingredients: For the best flavor and refreshing experience, ensure all juices and sparkling water are chilled before mixing. This will enhance the punch's crispness. Adjust Sweetness: Taste your punch before serving and adjust the sweetness to your liking by adding more simple syrup or a splash of juice. This ensures it meets your guests' preferences. Add Seasonal Fruits: Enhance the punch by adding other seasonal fruits like pomegranate seeds or sliced strawberries. This not only adds flavor but also boosts the visual appeal. Make Ahead: Prepare the juice mixture a day in advance and store it in the fridge. Just add the sparkling water and garnishes before serving for a quick and easy presentation. {{image_4}} You can change the flavor of Midnight Frost Christmas Punch by using different juices. Try pineapple or pomegranate juice for a unique twist. Both juices bring bright, fruity notes that enhance the drink. You can also substitute seasonal fruits. Think about adding fresh peaches in summer or ripe pears in fall. These fruits add flavor and a beautiful look to your punch. For a bubbly touch, swap out the sparkling water with sparkling cider or lemonade. Both options add a fun fizz and sweetness. If you want a bit more flair, infuse your punch with flavored sparkling beverages. Ginger ale or lemon-lime soda can add zest. Just remember to add the sparkling component right before serving. This keeps the fizz intact and the drink refreshing. If you want a spirited version of this punch, adding vodka or rum can be a great choice. For vodka, 1 to 2 cups will give you a nice kick without overpowering the flavors. Rum can add warmth and depth. Use about 1 cup for a balanced taste. Always stir the alcohol into the juice mixture before adding the sparkling water. This ensures even distribution for every sip. To store leftover Midnight Frost Christmas Punch, keep it in a sealed container. This helps keep the punch fresh and tasty. Make sure to consume it within three days for the best flavor. If it’s been out at room temperature for more than two hours, it’s safer to toss it. Always check for off smells or changes in color before drinking. You can prepare this punch up to two days in advance. To keep it fresh, store the juice mix without the sparkling water. Add the sparkling water just before serving. This way, you’ll have that nice fizz. If you want to add fruits, slice them just before serving to keep them fresh and bright. You can easily make this punch non-alcoholic by skipping any spirits. The base of this punch is already delicious with juices and sparkling water. You just need to follow the recipe as is. You will still have the great taste and the fun fizz! Yes, you can prepare the punch the night before. Just mix all the juices and simple syrup. Add the fresh fruits and sparkling water right before serving. This keeps the fizz fresh and bubbly. You can use many alternatives for garnish. Try using slices of lemon or lime for a citrus twist. Pomegranate seeds add a nice color and flavor too. Fresh basil leaves can also give a unique taste. To scale the recipe, simply multiply each ingredient. If you want to serve 20 people, double all the ingredients. Use a larger punch bowl to hold the extra volume. Keep the same steps to ensure a tasty punch. Yes, you can freeze leftover punch! Just pour it into an ice cube tray. This makes great punch ice cubes for future drinks. When you want a cold drink, just pop them out and add to your glass. You learned how to make a tasty Midnight Frost Christmas Punch. We covered the ingredients, step-by-step instructions, and clever tips. I shared ways to customize the drink and tasty alternatives. Finally, we talked about how to store leftovers and answered your questions. Now, it’s time to enjoy this festive drink at your next gathering. Get creative, have fun, and impress your guests with your punch-making skills!

Midnight Frost Christmas Punch Festive and Refreshing Mix

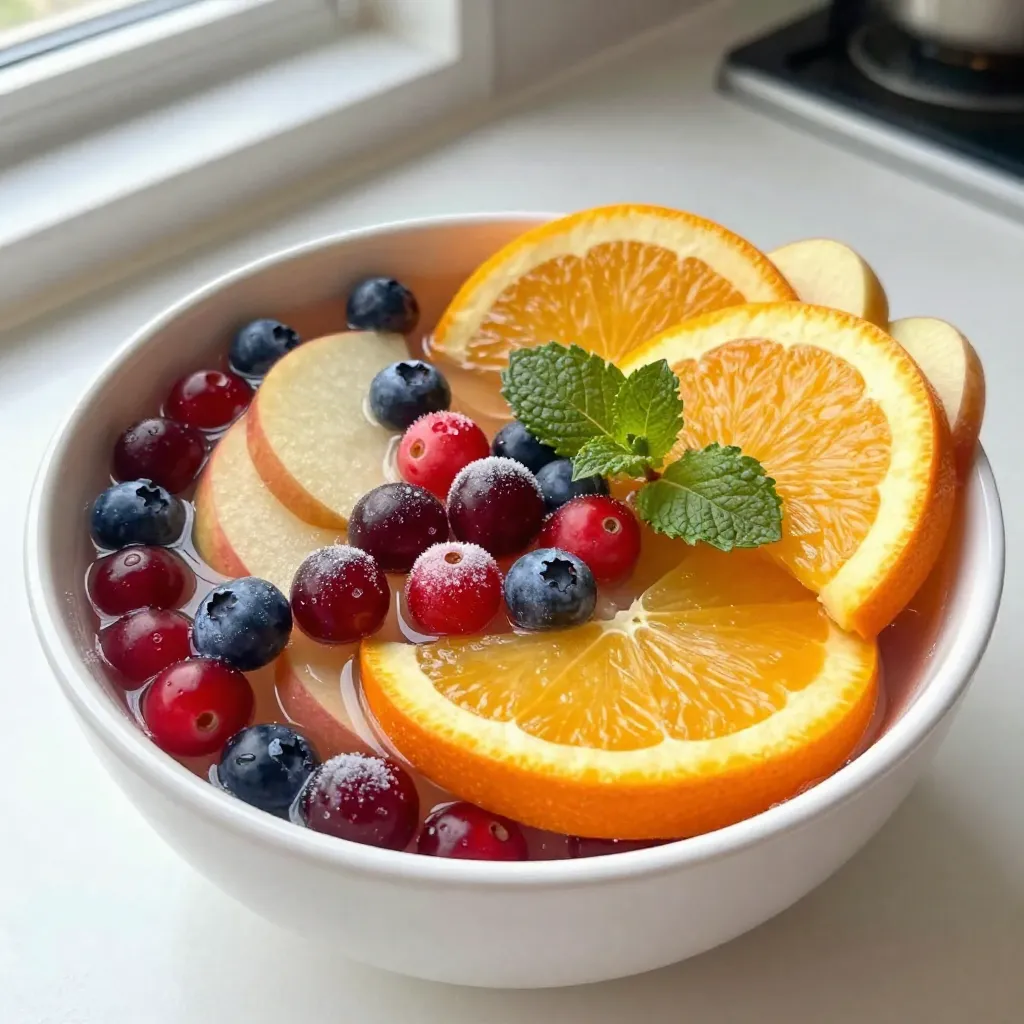
Are you ready to elevate your holiday gatherings? Midnight Frost Christmas Punch is the perfect drink for festive fun. This

For the Cheesy Taco Pasta Bake, you need a few key items. - Pasta selection options: I love using 8 ounces of elbow macaroni. However, you can use penne or fusilli for fun shapes. These hold cheese and sauce well. - Protein choices: Ground beef or ground turkey works best. One pound is perfect. Both give great flavor, but turkey is leaner. - Taco seasoning and salsa suggestions: Grab one packet of taco seasoning, about one ounce. This adds bold flavor. Choose salsa based on your spice level. A medium salsa works for most people. Adding more ingredients boosts taste and texture. - Importance of beans and corn: A can of black beans (15 ounces), drained and rinsed, adds protein and fiber. Corn kernels, one cup, bring sweetness and color. Both make the dish hearty. - Choosing the right cheese for maximum cheesiness: I suggest two cups of shredded cheddar cheese. It melts well and gives a rich taste. You can mix in Monterey Jack for a different twist. - Fresh garnishes and their impact: Fresh chopped green onions and cilantro brighten the dish. They add color and fresh flavor. Sprinkling these on top makes it look inviting and tasty. For the full recipe, you can look below for every step you need. First, I preheat the oven to 350°F (175°C). This helps the dish cook evenly. Next, I cook the pasta. I bring a large pot of salted water to a boil. Then, I add the elbow macaroni and cook it until it’s al dente. This means the pasta is firm but cooked. After cooking, I drain it and set it aside. Now, I turn to the meat. In a large skillet over medium heat, I add the ground beef or turkey. I cook it until it’s brown, breaking it into small pieces. Once browned, I drain any extra fat. Next, I add chopped onion and minced garlic to the skillet. I sauté them until the onion looks clear. Then, I add the taco seasoning, salsa, black beans, corn, and diced tomatoes. I mix everything well, letting it heat up for a few minutes. I finish this step by adding salt and pepper to taste. In a large mixing bowl, I combine the cooked pasta with the meat and vegetable mixture. I gently fold in 1 cup of grated cheddar cheese and the sour cream. I mix until everything is blended well. Then, I lightly grease a 9x13 inch baking dish and transfer the mixture into it. I spread it out evenly. Next, I top it with the remaining shredded cheddar cheese, making sure it covers the dish. Finally, I place the baking dish in the oven and bake for 25-30 minutes. I watch for the cheese to melt and turn a light golden color. If you want the Full Recipe, check it out for even more details! Seasoning makes a big difference in taste. I always season meat while it cooks. This step builds a great flavor base. Add salt and pepper to your pasta water. It helps the pasta absorb flavors as it cooks. When you mix in sour cream, stir it well. This makes the dish creamy and smooth. Make sure you use full-fat sour cream for the best results. To get a golden top, broil the dish at the end. Just a few minutes under the broiler gives that nice crust. Keep an eye on it to avoid burning. Baking time is key. If your oven runs hot, check it early. Bake the pasta bake at 350°F for 25-30 minutes. The cheese should be melted and bubbly. Serve this dish with a fresh green salad. A side of tortilla chips adds crunch. For gatherings, make small portions in ramekins. This way, everyone gets their own serving. You can also top each bowl with extra salsa or sour cream. Fresh toppings like chopped cilantro and green onions add color and flavor. For even more fun, set up a taco bar. Let guests choose their own toppings. This makes your Cheesy Taco Pasta Bake even more enjoyable! {{image_4}} You can easily adapt this dish to fit your needs. If you are gluten-free, choose gluten-free pasta. Many brands offer great options, like chickpea or brown rice pasta. These options cook like regular pasta and taste great. For those who prefer a vegetarian dish, veggie crumbles work well. They provide a similar texture to meat. You can also use beans as a protein source. Black beans or lentils can make your meal hearty and satisfying. To change the flavor, you can adjust your salsa. If you like heat, pick a spicier salsa. For a milder taste, choose a mild salsa. You can also mix different salsa types for a unique flavor. Adding extras boosts the taste, too. Sliced jalapeños add spice, while bell peppers add sweetness. You can toss in some corn, olives, or even diced avocado for fun flavors. You can make this dish in different ways. Using an Instant Pot or slow cooker can save time. Simply add all ingredients and cook until done. This method makes dinner easy and quick. If you want to clean up faster, try a one-pan method. Cook the meat and veggies in one pan, then add the pasta and cheese. This way, you only need to wash one pot! For the full recipe, check the previous section. It has all the steps you need to create your Cheesy Taco Pasta Bake! To keep your Cheesy Taco Pasta Bake fresh, store it in an airtight container. Place it in the fridge within two hours of cooking. This dish stays tasty for up to three days. If you want to save it longer, consider freezing it. In the freezer, it lasts up to three months. Just make sure to cover it well to avoid freezer burn. When warming up your leftover Cheesy Taco Pasta Bake, the oven works best. Preheat the oven to 350°F (175°C). Place the dish in an oven-safe container and cover it with foil. Heat for about 20 minutes or until it's hot throughout. This method keeps the dish creamy and cheesy. If you're short on time, the microwave is an option too. Use a microwave-safe container and cover it loosely. Heat in short bursts of one minute, stirring in between. Be careful not to overheat, as this can make the pasta dry. Aim for a creamy, cheesy texture when you reheat. Yes, you can prepare this dish ahead of time. To meal prep, make the recipe up to the baking step. Store the raw pasta bake in the fridge for up to two days. This keeps all the flavors fresh. When ready to eat, bake it straight from the fridge. You may need to add a few extra minutes to the cooking time. This dish pairs well with several sides. Here are some ideas: - Fresh green salad with a light vinaigrette - Steamed broccoli or green beans - Cornbread or tortilla chips for crunch - Guacamole or fresh salsa for dipping To add heat to your Cheesy Taco Pasta Bake, try these tips: - Use spicy salsa instead of mild - Add fresh jalapeños or serrano peppers - Incorporate crushed red pepper flakes into the meat mixture - Experiment with spicy taco seasoning blends Yes, this recipe freezes well. To freeze, let the bake cool completely. Cover it tightly with plastic wrap and then foil. It can stay in the freezer for up to three months. When ready to eat, thaw it in the fridge overnight. Bake it at 350°F until heated through. Absolutely! Ground chicken or pork works great in this dish. Each protein brings a unique flavor. Ground chicken is leaner, while pork adds richness. Adjust your seasonings to fit the protein you choose. Enjoy experimenting with different tastes! For the complete recipe, check out the Full Recipe section. In this blog post, we explored how to make a tasty Cheesy Taco Pasta Bake. We covered essential ingredients, from pasta to cheese, and shared step-by-step instructions for preparing, cooking, and assembling the dish. I shared tips on perfecting flavor and texture while also providing fun variations to suit dietary needs. Store your leftovers correctly to enjoy them later. Remember, you can adjust this recipe to fit your taste, so get creative! Happy cooking!

Cheesy Taco Pasta Bake Comforting and Easy Recipe

Craving a warm, cheesy dish that brings comfort and smiles? Look no further! This Cheesy Taco Pasta Bake is your

To make skillet creamed spinach, gather these simple ingredients: - 4 cups fresh spinach, rinsed and roughly chopped - 1 tablespoon extra virgin olive oil - 2 cloves garlic, finely minced - 1 small onion, finely chopped - 1/2 cup cream cheese, softened to room temperature - 1/2 cup sour cream - 1/2 cup freshly grated Parmesan cheese - 1/4 teaspoon freshly grated nutmeg - Salt and pepper, to taste - 1/4 cup toasted pine nuts, for garnish You can adjust some ingredients if you need. Here are a few options: - Use frozen spinach if fresh isn't available. Just thaw and drain it first. - Swap cream cheese for ricotta for a lighter texture. - Greek yogurt can replace sour cream for a tangy kick. - If you have no Parmesan, try feta or mozzarella instead. - Use walnuts or almonds instead of pine nuts for garnish. Garnishes can elevate your dish. Here are some ideas: - A sprinkle of freshly chopped parsley adds color. - Drizzle a bit of extra virgin olive oil for shine. - Add a dash of red pepper flakes for heat. - A squeeze of lemon juice brightens the flavors. This recipe will help you create a rich and tasty dish. For the full recipe, check the details above! Start by gathering your ingredients. You will need: - 4 cups fresh spinach, rinsed and roughly chopped - 1 tablespoon extra virgin olive oil - 2 cloves garlic, finely minced - 1 small onion, finely chopped - 1/2 cup cream cheese, softened to room temperature - 1/2 cup sour cream - 1/2 cup freshly grated Parmesan cheese - 1/4 teaspoon freshly grated nutmeg - Salt and pepper, to taste - 1/4 cup toasted pine nuts, for garnish Make sure to wash the spinach well. Chop the onion and mince the garlic. This will help the flavors mix well in your dish. 1. Heat the olive oil in a large skillet over medium heat. Wait until the oil shimmers. 2. Add the chopped onion. Sauté for about 3-4 minutes. Stir occasionally until the onion is soft and clear. 3. Next, add the minced garlic. Sauté for one more minute until fragrant. Do not let it burn! 4. Now, add the chopped spinach. Stir constantly for about 2-3 minutes until it wilts. 5. Reduce the heat to medium-low. Fold in the softened cream cheese. Stir until it melts and combines with the spinach. 6. Gradually mix in the sour cream and Parmesan cheese. Make sure everything is rich and creamy. 7. Add freshly grated nutmeg along with salt and pepper to taste. Stir until well combined and heated through. 8. Remove the skillet from heat. You can serve it straight from the skillet or transfer it to a dish. 9. Before serving, sprinkle toasted pine nuts on top for a crunchy finish. For a cozy feel, serve the creamed spinach right in the skillet. If you want a fancy look, use a bowl and drizzle olive oil on top. This dish goes well with grilled chicken or fish. It makes a full and delightful meal. You can find the Full Recipe [here](#). To make the best skillet creamed spinach, start with fresh spinach. Rinse it well and chop it roughly. This helps the leaves cook evenly. Use a heavy skillet for better heat control. Heat the olive oil until it shimmers. This means it's hot enough for sautéing. Sauté the onion until it is soft and sweet. Add the garlic just before the spinach, so it stays fragrant. When you add the spinach, stir it continuously. This ensures it wilts down nicely without burning. For that creamy texture, mix in the cream cheese slowly. Let it melt before adding the sour cream and Parmesan. This way, you avoid lumps. Lastly, sprinkle fresh nutmeg for a warm, earthy flavor. One common mistake is overcooking the spinach. This makes it slimy and loses its bright color. Another mistake is not seasoning enough. Always taste and adjust salt and pepper as needed. When adding cream cheese, don't rush. Mix it until it fully melts, or you’ll get lumps. Also, avoid cooking at high heat. This can burn the garlic and onion, giving a bitter taste. Finally, don’t skip the toasted pine nuts. They add a crunchy texture that balances the creaminess. Skillet creamed spinach pairs well with many dishes. Try it with grilled chicken or fish for a complete meal. You can also serve it with steak for a rich flavor combo. For a vegetarian option, pair it with roasted vegetables or quinoa. This dish also goes great with crusty bread, perfect for scooping up the creamy goodness. If you're feeling adventurous, serve it alongside pasta for a unique twist. {{image_4}} You can boost your skillet creamed spinach with protein. Chicken is a great choice. Cook diced chicken in the skillet before adding spinach. Shrimp also works well. Sauté shrimp until pink, then add the spinach mix. For a heartier meal, add cooked sausage. Slice it and mix it in during the last few minutes of cooking. To make this dish vegan, swap out the cream cheese and sour cream for cashew cream or firm tofu. Blend soaked cashews with a bit of water until smooth. This gives a nice creamy texture. Use nutritional yeast in place of Parmesan for a cheesy flavor. This way, you enjoy rich taste without dairy. Add a squeeze of lemon juice for brightness. It lifts the flavors and adds freshness. You can also try adding a pinch of cayenne pepper for a spicy kick. Fresh herbs such as basil or thyme bring extra depth. Mix them in right before serving to keep their taste vibrant. You can find the Full Recipe in our article for more details. You can keep your creamed spinach in the fridge for up to three days. Store it in an airtight container for best results. Make sure the spinach is cool before sealing it. This helps keep the flavor fresh. When ready to eat, check for any off smells or changes in color. To freeze creamed spinach, first let it cool completely. Place it in freezer-safe bags or containers. It can last for about two months in the freezer. When freezing, try to remove as much air as possible. This helps prevent freezer burn. Label the bags with the date, so you know when to use them. When you’re ready to enjoy your creamed spinach, thaw it in the fridge overnight if frozen. You can reheat it on the stove over low heat. Stir often to avoid sticking. If it seems dry, add a splash of milk or cream. You can also use the microwave, heating in short bursts, stirring in between. This keeps the texture creamy and smooth. For the full recipe, refer to Skillet Creamed Spinach Delight. Enjoy your cooking! Skillet creamed spinach can last about 3 to 5 days in the fridge. Store it in an airtight container to keep it fresh. Before serving leftovers, check for any off smells or changes in texture. Reheat it gently on the stove or in the microwave. Yes, you can use frozen spinach. It is a great time-saver. Just thaw it first and squeeze out excess water. This prevents the creamed spinach from being too watery. You may need to adjust the cooking time slightly, but the flavor will still be delicious. Skillet creamed spinach pairs well with many dishes. It goes great with grilled chicken or fish. You can also serve it with steak or pork chops for a hearty meal. For a lighter option, serve it alongside roasted vegetables or a fresh salad. Check out the Full Recipe for more ideas. In this blog post, we covered all you need to know about skillet creamed spinach, from ingredients to storage. We explored ingredient swaps and garnish options to customize your dish. You learned step-by-step cooking instructions and tips to make it perfect. Plus, we looked at variations, storage methods, and answered your common questions. Skillet creamed spinach can be a delightful side dish. With the right methods, it can shine at any meal. Enjoy making this dish your own!

Skillet Creamed Spinach Savory and Easy Recipe

Are you ready to elevate your side dish game? My Skillet Creamed Spinach recipe is simple, quick, and packed with

- 2 lbs chicken wings - 1/4 cup honey - 1/4 cup sriracha sauce - 2 tablespoons soy sauce - 1 tablespoon apple cider vinegar - Spices: garlic powder, ginger powder, smoked paprika, salt, black pepper To make sweet and spicy chicken wings, you need fresh chicken wings. Choose wings that look plump and juicy. The honey adds sweetness while the sriracha brings the heat. Soy sauce gives umami flavor. Apple cider vinegar adds a tangy touch. Garlic powder and ginger powder enhance the taste. Smoked paprika provides a nice smokiness. Don’t forget to season with salt and black pepper for balance. - Sesame seeds - Chopped green onions Garnishing your wings makes them look even better. Sesame seeds add crunch and a nutty flavor. Chopped green onions bring bright color and freshness. These simple touches can elevate your dish and make it more appealing. You can sprinkle them right before serving to keep the crunch. For the full recipe, check out the detailed instructions! Start by seasoning the chicken wings with salt and black pepper. This simple step adds flavor. Next, pat them dry with paper towels. Dry wings help achieve that perfect crispy texture. In a bowl, combine honey, sriracha sauce, soy sauce, apple cider vinegar, garlic powder, ginger powder, and smoked paprika. Whisk these ingredients together until smooth. This sauce brings the sweet heat that makes these wings so tasty. Pour half of the sauce over the wings. Make sure each wing gets coated well. For the best flavor, let the wings marinate. I recommend at least 30 minutes at room temperature. You can also refrigerate them for up to 2 hours. Preheat your oven to 400°F (200°C). Line a baking sheet with parchment paper for easy cleanup. Arrange the marinated wings in a single layer on the sheet. Bake for 40-45 minutes. Flip the wings halfway through for even cooking. They should be golden brown and crispy. In the last 10 minutes of baking, brush the remaining sauce over the wings. This creates a beautiful glaze. Return the wings to the oven to let the sauce caramelize. Once the wings are done, take them out and let them rest for a couple of minutes. This helps the juices settle. For presentation, serve your wings on a large platter. Garnish with sesame seeds and chopped green onions for color. Pair with crunchy celery sticks and your favorite dip for a great meal! For the full recipe, check out the detailed instructions above. To get crispy wings, you need to dry them well. After washing, use paper towels to pat them dry. This step helps remove extra moisture, which can make them soggy. Next, set your oven to 400°F (200°C). This hot temperature gives your wings a nice crunch. Bake them for 40 to 45 minutes. Be sure to flip them halfway for even crispiness. Want to boost the flavor? You can add more spices. Try cayenne pepper for heat or smoked paprika for a deeper flavor. If you want a twist, swap the sriracha for a BBQ sauce or teriyaki. Each sauce gives the wings a new taste. Mix and match until you find your favorite! You can cook wings in different ways. Grilling adds a smoky flavor, while frying makes them crispy fast. If you grill, keep an eye on the time. Usually, they take about 20 to 25 minutes. For frying, cook them for 10 to 12 minutes until golden brown. Adjust your cooking time based on the method you choose. Remember, for the full recipe, check out the details earlier in this article. Enjoy experimenting! {{image_4}} You can switch up the flavors of your sweet and spicy chicken wings. Here are two tasty ideas: - Honey BBQ Sauce Alternative: Replace the sriracha with your favorite BBQ sauce. Mix in honey for sweetness. This gives you a rich and smoky flavor. - Spicy Garlic Wings Option: Add minced garlic and extra sriracha to the sauce. This brings a bold and zesty kick to the wings. There are many ways to cook these wings. Here are two popular methods: - Air Fryer Instructions: Preheat your air fryer to 375°F (190°C). Arrange wings in a single layer. Cook for 25-30 minutes, flipping halfway through. This makes them crispy and juicy. - Slow Cooker Method: Place the marinated wings in the slow cooker. Cook on low for 4-5 hours or high for 2-3 hours. This method makes the wings tender and full of flavor. You can make these wings fit different diets with a few easy swaps: - Gluten-Free Options: Use tamari instead of regular soy sauce. This keeps the wings gluten-free without losing flavor. - Low-Sugar Alternatives: Swap honey for a sugar-free syrup. This cuts down the sugar while keeping the sweet taste. Experiment with these variations to find your favorite flavor! For the full recipe, check out the Sweet and Spicy Chicken Wings section. After enjoying your sweet and spicy chicken wings, let them cool down. Place them in the fridge within two hours. This helps keep them fresh. Use an airtight container to store the wings. This will prevent them from drying out or absorbing other smells in the fridge. When you're ready to enjoy the leftovers, reheating is key. First, preheat your oven to 350°F (175°C). Place the wings on a baking sheet lined with foil. Heat them for about 10-15 minutes. This helps them regain their crispiness. Avoid using a microwave, as it can make the wings soggy. To store wings for a longer time, freezing is a great option. Make sure the wings are completely cool before freezing. Place them in a freezer-safe bag or container. Remove as much air as possible to prevent freezer burn. When you’re ready to eat, thaw the wings in the fridge overnight. Reheat them in the oven using the same method mentioned earlier for the best results. For the full recipe, check out the Sweet and Spicy Chicken Wings section. Enjoy every bite! To make sweet and spicy wings in an air fryer, follow these simple steps: 1. Prep the Wings: Dry the wings with paper towels. Season with salt and pepper. 2. Make the Sauce: In a bowl, mix honey, sriracha, soy sauce, apple cider vinegar, garlic powder, ginger powder, and smoked paprika. 3. Marinate: Coat the wings with half the sauce and let them sit for 30 minutes. 4. Preheat Air Fryer: Set the air fryer to 400°F (200°C). 5. Cook the Wings: Place wings in the air fryer basket. Cook for 25-30 minutes, flipping halfway through. 6. Glaze: Brush the remaining sauce on the wings in the last 5 minutes of cooking. 7. Serve: Let them cool slightly, then enjoy! Yes, you can use frozen chicken wings. Here’s how: 1. Thaw: Thaw the wings in the fridge overnight or use the microwave's defrost setting. 2. Prep and Season: Once thawed, dry them with paper towels. Season as usual. 3. Cook: Follow the same cooking steps as fresh wings, but increase the cooking time by about 5-10 minutes. Here are some great sides to enjoy with sweet and spicy chicken wings: - Celery Sticks: Crunchy and refreshing. - Carrot Sticks: Sweet and colorful. - Ranch Dressing: For dipping and cooling down the spice. - Blue Cheese Dressing: A classic pairing. - Coleslaw: Creamy and tangy to balance the heat. Cooked wings can be stored in the fridge for about 3-4 days. Here are some tips: - Cool them down: Let the wings sit at room temperature for no more than two hours before refrigerating. - Use Airtight Containers: This helps keep them fresh. - Reheat Safely: Make sure to heat them until hot before eating. For the full recipe, check out the Sweet and Spicy Chicken Wings section! This blog post covered how to make sweet and spicy chicken wings. You learned about the key ingredients, step-by-step cooking instructions, and useful tips. I shared variations to try and storage tips for leftovers. For tasty wings, focus on seasoning and cooking time. Experiment with your favorite flavors. Make this dish your own by using different sauces or spices. Enjoy your new favorite recipe!

Sweet and Spicy Chicken Wings Easy Flavor Explosion

Are you ready for a flavor explosion? These Sweet and Spicy Chicken Wings are easy to make and perfect for

Older posts
Newer posts
← Previous Page1 … Page79 Page80 Page81 … Page86 Next →

dsad

© 2026 lazychefmagic • Built with GeneratePress

Our Policies

  • Copyright Policy
  • Cookie Policy
  • GDPR Policy
  • Privacy Policy
  • Disclaimer
  • Terms Of Use

More Information

  • Home
  • About
  • Contact
  • Appetizers
  • Dessert
  • Dinner
  • Drinks
©2026, lazychefmagic About Back To Top