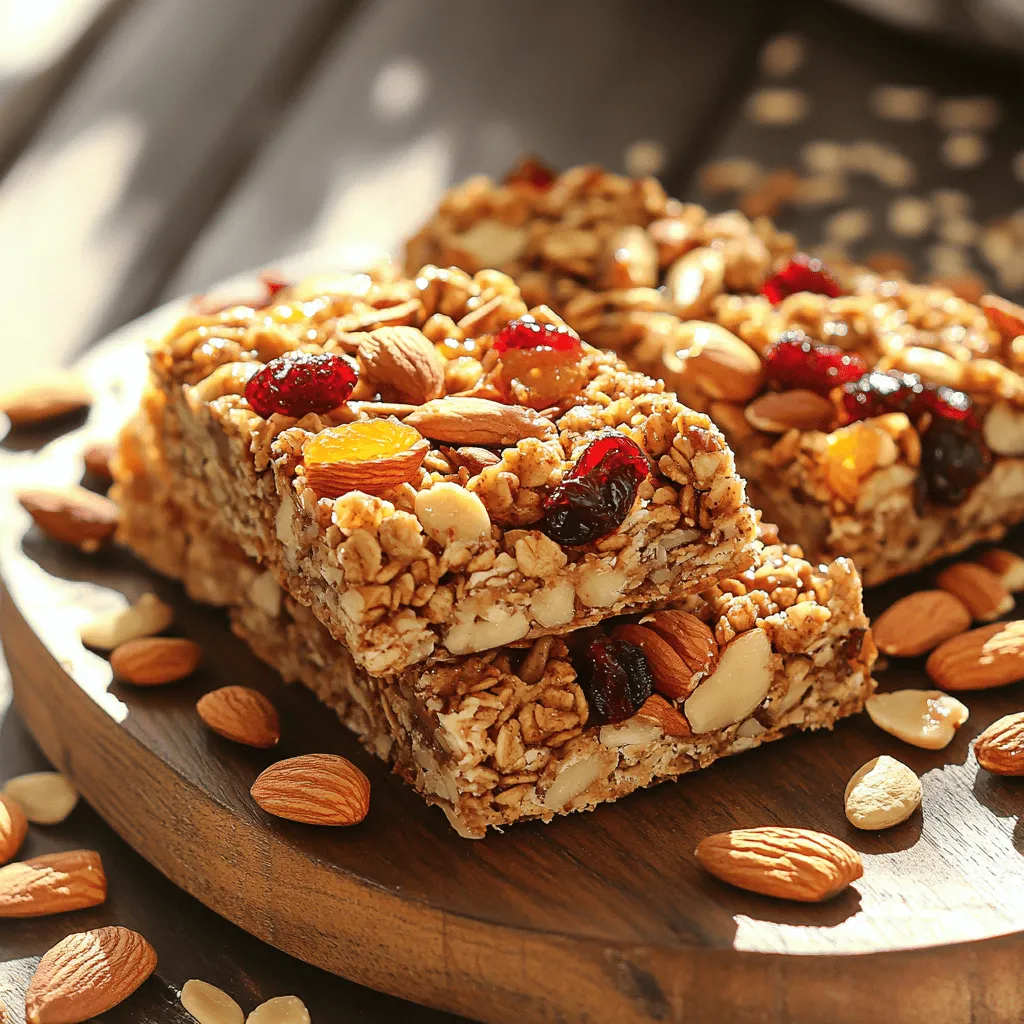
Are you tired of store-bought snacks filled with mystery ingredients? Look no further! My homemade granola bars are simple to make and packed with nutrition. In this guide, I’ll share easy steps, smart tips, and creative variations to satisfy your snack cravings. Whether you want a sweet treat or a healthy bite, my recipe will show you how to whip up delicious bars that you and your family will love. Let’s get started!
Ingredients
Detailed Ingredient List
To make Nutty Bliss Homemade Granola Bars, gather these simple ingredients:
– 2 cups rolled oats
– 1 cup mixed nuts (almonds, walnuts, and pecans), roughly chopped
– ½ cup honey or maple syrup
– ½ cup natural nut butter (peanut or almond)
– ½ cup dried fruits (cranberries, raisins, or chopped apricots)
– ¼ cup seeds (pumpkin or sunflower seeds)
– 1 teaspoon vanilla extract
– ½ teaspoon ground cinnamon
– Pinch of salt
Substitutions and Alternatives
You can easily swap ingredients based on your taste or what you have at home.
– Use any nut butter like cashew or sunflower seed butter.
– You can replace honey with agave syrup for a vegan option.
– Choose whatever nuts you prefer; just ensure they are unsalted.
– If you dislike dried fruits, try adding dark chocolate chips or coconut flakes instead.
Nutritional Information per Serving
Each serving of these granola bars is packed with nutrients.
– Calories: About 150
– Protein: 4g
– Carbohydrates: 20g
– Fiber: 3g
– Sugars: 7g
– Healthy Fats: 7g
These homemade granola bars are a great snack for energy and nutrition. You can enjoy them after school, during work, or while hiking. They are simple to make, and you know exactly what goes into them.
Step-by-Step Instructions
Preparation Overview
To start, gather all your ingredients for the granola bars. You will need rolled oats, mixed nuts, honey, nut butter, dried fruits, seeds, vanilla extract, ground cinnamon, and a pinch of salt. Measure each ingredient carefully. This will make mixing easier and more efficient. Preheat your oven to 350°F (175°C). Line an 8×8 inch baking dish with parchment paper. Leave some paper hanging over the sides. This will help you lift the bars out later.
Baking Process
In a large mixing bowl, add the rolled oats, chopped mixed nuts, seeds, ground cinnamon, and a pinch of salt. Stir these dry ingredients well to mix them evenly. In a small saucepan, warm the honey and nut butter over low heat. Stir until they melt and blend smoothly. Remove the pan from heat and mix in the vanilla extract. Pour this warm mixture over the dry ingredients. Stir until everything is coated. Then, gently fold in the dried fruits.
Transfer the mixture to the lined baking dish. Use your hands or a spatula to press it down firmly. This helps the bars stick together. Bake for 20-25 minutes. Watch for the edges to turn golden brown. The center should stay soft but not wet.
Cooling and Cutting Tips
Once baked, let the granola bars cool completely in the pan for about 30 minutes. This cooling time is crucial for setting the bars. Use the parchment paper overhang to lift the bars out of the dish. Place them on a cutting board. Use a sharp knife to cut them into bars or squares. You can choose the size that you like best. Store the granola bars in an airtight container at room temperature for up to one week. For longer freshness, refrigerate them.
Tips & Tricks
Common Mistakes to Avoid
When making homemade granola bars, some mistakes can happen. Here are a few to watch out for:
– Not measuring ingredients: Always measure your oats, nuts, and sweeteners. This ensures the right balance.
– Overmixing: Mixing too much can break down the oats. Stir just until combined.
– Skipping the cooling step: Letting bars cool completely helps them set. Cutting too soon can lead to crumbling.
Enhancing Flavor and Texture
To make your granola bars even tastier, try these tips:
– Add spices: Consider adding nutmeg or ginger for a warm flavor.
– Use flavored nut butter: Try almond butter with honey or chocolate for a twist.
– Mix in chocolate chips: Sprinkle some dark chocolate chips for extra sweetness and texture.
Best Practices for Mixing Ingredients
The way you mix your ingredients matters a lot. Here’s how to get it right:
– Start with dry ingredients: Mix oats, nuts, and seeds first. This helps distribute flavors evenly.
– Warm wet ingredients: Heat honey and nut butter together. This makes it easier to coat dry ingredients.
– Fold in dried fruits last: Adding them last prevents them from breaking down in the mixture.
Use these tips and tricks to create your perfect homemade granola bars.
Variations
Flavor Variations: Sweet and Savory
You can add many flavors to your granola bars. Want something sweet? Try adding chocolate chips or dried mango. You can mix in spices like nutmeg or ginger for a warm flavor. If you prefer savory, consider adding cheese powder or even herbs. A hint of rosemary can make your bars unique.
Ingredient Customizations for Dietary Needs
Customizing ingredients is easy. If you’re gluten-free, use certified gluten-free oats. For nut allergies, swap nuts for seeds like sunflower or hemp. You can also use a nut-free butter like sunflower seed butter. If you’re vegan, replace honey with agave or maple syrup. Adjusting the recipe for your needs makes it more enjoyable.
Seasonal Add-ins and Themes
Seasonal ingredients can make your granola bars fun. In fall, add pumpkin spice and chopped pecans for a cozy taste. During summer, use fresh berries or toasted coconut for a light feel. In winter, consider adding dried cranberries and orange zest to brighten your day. These themes keep your snacks fresh and exciting.
These variations let you create a granola bar that fits your taste and needs.
Storage Information
How to Store Homemade Granola Bars
Store your granola bars in an airtight container. This keeps them fresh. You can keep them at room temperature for up to one week. If you prefer, refrigerate them to make them last longer. Just remember to wrap each bar well if you do.
Increasing Shelf Life
To increase the shelf life, avoid moisture. When you store the bars, keep them away from heat or sunlight. For added protection, you can wrap them in plastic wrap and then place them in a container. This helps to keep them tasty and fresh.
Freezing Instructions
Freezing is a great way to save your granola bars. Cut them into squares or bars first. Then, wrap each piece tightly in plastic wrap. Place the wrapped bars in a freezer-safe bag or container. They can last for up to three months in the freezer. When you want one, let it thaw at room temperature for about 30 minutes before enjoying.
FAQs
How do I make granola bars crunchy?
To make your granola bars crunchy, bake them longer. Aim for a golden color on the edges. You can also add more nuts or seeds. These ingredients add texture and crunch. Let them cool completely before cutting. This helps them hold together better.
Can I omit the sweetener?
You can omit the sweetener, but the bars may taste bland. Sweeteners like honey or maple syrup help bind the ingredients. If you skip them, try adding mashed bananas or unsweetened applesauce. These options add some natural sweetness and moisture.
What’s the best way to cut granola bars?
The best way to cut granola bars is when they are cool. Use a sharp knife for clean cuts. You can also score them before they cool completely. This will guide your cuts and help prevent crumbling.
How long do homemade granola bars last?
Homemade granola bars last about one week at room temperature. Store them in an airtight container to keep them fresh. If you want them to last longer, place them in the fridge. This can extend their life by a few more days.
What are the benefits of homemade granola bars vs. store-bought?
Homemade granola bars offer many benefits. You control the ingredients and can adjust flavors. They are often healthier than store-bought options, which may contain added sugars or preservatives. Making them at home can also save money and reduce waste.
Making granola bars at home is easy and fun. You learned about ingredients, baking steps, and storage tips. Remember to mix flavors for your favorite taste. Use our common mistakes to avoid pitfalls as you bake. Homemade bars are not just healthier; they are also tasty and last long when stored properly. Enjoy making your granola bars and share them with friends!