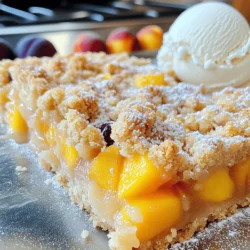
Peach Plum Crumble Bars
Discover the perfect sweet treat with these Peach Plum Crumble Bars! Made with fresh peaches and plums, this easy recipe combines a buttery crumble topping with juicy fruit for a delightful dessert. Follow our simple steps and enjoy a tasty addition to your baking repertoire. Don’t miss out on the chance to impress your friends and family—click through to explore this delicious recipe and elevate your dessert game today!