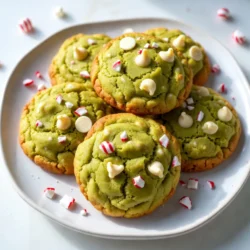
Peppermint Grinch Cookies
Festive green cookies with peppermint and white chocolate, perfect for the holiday season.
Ingredients
- 1 cup unsalted butter, softened to room temperature
- 1 cup granulated sugar
- 1 cup tightly packed brown sugar
- 2 large eggs at room temperature
- 1 teaspoon pure vanilla extract
- 3.25 cups all-purpose flour
- 1 teaspoon baking soda
- 0.5 teaspoon fine sea salt
- 1 teaspoon peppermint extract
- 0.5 cup green food coloring
- 1 cup white chocolate chips
- 0.5 cup crushed peppermint candies
Instructions
- Begin by preheating your oven to 350°F (175°C). Prepare two baking sheets by lining them with parchment paper to prevent sticking.
- In a large mixing bowl, using an electric mixer or a sturdy wooden spoon, cream together the softened butter, granulated sugar, and brown sugar until the mixture becomes light and fluffy—this should take about 2-3 minutes.
- Add the eggs to the mixture, one at a time. Make sure to mix thoroughly after each addition. Stir in the pure vanilla extract and peppermint extract until well combined.
- In a separate bowl, whisk together the all-purpose flour, baking soda, and fine sea salt. Gradually blend the dry ingredients into the wet mixture, mixing just until no flour streaks remain. Avoid overmixing to keep the cookies tender.
- Add the green food coloring to the dough and mix gently until the color is evenly distributed throughout the dough.
- Carefully fold in the white chocolate chips and crushed peppermint candies, ensuring they are evenly dispersed throughout the mixture.
- Using a tablespoon or a cookie scoop, drop rounded balls of dough onto the prepared baking sheets, leaving about 2 inches of space between each cookie for spreading during baking.
- Place the cookies in the preheated oven and bake for 10-12 minutes. The edges should be lightly golden while the centers might appear slightly underbaked; they will firm up as they cool.
- After baking, allow the cookies to cool on the baking sheets for about 5 minutes. Then, gently transfer them to wire racks to cool completely.
Notes
Stack the cookies in a vibrant festive cookie jar or elegantly arrange them on a decorative platter. For an extra holiday flair, sprinkle a bit of crushed peppermint on top of each cookie just before serving!