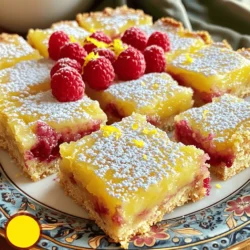
Raspberry Lemon Bars
Satisfy your sweet tooth with my easy recipe for Raspberry Lemon Bars that perfectly balance tangy and sweet flavors! With a buttery crust and a creamy filling, these delightful treats are perfect for any occasion. Discover simple tips for baking success, dietary substitutions, and creative ways to serve them.